How to Enable One Page Personalization?
To customize the Popup, follow the steps mentioned below:
Go to:
- The Program Campaign (prgm_campaign) table.
- Copy the campaign id (cmp_pk__id = 16547) of the campaign (cmp_name) that you have created.

Now,
- Go to table Program Notification table (prgm_notifications).
- Click Search.
- In the cmp_fk_id column and paste the campaign id (cmp_pk__id = 16547) in the value section and click enter.

If you want to display the customized html popup, then go to pnf_message column and there you can change the content and customize the Popup.

Now, go to the previous page (Refer to Screen Number: 51) and refresh it, you’ll see the Popup has been updated.
How to Enable Dynamic Personalization (One Page & Multipage)
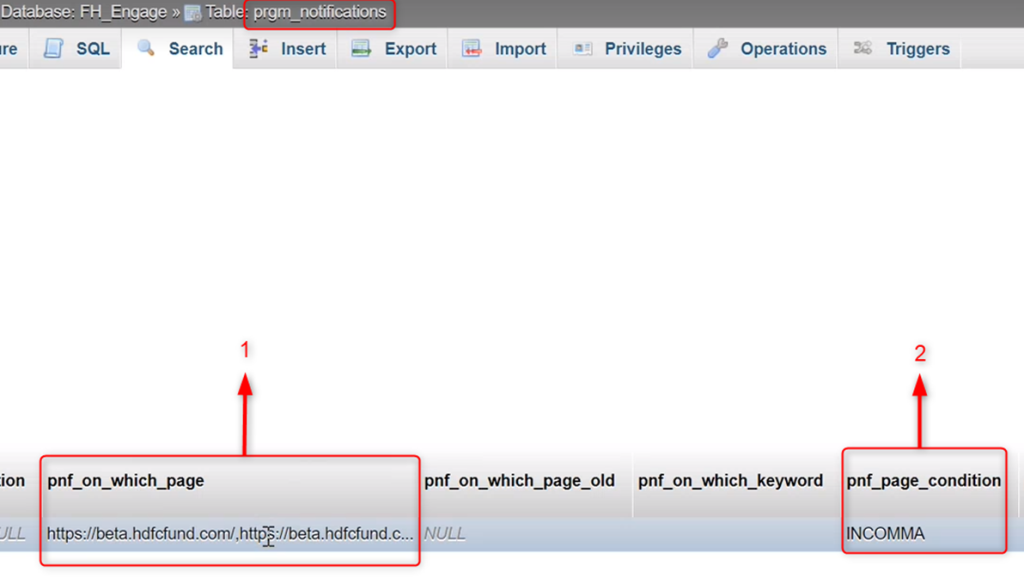
If you want to configure the Dynamic Popup (for multiple pages), then go to prgm_notifications table:
- On pnf_on_which_page column, enter the page URLs.
- On pnf_page_condition, insert INCOMMA.
For Web Banner
For Web Banner, follow the steps mentioned above, and to customize the web banner, use this JavaScript.
| $(document).ready(function($) {$(‘.carouselSection .section-inner-txt .carousel-inner .carousel-item’).each(function(index, element) {if(index===0) $(this).html(content); }); $(‘.carouselSection .section-inner-txt .carousel-inner .carousel-item’).removeClass(‘active’); $(‘.carouselSection .section-inner-txt .carousel-indicators li’).removeClass(‘active’); $(‘.carouselSection .section-inner-txt .carousel-inner .carousel-item:first’).addClass(‘active’); $(‘.carouselSection .section-inner-txt .carousel-indicators > li’).first().addClass(‘active’); }) |
Go to:
- The Program Campaign (prgm_campaign) table.
- Copy the campaign id (cmp_pk__id) of the campaign (cmp_name) that you have created.
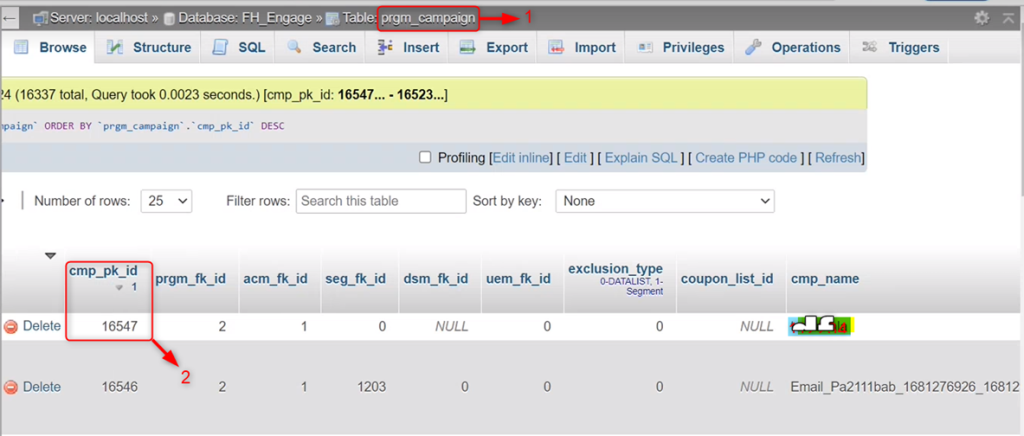
Now,
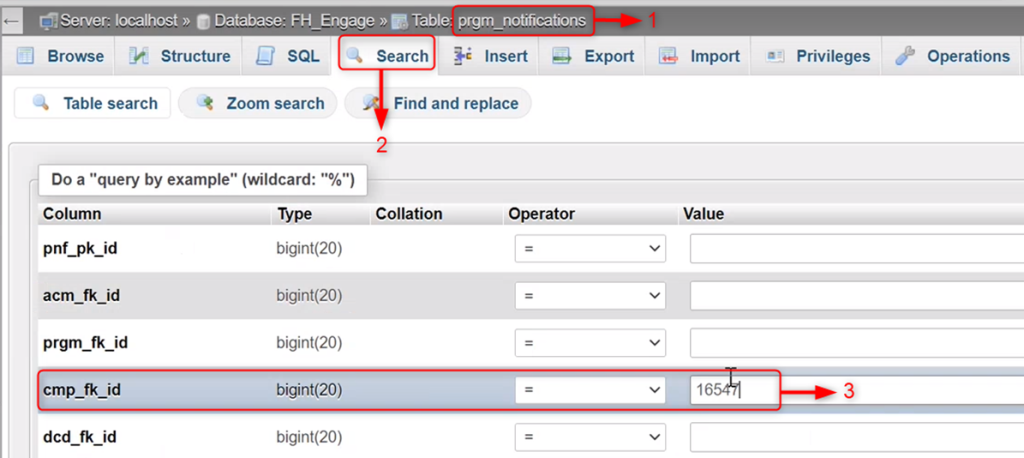
- Go to table Program Notification table (prgm_notifications).
- Click Search.
- In the cmp_fk_id column and paste the campaign id (cmp_pk__id = 16547) in the value section and click enter.
Go to prgm_notifications table and put this code (JavaScript) in pnf_message column.

| Important You need to perform the steps mentioned above for Web Popup. |
Continue from Where You Left
| NOTE This feature is not implemented for any client. This feature is to be implemented only for RoyalSundaram (RS), which is under progress. Once the integration process gets completed, the team will update. |
As of now for the understanding purpose, we can take an example, how exactly this feature will work:
- You go to a hotel’s website and click Stays.
- You put all the required information such as, the city in which you are looking for the stay, the number of days you are planning to stay (from date – to date), and for how many people, etc., but you left the website without completing the booking process or making payment.
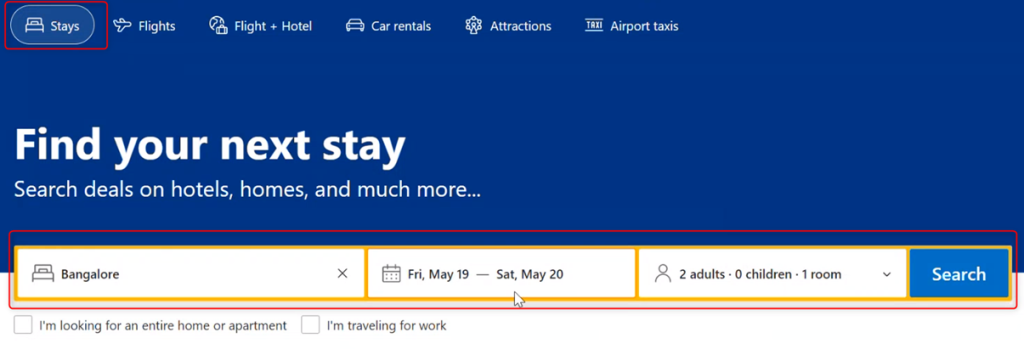
- The very next time, you come to that website/page, all your information will be auto-filled by the website itself.
- Like that only, FirstHive updates the drop-out campaigns.
Key Points
A few implantations need to be done from the client side:
- Either the clients have to store all the information in a session or FirstHive will send all the information though the URL, which they need to capture and populate in their website.
- Another way is, FirstHive will send some simple communication through the campaign to those users who have dropped out from a particular page such as; please continue or complete the checkout.
In every 5 minutes the campaign checks, whether any new person has dropped out without making the payment or completing the checkout process.
| Important The buffer time is 5 minute – from one step to another (depending on the client.) FirstHive checks in every 5 minutes, whether the user has moved to next page or not. If the user doesn’t move to the next page within 5 minutes, then FH considers it as dropped out. The very next time that user comes to the website, all the information that he/she had previously entered will be auto filled. |
