FirstHive Tag Manager
Simply put, FirstHive Tag Manager is a plugin that takes FirstHive Analytics to the next level. Similar to how a CMS brings you all the flexibility to publish content for your website, a Tag Management System (TMS) will allow you to easily embed 1st and 3rd party application resources into your website.
What is a Tag Manager?
A Tag Manager lets you manage and unify all your tracking and marketing snippets in one place. Such snippets are typically JavaScript code or HTML and let you integrate various features into your site in just a few clicks, for example:
- Analytics
- Conversion Tracking
- Newsletter signups
- Exit popups and surveys
- Remarketing
- Social widgets
- Affiliates
- Ads and more
This can be achieved using these main components:
- Tags – A snippet of code (usually JavaScript or HTML) which will be added to your site.
- Triggers – Defines when a tag should be fired.
- Variables – Lets you retrieve data which can be used by tags and triggers.
Why or When Do I Need a Tag Manager?
A Tag Manager makes your life easier when you want to modify your website without needing a developer to make the necessary changes for you. Instead of having to contact a developer and waiting for someone to deploy your website, you can easily make the necessary changes yourself without having to wait for anybody else. This lets you bring changes to your website and to your market faster, you gain the insights you need faster, and it reduces cost.
It also comes in handy if you’re embedding many third-party snippets into your website and want to add structure and oversee all the snippets that are embedded, as well as having a convenient way to manage them.
The FirstHive Tag Manager also makes sure that all snippets are implemented correctly and loaded in the right way for faster performance.
What are the benefits of a Tag Management System?
A Tag Management System will offer your analytics infrastructure the following benefits:
- Better management and control over your tags.
- Higher security.
- Code optimization.
- Release IT from marketing code deployment.
- Bring changes to the market faster.
- Reduce cost in your organization.
What are TMS Drawbacks?
Tag Management Systems are becoming a standard in analytics projects.
A TMS in some ways is like a “black box” containing all the tags on your website, if a visitor blocks the TMS script, it will block all the resources included within it.
In comparison to other tag manager solutions, the FirstHive TMS is hosted on your website making it unlikely this scenario will happen and with FirstHive there are various ways to avoid these problems.
TMS are highly powerful, by installing one you will probably give access to non-technical profiles who could in a couple of clicks break your website. As a result, you need to ensure that you manage user rights accordingly and that each user will have proper training. Additionally, you may want to disable Custom Templates.
How can I Set up FirstHive Tag Manager on my Website?
FirstHive Tag Manager is available through FirstHive’s marketplace as a plugin. Once installed and activated, it will appear straight away at the top right corner in your FirstHive:

Getting Started by Creating a Container
When you create a new site in FirstHive(most of the time a container will equal one website), the Tag Manager will automatically pre-configure a container with a FirstHive tracking code tag for you (you will find this tracking code within the Tracking code menu in the backend):

If you want to create a container for an already existing site, or create an additional container, log in to your FirstHive now and click on “Tag Manager => Manage Containers”.
You will now see the list of containers:
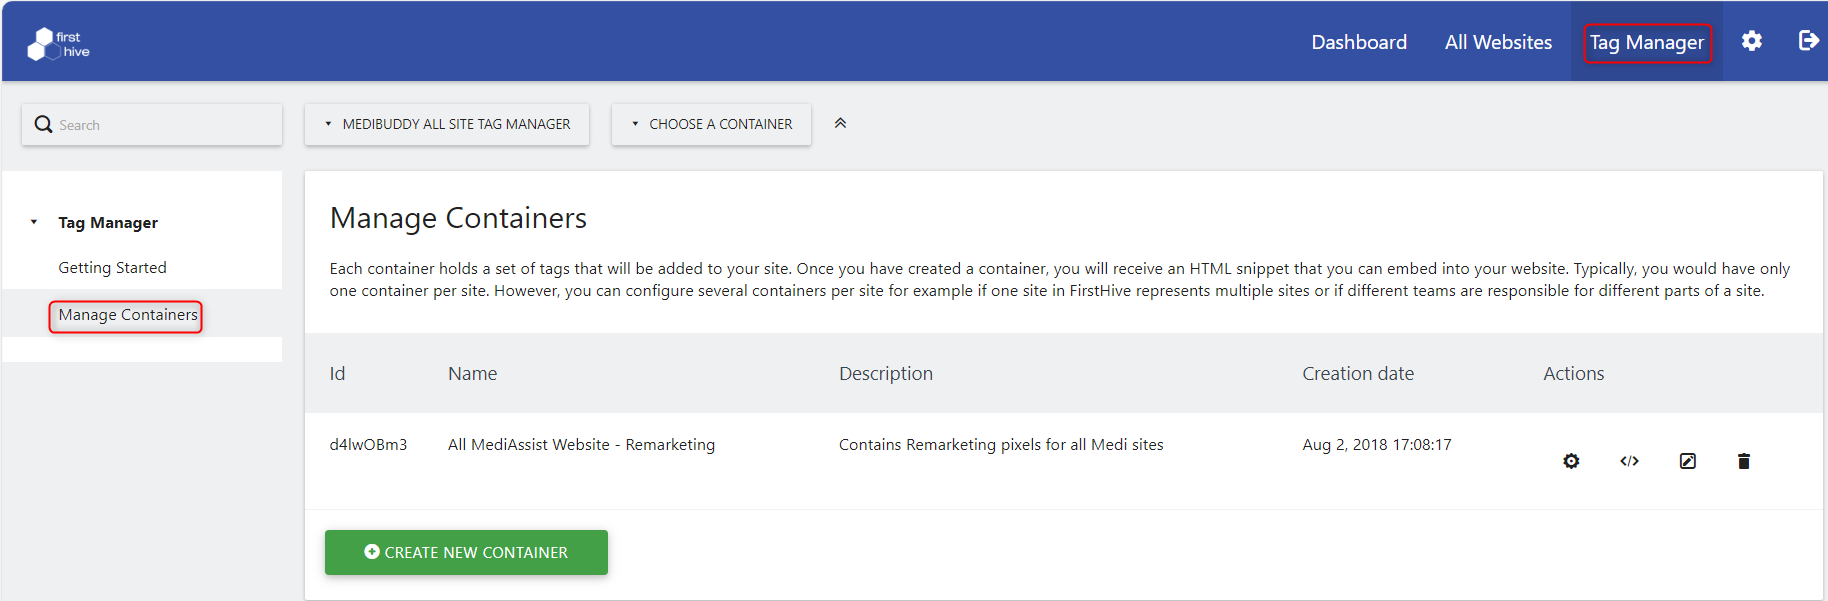
Click on the link to “Create new container”. Here you can enter the name and description (optional) for your container. Use any name that helps you identify this container, for example the name of the site or what you are using this container for. The “context” option will be disabled as we do not yet support a different context such as Android or iOS.
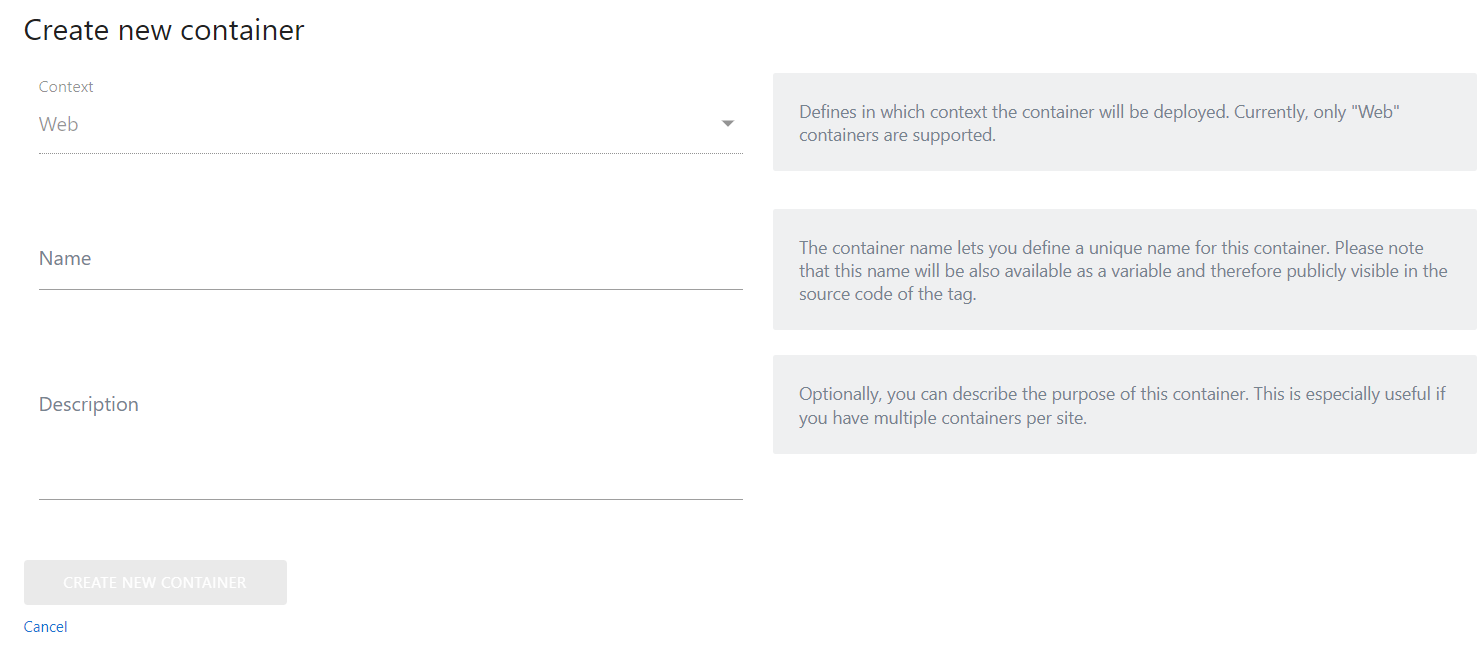
Once you have created a container, you will automatically be redirected to the container dashboard.
Installing the Container
Now that you have created the container, it is time to embed the container into your website. To do this, you can click on the “Install Code” icon on the left menu:
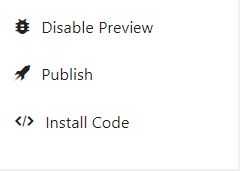
You will then have three different options:
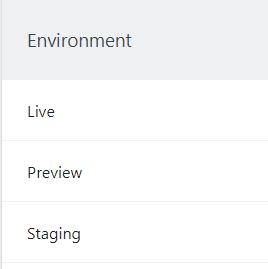
A simple installation will only need a Live environment. However, if you are working on websites where security and stability are critical, you will likely need to add a Dev and Staging environment.
Picking up any of those three options will end up in a slightly different container tracking code:
![]()
Whatever the option you choose, all you need to do is to copy / paste this snippet of code as high as possible into the of your website. In most cases you will want to copy the code for the “Live” environment.
A user with super user access can configure the list of available environments in the plugin settings by going to “Administration => General settings”.
We recommend you check our Tag Manager Install developer guide on how to embed the container into your website.
Before we move on to the next section, here is a quick tip:
Jumping between containers
You can easily jump between containers through the container control next to the website drop down menu in the top toolbar:
![]()
Or you can select a container by clicking on the cog icon in the “Manage Containers” overview.
 The Dashboard
On the dashboard you will get an instant overview of all your configured tags, triggers, variables, and versions. With just one click you can quickly edit any entity, or create new entities. To get more information about a specific entity, simply hover the name. It will tell you when the entity was created, last edited, and of what type it is.
![]()
Tags
A tag is a snippet of code which can be executed on your site. Most of the time a tag may be used to either send data to a third-party (for example tracking data) or to embed content from a third-party into your website (for example social widgets or surveys). You can add as many tags as you like and a tag will be executed as soon as the condition of a connected trigger is met.
In order to create a new tag:
![]()
Select the tag you would like to include within the container, for example “FirstHive Analytics”, in order to embed the FirstHive tracking code into your website through the TMS:
![]()
Configuring a Tag

The tag configuration consists of three main parts:
- A section where you configure the tag itself and what it should do or how the tag should behave, for example you may configure a FirstHive Tracking URL or your Google Analytics Property ID. The available form fields in this section differ from tag to tag.
- A section where you configure when this tag should be executed (or blocked). This is done by assigning a so-called trigger. Only when such a trigger is being triggered, the tag will be executed.
- Advanced settings that let you configure, for example how often the tag should be executed, limit the date range when the tag should be executed, and more.
1 – Configuring a Tag
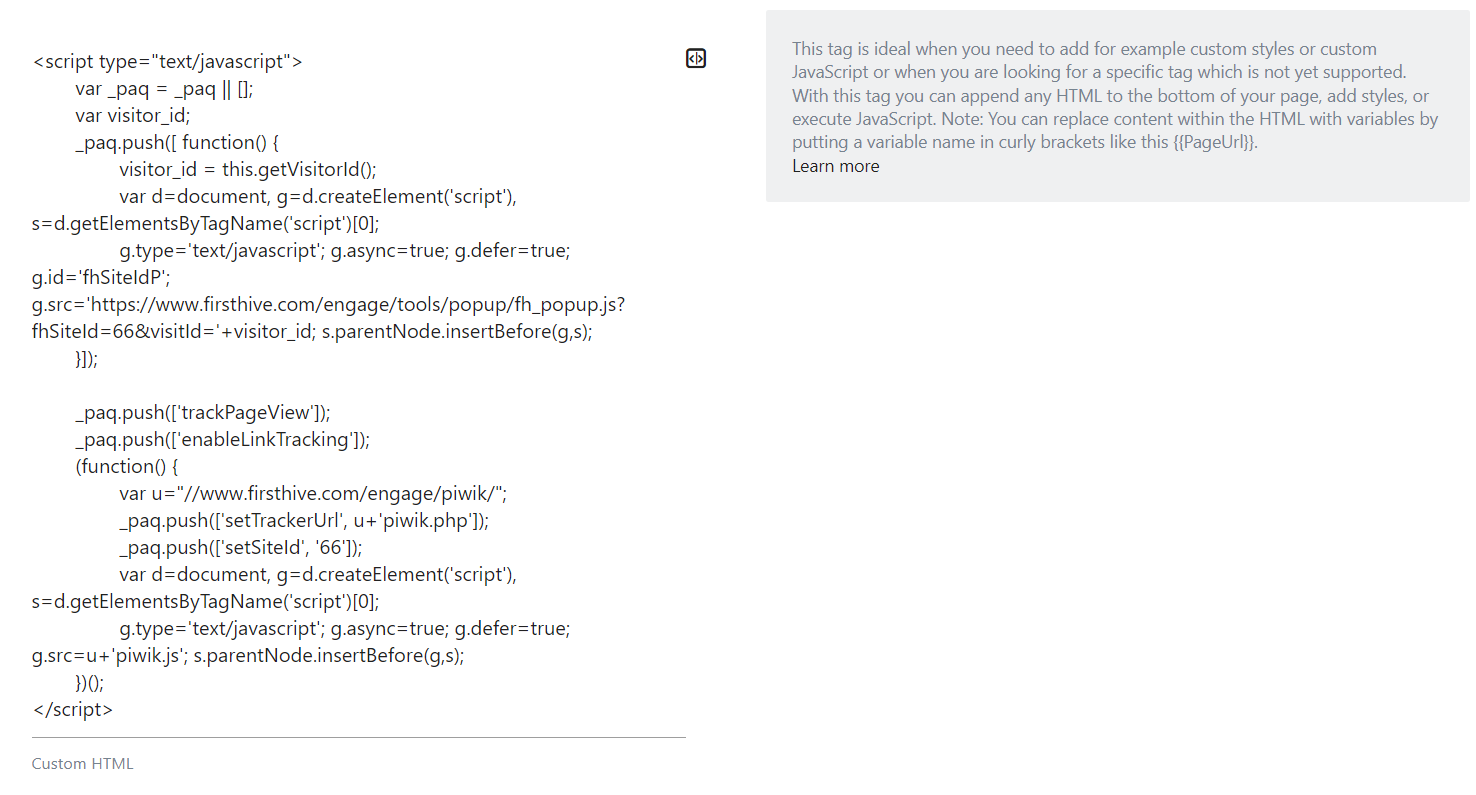
As each tag represent a different solution: FirstHive Analytics, Google Analytics, Facebook conversion pixel, remarketing tag etc., each configuration panel is different according to the tag you selected.
Some can be very complete and composed of multiple fields that’s the case for FirstHive Analytics whereas others such as the custom HTML tag will need only one field to fill in:
2 – Configure When a Tag should be Executed
When you copy/paste the FirstHive Analytics JavaScript default tracking code, it is sending the data to the FirstHive server on each pageview. This behavior can be problematic in some situations, for example, certain pages should be tracked in conditions where consent is required from the user.
You can configure when a tag should be executed through Triggers. If you are not familiar with a tag manager or triggers yet, we recommend you read the Triggers guide to understand this concept.
3 – Advanced Settings
Some users may need a complex configuration like setting the number of times a tag should be fired, the order in which tags should be triggered, and even which specific start date a tag should be triggered and ended.
One mere example could be a remarketing campaign where cookies will be set until a specific end date. This is exactly what the advanced settings are designed for:
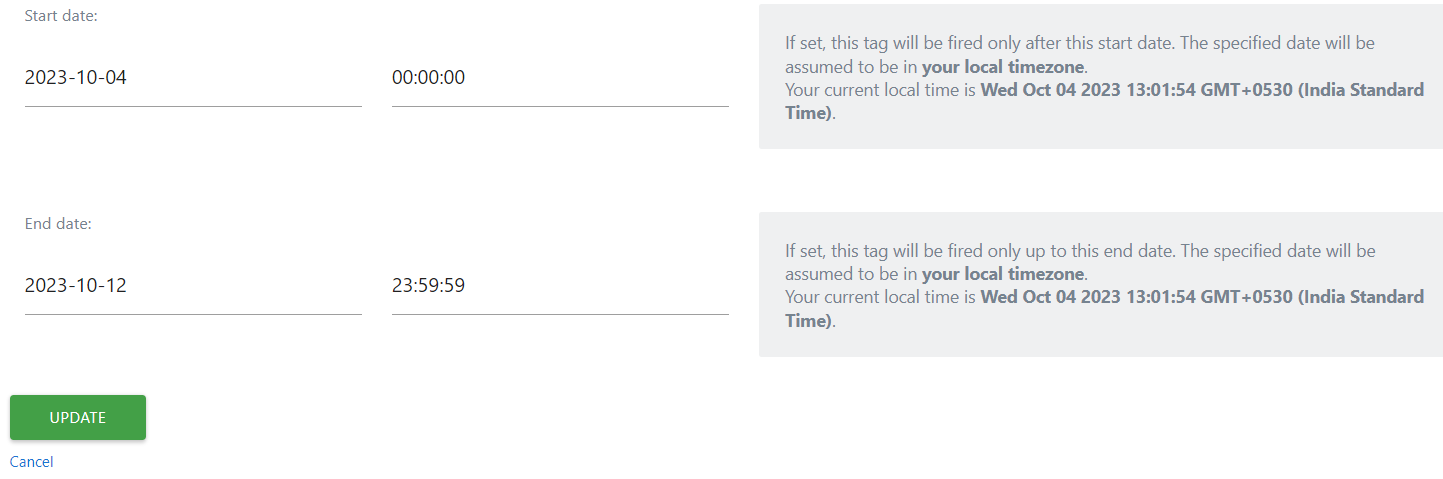 In the screenshot example above, by defining an end date, it will automatically stop the tag triggering without the need for you to go back into the backend to remove it.
Congratulations, you have just configured your first tag! However, the tag will not yet be loaded on your website as some more important steps are missing:
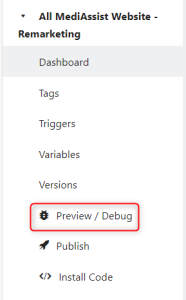
- Preview/Debug
- Create a version.
- Publish to an environment (Staging, Dev, Staging).
Preview/Debug
One of the most important features of a TMS is the possibility to test it before sending it online.
It is important to note that the tag(s) you will publish may have some consequences on the performances of your website (display, loading time etc.) so exactly like a Content Management System, you will preview how your tags are rendering before sending the live version to your website.
The use of the preview/debug mode is straightforward; once your tags, triggers and potential variables are set, just click on Preview/Debug:
You will then be notified straight away through the dashboard that you are in the selected mode:

In some cases, you will need to append ?mtmPreviewMode=YourContainerID to the URL of your website to see the debug console:
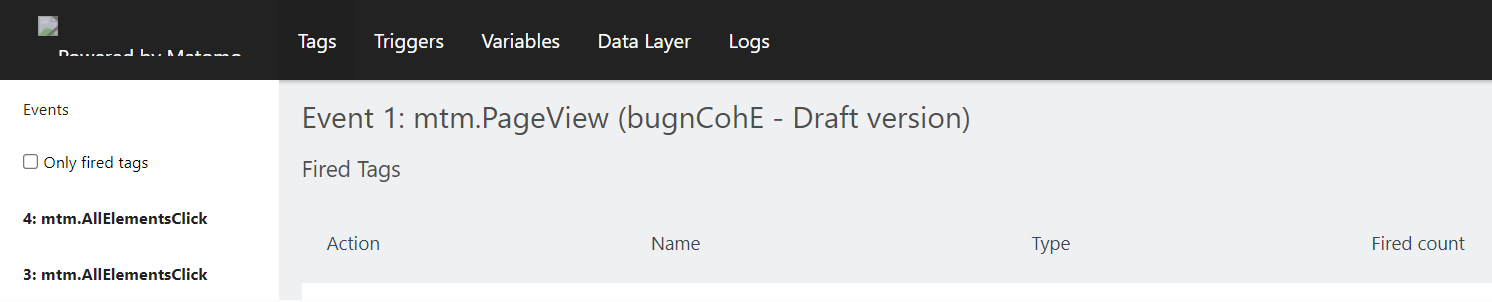
Everytime, you will perform an action that you defined as a trigger: PageView, Click, Scroll, etc., you will see it appearing on the left with the associated tag fired on the right:

To make it straightforward, the debug feature allows you to find your own errors and fix them on your own without requiring the help of a developer.
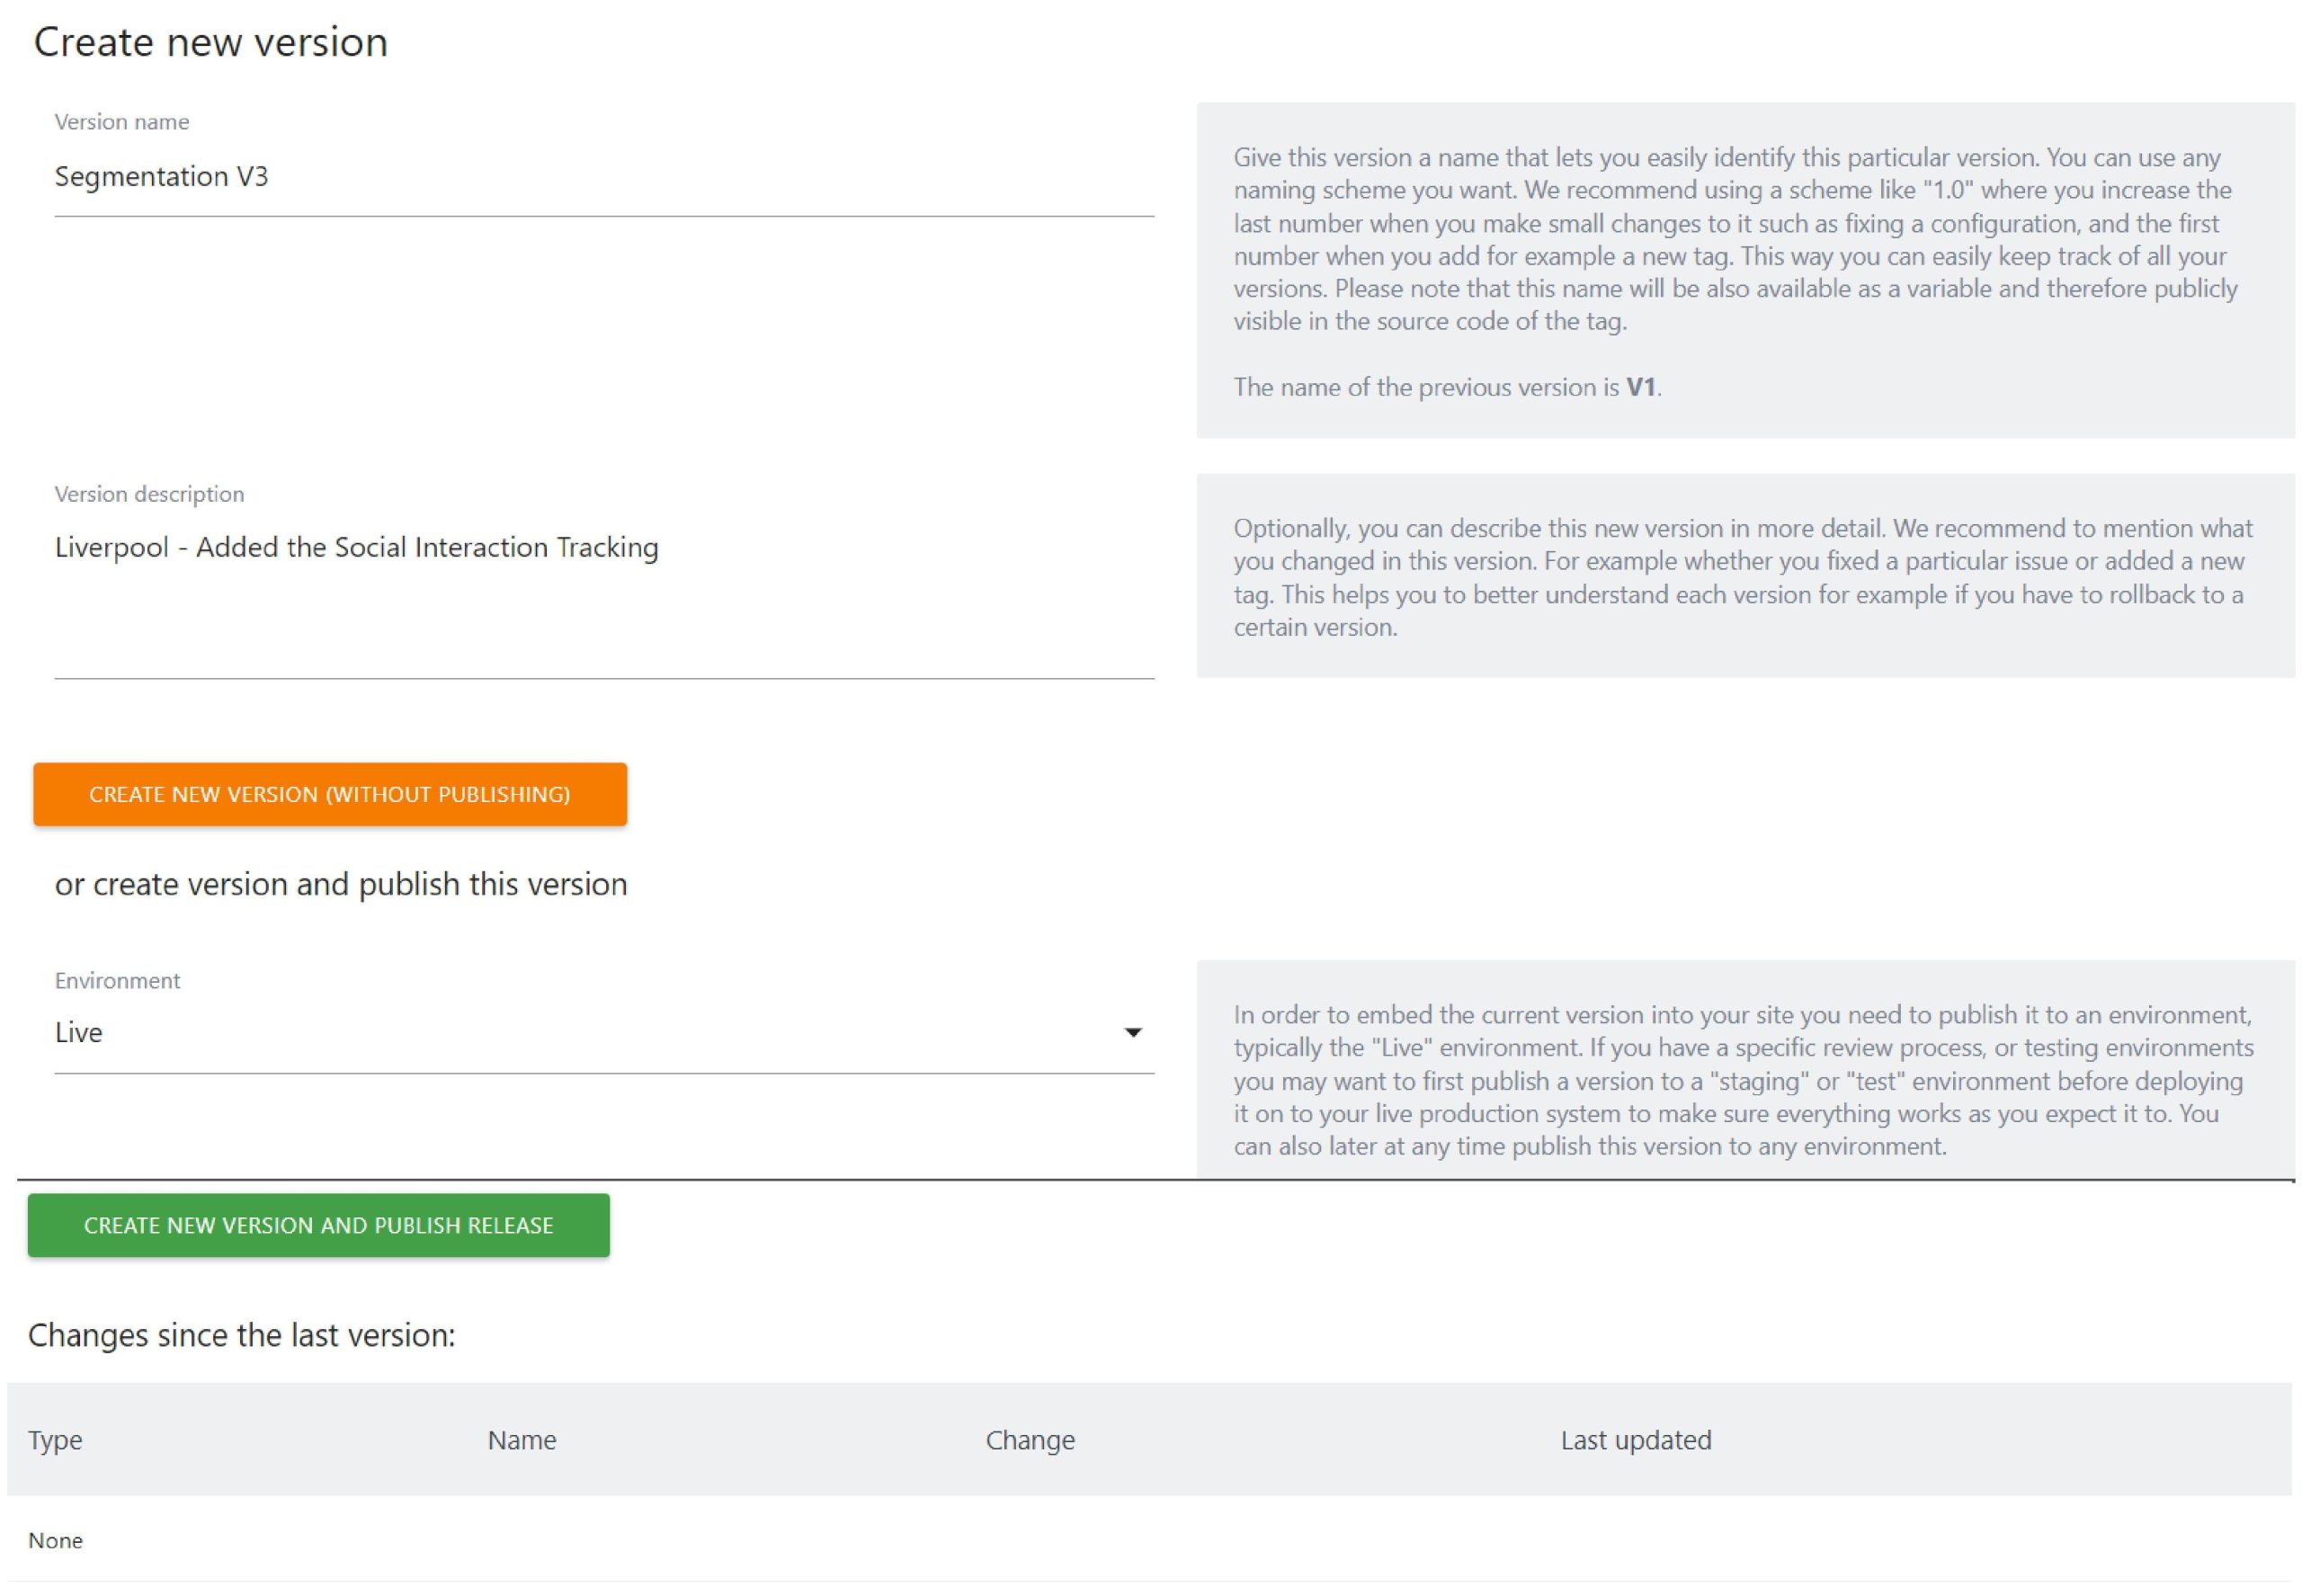
Versions
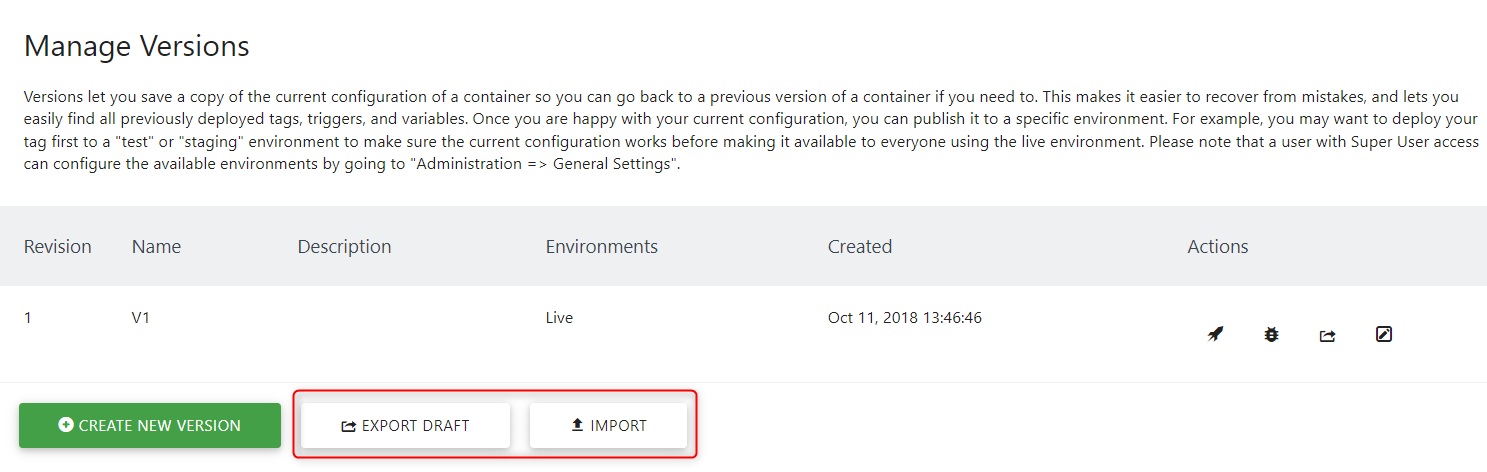
Versions let you save a copy of the current configuration of a container so you can go back to a previous version of a container if you need to do so.
You have the choice to not publish it yet, which will give an opportunity for other users to see the modifications you performed and to provide their feedback. It also makes it easy to recover from mistakes, and lets you easily find all previously deployed tags, triggers, and variables. Once you are happy with your current configuration, you can publish it to a specific environment (Dev, Staging, Live).
For example, you may want to deploy your tag first to a “test” or “staging” environment to make sure the current configuration works before making it available to everyone using the live environment.
You can also import / export containers within the version menu.
Publish
Once you feel that your tags, triggers, and variables are properly set, you can publish them on your website by informing your team about the changes which have been made:
 Variables
While you configure some tags or triggers, you may have noticed text fields with such an icon on the right:

Instead of setting a fixed value for a form field, this icon lets you select a so called “Variable”. A Variable allows you to basically use a dynamic value whose actual value will be resolved at the time the value is being accessed, for example this could depend on the current page URL, Referrer, Screen size, or more. If it looks like a great feature, that’s because it is. For example, instead of defining a hard coded event name “//mypageurl”, you may want to replace the event name with the current page URL path. This means depending on which page URL a user is currently viewing, the event name will be different.
To do this, click the icon on the right-hand side and locate the row that says “Page URL Path” and select it. The text field will afterwards look like this:

The curly brackets you see means that they reference a variable with the id “PagePath”.
You can even go a step further and connect multiple variables or add custom text like this:

Preconfigured variables
FirstHive Tag Manager comes with a set of preconfigured variables that you can use right away without having to configure them. Whenever you want to use them, you just select them and that’s it.

As you will see the list is quite long.
As an example, let’s imagine that you would like to know if some of your pages are containing several H1 HTML tags, you could then use a variable within the FirstHive configuration as shown in the example below:
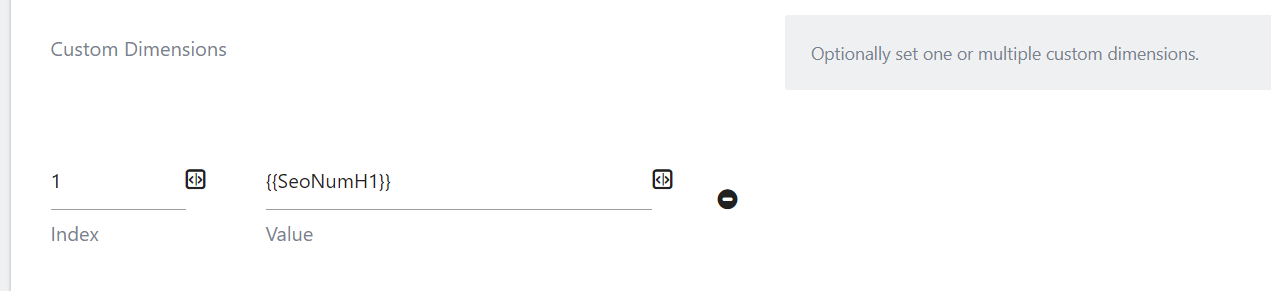
As a result, this appears like when a page is loaded:
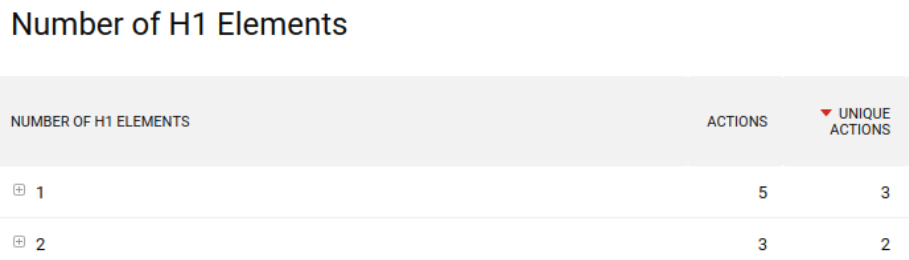
As you can see in the example above, the variable plays its role by auto-filling our custom dimension.
Preconfigured variables can be very powerful, but you can go even further with user-defined variables.
User-defined Variables
Besides this, FirstHive comes with an equally big set of Variable types that you can configure to your needs. You may want to read the value from a certain HTML DOM element (for example the content of a form), or you want to read the value from a meta tag such as the current language being used, a specific cookie value, or a value from the data layer.
To use any of these variable types, you first have to create a variable, configure the variable, and afterwards you can reference this variable by name and re-use it whenever you need it. Say you have given the variable the name “my own variable name that I created”, then you can reference it like this later:

Don’t worry, you don’t have to remember the name of the variable. You can simply select the created variable by clicking on the icon on the right.
To create such a variable, go to “Variables => Create Variable”, or you can always directly create a variable by clicking on the above text field icon, and then select “Create a new variable”.
Now you’ll see the screen of variable types which explains that you first need to select a variable type:
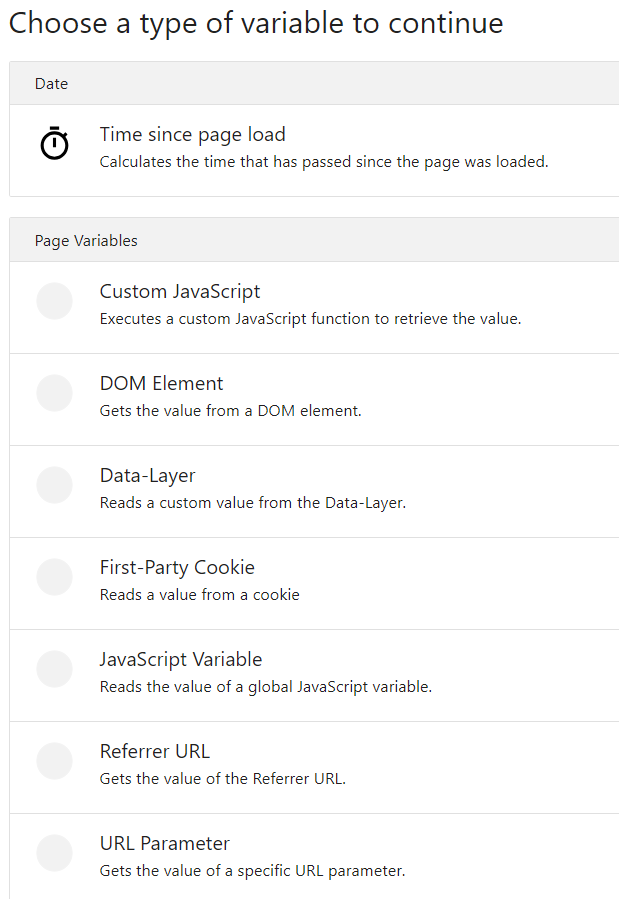
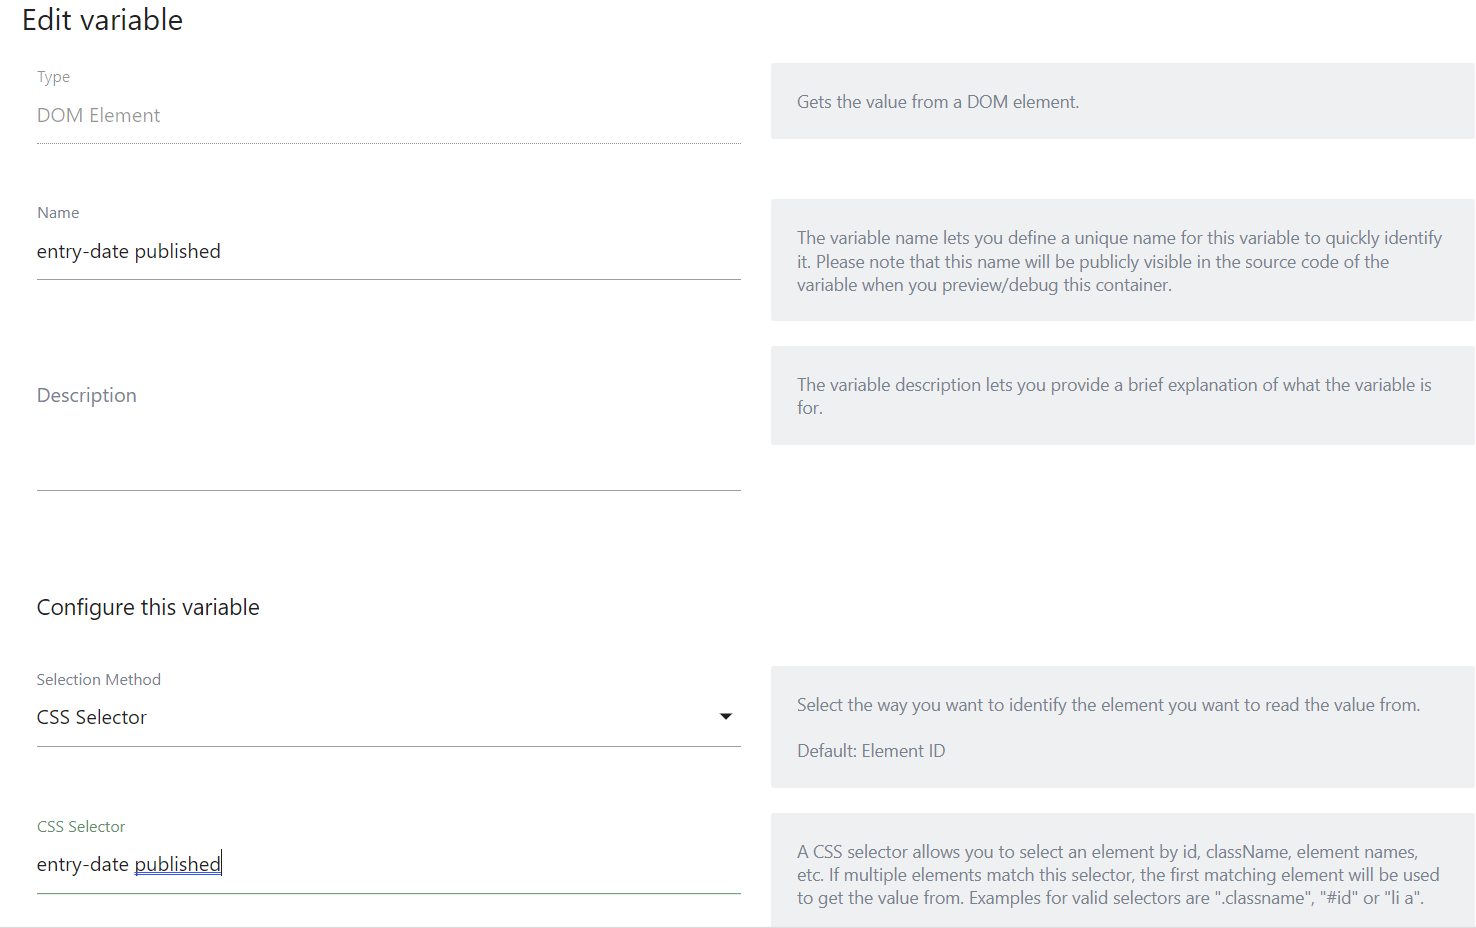
In this example, we would like to collect the “publishing date”, this variable is defined within a DOM element of the page:
![]()
In order to get this data, we need to indicate to FirstHive the DOM Element we would like to work on. In our specific case, this DOM Element contains a class which has “entry-date published” as a value.
Once created, you just need to associate it with a tag, for example a custom dimension in order to process that data within reports:
![]()
If you’re feeling that the possibilities are endless… that’s because they are. And guess what? You can even go further.
Advanced Variables Settings: Default value & lookup table
Advanced variables settings allow you to go even further within your TMS configuration. In the screenshot example below is a lookup table, you can create a variable which changes according to some conditions:
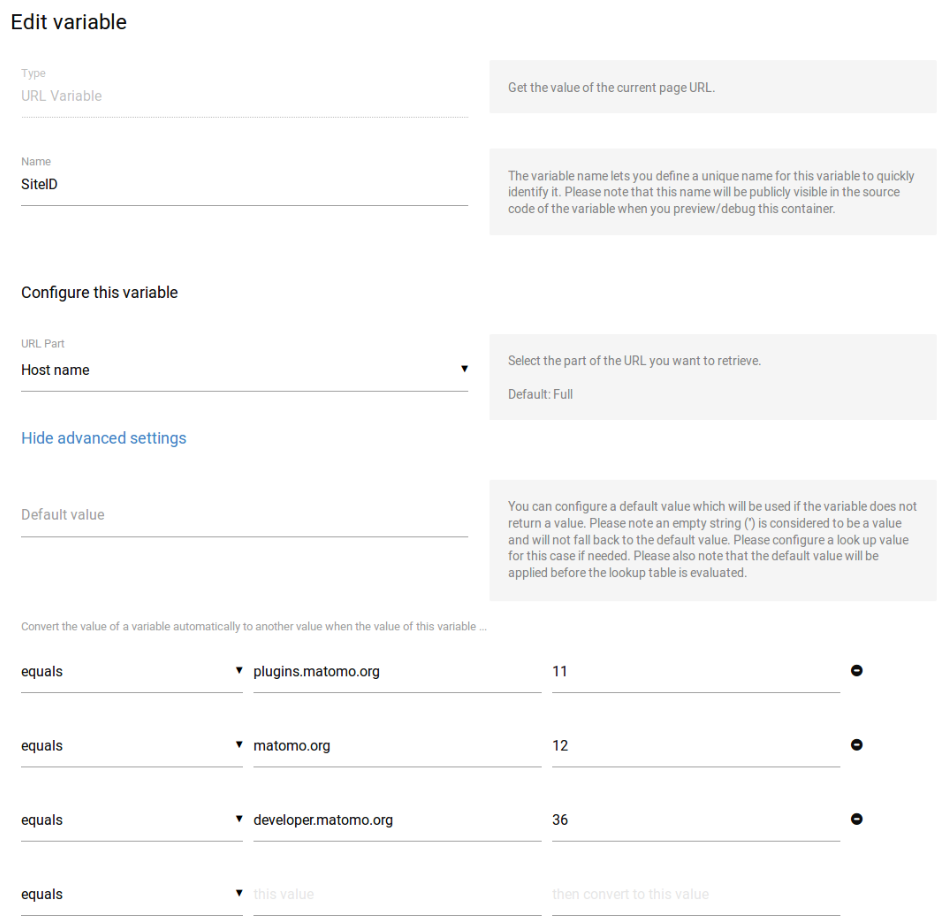
You can then call this variable within your FirstHive tag through the configuration variable:
As a result, you will only need one container to send data to all your websites which will save you heaps of time in terms of tag deployment.
Triggers
Triggers let you define on which event a certain tag should be fired or blocked. For example when a specific element was clicked, or when a visitor reached a certain scroll position. Additionally, you can specify a filter to further restrict if a certain trigger should be triggered or not.
A large choice of different triggers is defined by default within FirstHive as shown in the screenshot below. These can also be individually configured:
![]()
Let’s take a look at an example. Imagine that you are allowing your visitors to comment on your blog post and you would like to measure the number of comments you are receiving:
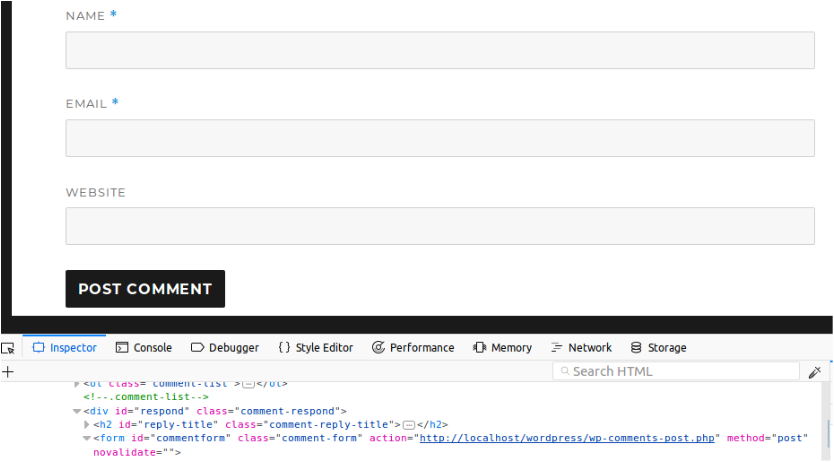
Without a TMS you would most likely need to add a tracking code to the source code of your website.
With a TMS, the only thing you need to do is indicate that you will trigger your tag when this form will be sent:
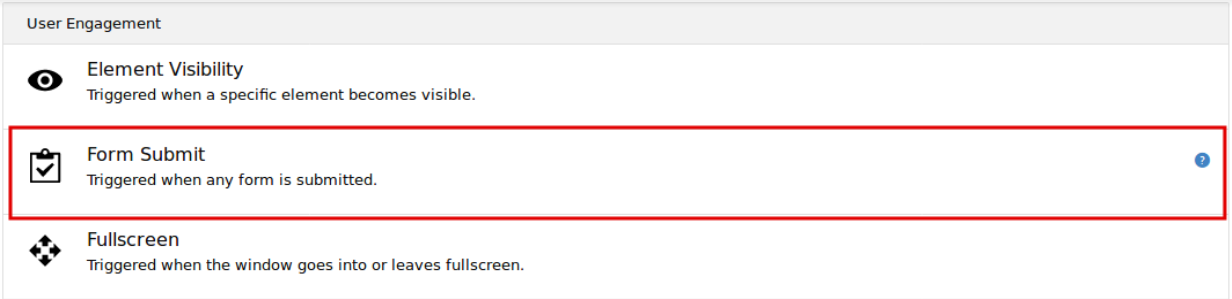
You can then even perform laser triggering by specifying a form in particular:

As you can see, triggers are an easy way to deploy powerful tracking codes with FirstHive Analytics.
Data Layer
The data layer is used by advanced developers and analysts in order to fully take advantage of a TMS.
To make it simple, data layers are most commonly used to access data which is not displayed on a page. The best example is the ecommerce analytics feature. When a customer validates an order, often the page confirming the product he or she bought shows the purchase amount, the number of products etc. But they are no longer listed on the page anymore. As a result, you need to find a way to make these values known to the Tag Manager. This can be achieved with the data layer.
Data layers are also a good way to make your data collection consistent. When using a Tag Manager, you are often defining variables based on the source code of your website, that’s the case when you are using DOM elements such as ID, classes etc. But what is going to happen if you change your source? Well, your tracking will break.
A data layer is solving this issue by ensuring that the data has been properly collected right at the beginning of the page.
Using a data layer means that you’re inserting extra source code within the content of your web pages and cannot be inserted through the Tag Manager.
To include a data layer, you will need to add the following lines of code before your container tag:
| <script> var _mtm = _mtm || []; </script> |
As this data layer is empty, you will need to insert an extra line of code in order to push variables into it, so it will look something like this if you’re hard coding it:
| <script> var _mtm = _mtm || []; _mtm.push({‘weather’: ‘sunny’}); </script> |
Once defined, you will see straight away within the debug mode that your data layer has been populated with a new variable:
![]()
In the screenshot example above, we want to push the weather from the location of the user. As you would like this value to be dynamic, your developer will set something like this instead of inserting a static value:
| <script> var _mtm = _mtm || []; _mtm.push({‘weather’: ‘MY CODE HERE TO GET THE DATA FROM A WEATHER API’}); </script> |
Once done, you can easily create a variable within FirstHive Tag Manager in order to use this variable afterwards for any tag:
And then analyze it within FirstHive Analytics as shown in the screenshot example below:
Note that if you want to migrate from Google Tag Manager to FirstHive Tag Manager, our TMS supports data layers written in the Google Tag Manager format. As a result, if your data layer is written as:
| <script> dataLayer = [{ ‘variable-name’: ‘value’ }]; </script> |
We will support it in the same way as a FirstHive data layer.
Going further
The possibilities for deploying tags are endless. Now that you know how to deploy a simple tag, why not take advantage of the FirstHive TMS in order to deploy new tags on your website and/or applications.
Happy Analytics,