How to Create WhatsApp Campaign?
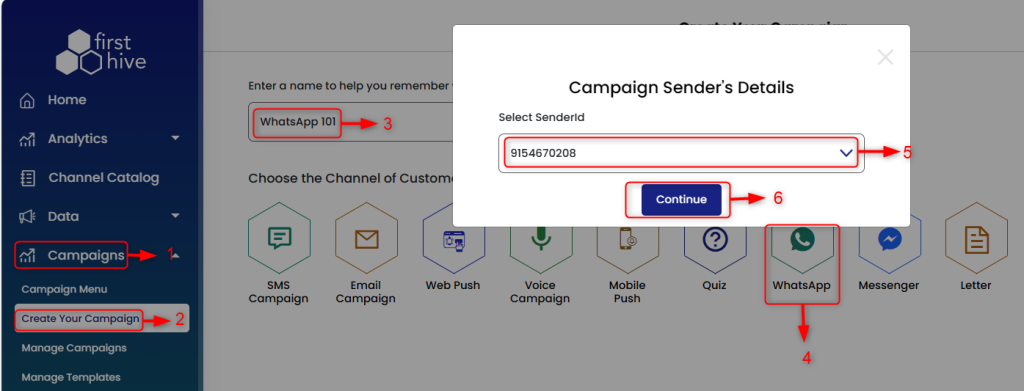
Step 1: Go to Campaigns.
Step 2: Click Create Your Campaign.
Step 3: Enter Campaign Name (mention unique title for the campaign as a name of the campaign).
Step 4: Select WhatsApp from the channels.
Step 5: Select SenderId from the drop-down.
Step 6: Click Continue.
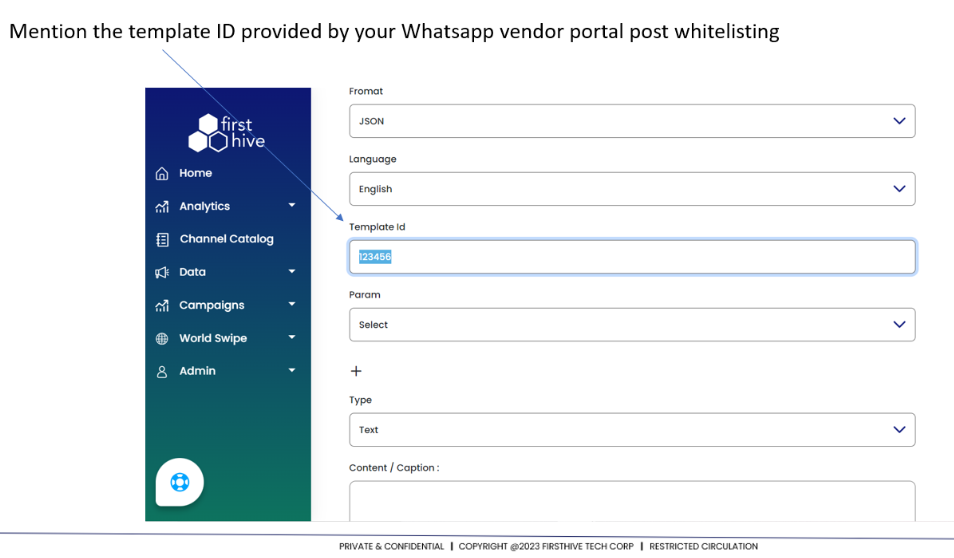
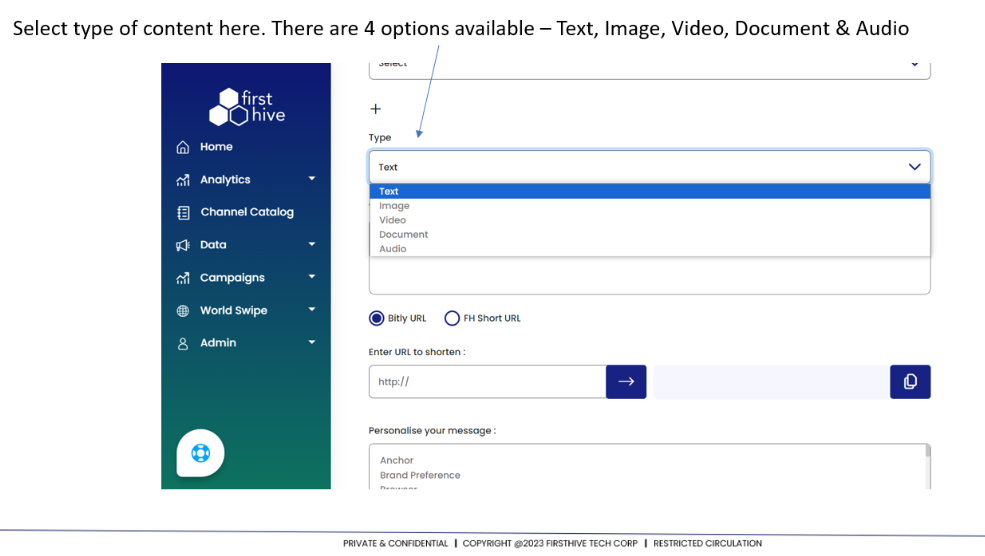
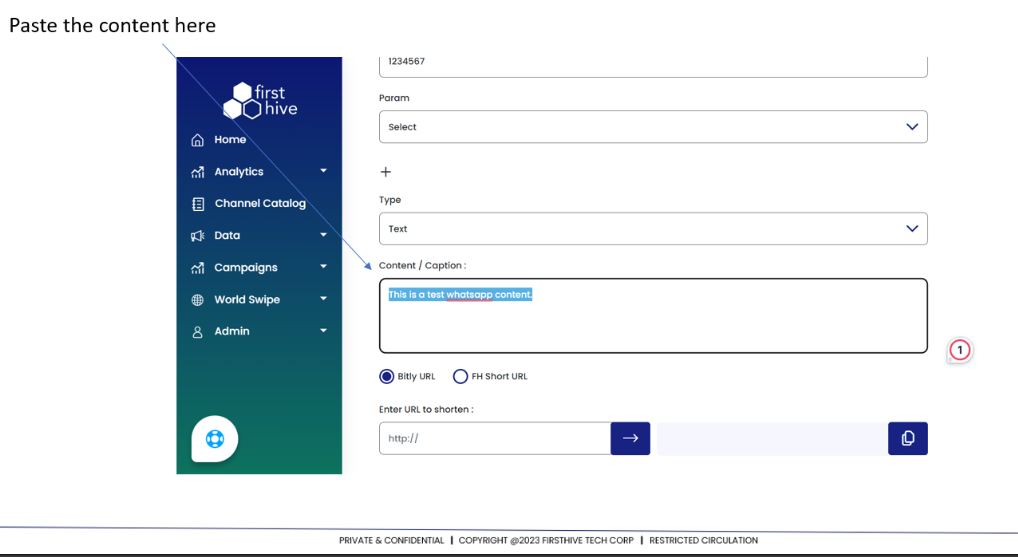
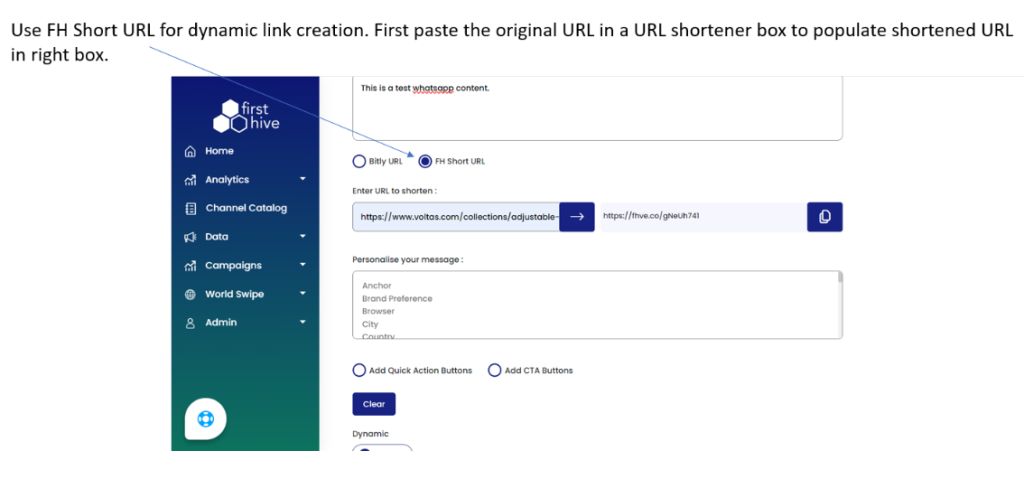
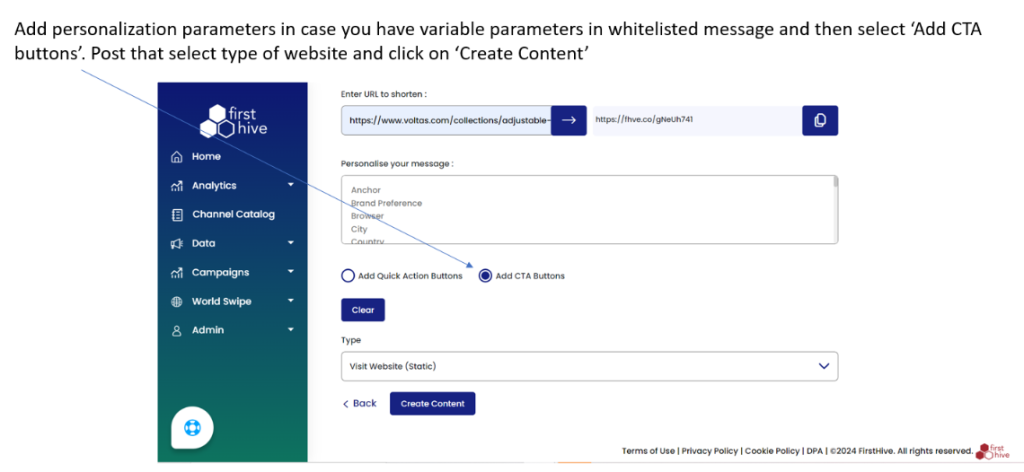
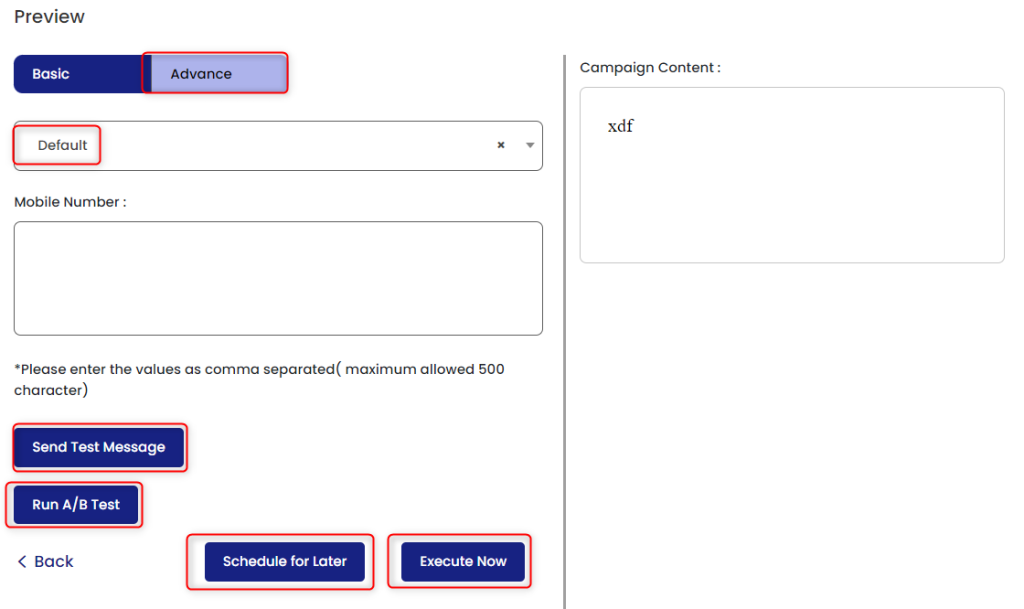
In the WhatsApp content page,

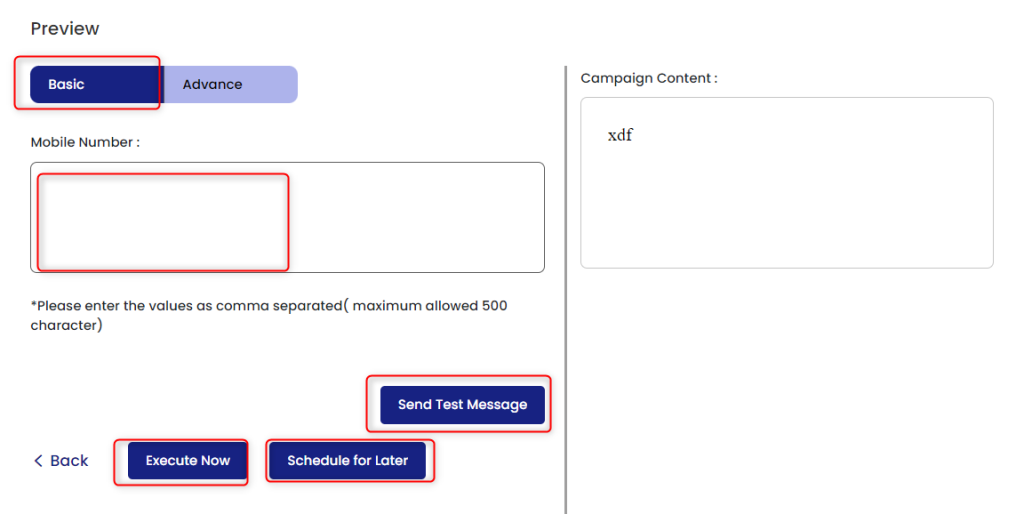
In the Preview section, you have two functionalities:
Basic
When you select Basic, you need to enter a mobile number/numbers and send a test message for checking purpose or you can click Execute now to execute the campaign or Schedule it for later.
Advance
When you select Basic, you need to enter a mobile number/numbers or select as default and send a test message for checking purpose or you can click Execute now to execute the campaign or Schedule it for later.
Here, you have another option to Run A/B Test.
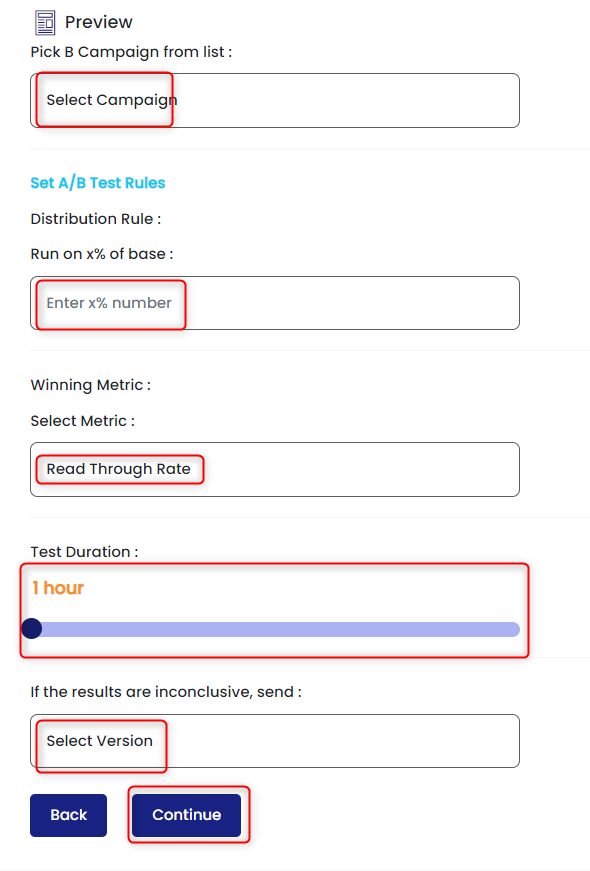
This takes you to the next window, where you need to enter the following details:
- Select the WhatsApp Campaign from the drop-down.
| In WhatsApp there is no subject line that is why you need to select the campaign. |
- Enter Test Percentage (%).
- Select the Metric from the drop-down. For WhatsApp, there are two metrics available:
- Read Through Rate
- Click Through Rate
- Select the Test Duration and wait. The Test Duration range is between 1-24 Hours, after crossing the set time; this will decide which campaign has performed better.
- If the result comes inconclusive (A=B), then you need to select the campaign of your preference/choice. Choose either A or B.
- Click Continue. Once you click on continue, this will go to prgm_campaing_ABtesting. The record will be saved against the record id in pk_cmp_A and pk_cmp_B column. All the details including Test Percentage, Metric, etc., will be saved in this table.
When you click on Manage Campaign (get back to the main Menu), you see:
- The A/B tag in the campaign dashboard.
- When you click on Execute Now, the pk_id will be passed for the campaign. This will search for the pk_id and from there it will get either Campaign A or Campaign B.

What is A/B Testing
A/B testing compares two versions of an email campaign, or an aspect in a scenario to evaluate which performs best. With the different variants shown to your customers, you can determine which version is the most effective with data-backed evidence.
FirstHive offers A/B testing in scenarios (WhatsApp campaigns). A customer is assigned a variant that will be shown to them instantly when reaching an A/B split node in a scenario or matching the conditions for displaying WhatsApp campaign.
Steps
Step 1: Create two Campaigns.
| For example, you need to create two campaigns for WhatsApp such as: Campaign A and Campaign B |
Step 2: Put the users in Campaign A.
- Copy the Exclusion IDs to Campaign B
Step 3: Validate Users
| Update the PCU Status for Duplicate: Duplicate = 10 |
Step 4: Get the Test % Users.
Step 5: Divide the users into two parts A and B.
| Do the Segment ExclusionDo the Domain Exclusion |
Step 6: Call the Campaign API.
| Call the Campaign API à Set the Wait Time |
Step 7: Set the Time and Wait.
| Set a particular Time and Wait. The wait time is 1 hour to 24 hours. |
Step 8: Calculate the Decision.
| Whether, Campaign A has performed well. Or Campaign B has performed well. |
Step 9: Select the campaign version to be sent, either A or B.
| Complete previous iterations |
Step 10: Send Final Campaign.