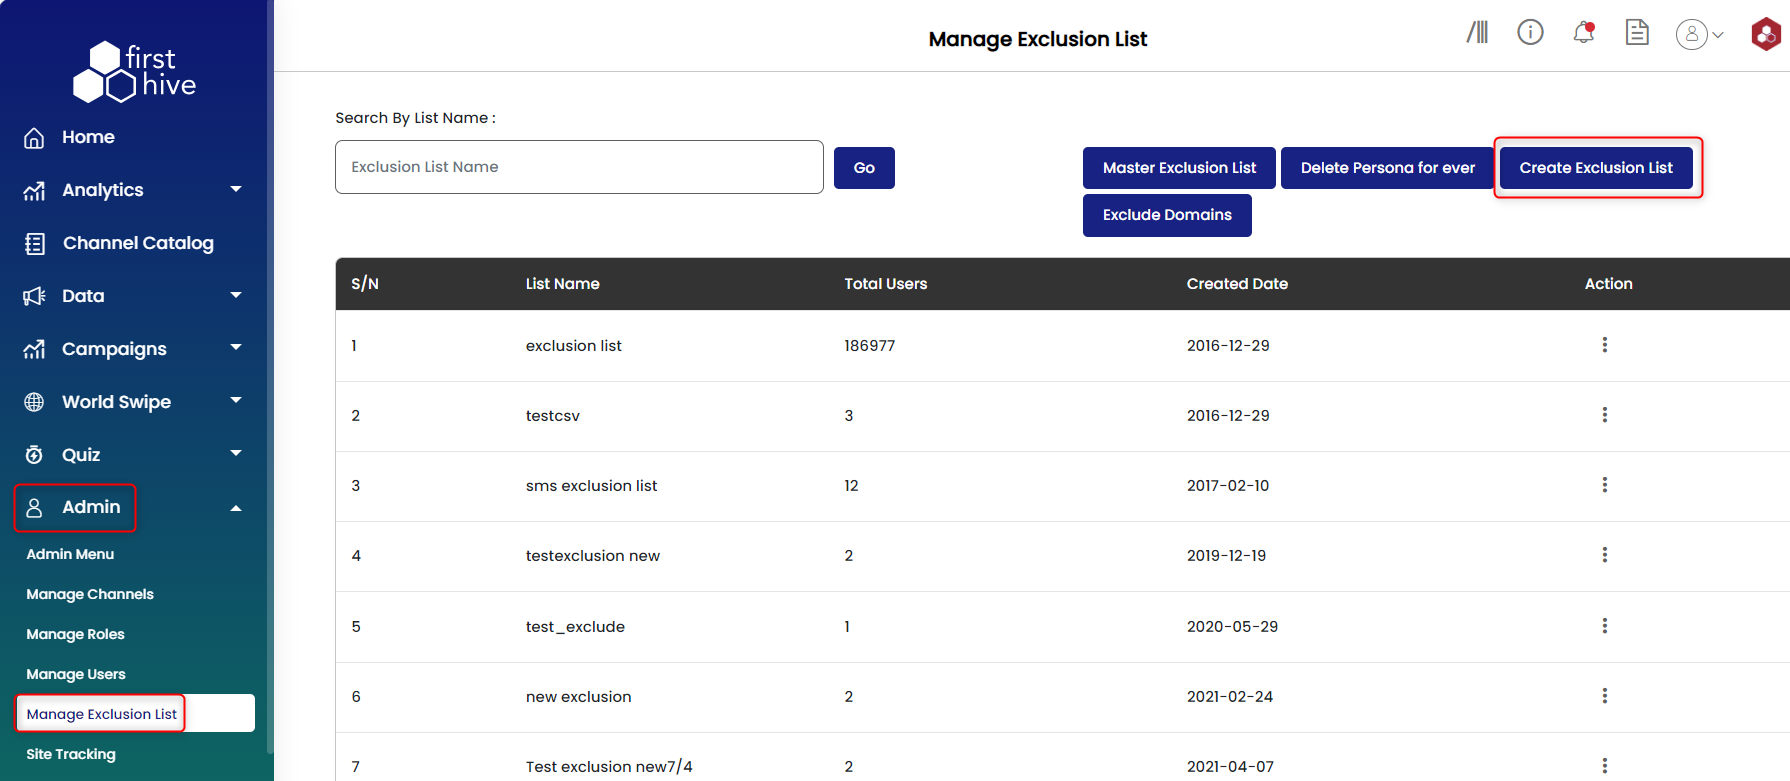
Create:
- Login to your FirstHive account.
- Go to Admin >> Manage Exclusion List.
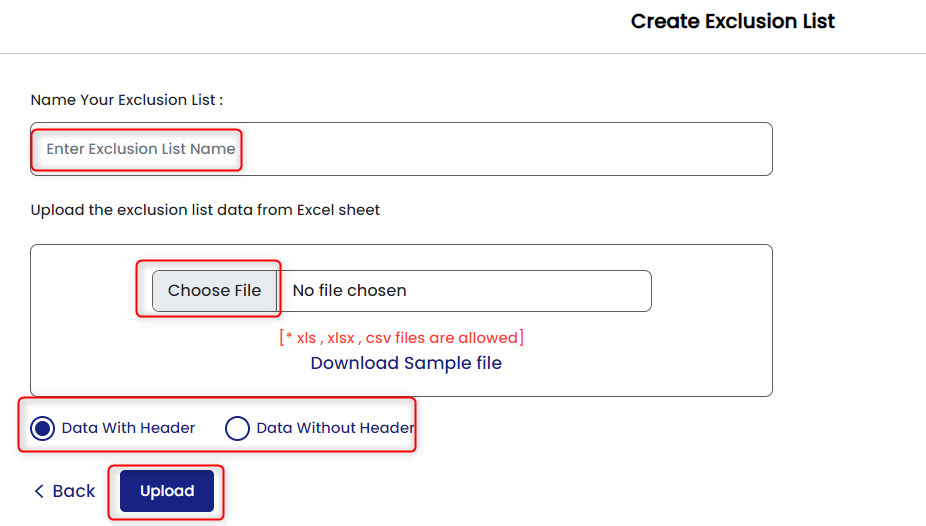
- Click Create Exclusion List.
- Enter the name of your exclusion list.
- Choose a file to upload.
- Select whether you want to go with Data With Header or Data Without Header.
- Click Upload.
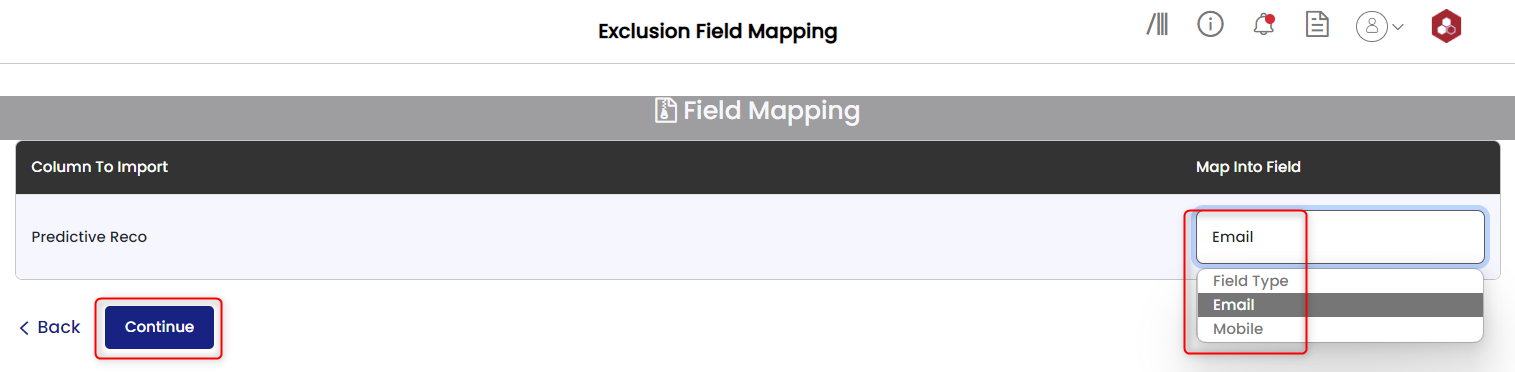
- Select the field you want to map into, whether Email/Mobile.
- Click Continue.
- You get a success message “Exclusion List has been created successfully”.

View:
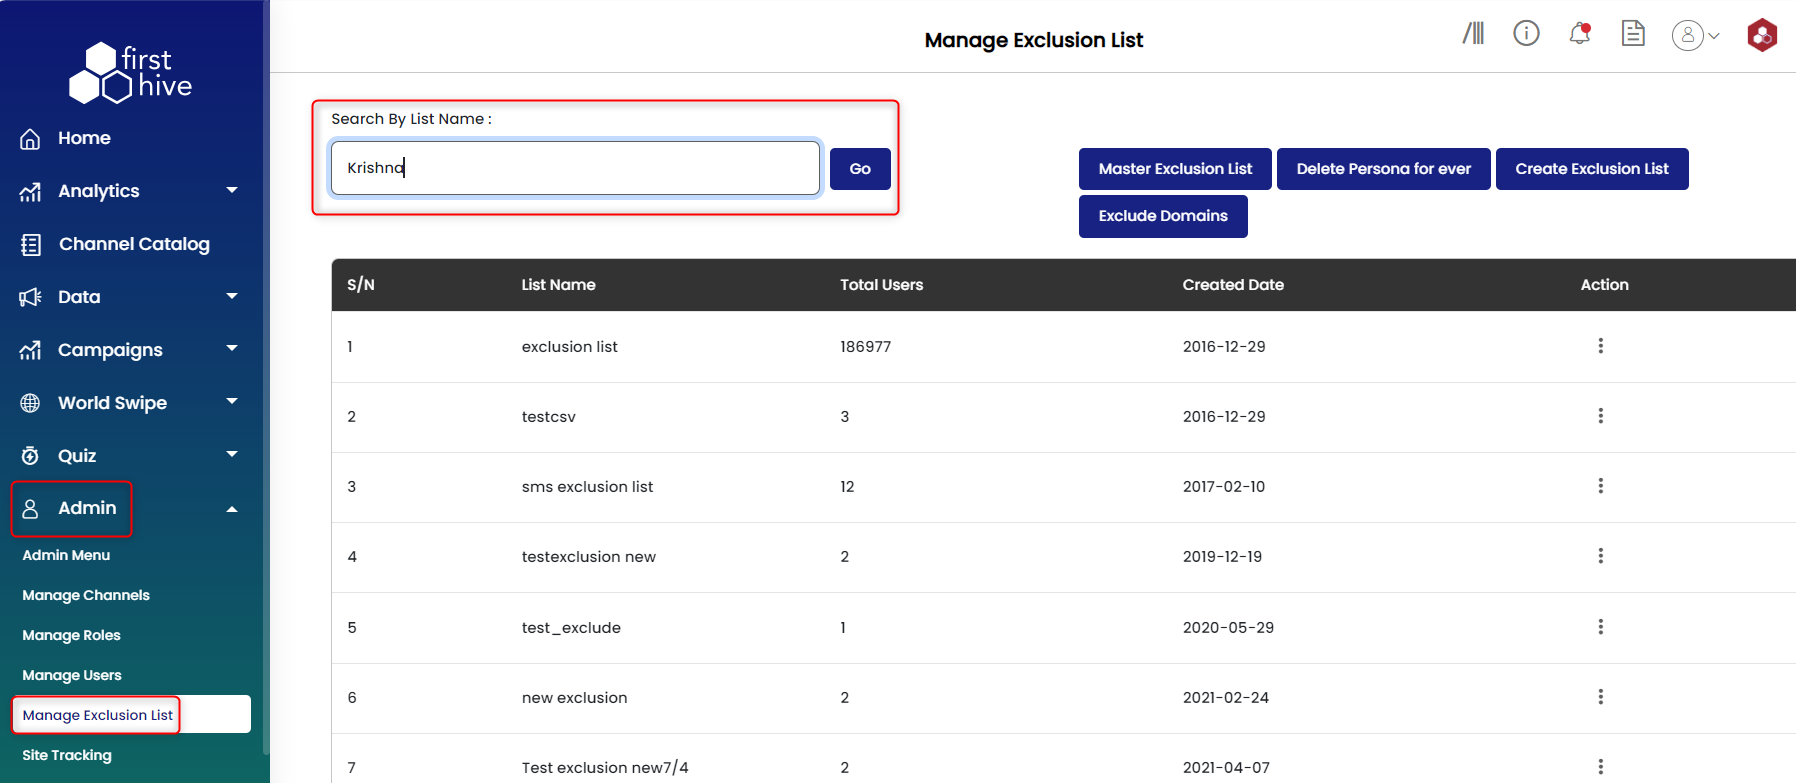
- Login to your FirstHive account.
- Go to Admin >> Manage Exclusion List.
- Search by title i.e., name of the exclusion list.
- Click on view icon
 under action column to view all the users in the exclusion list.
Edit:
- Login to your FirstHive account.
- Go to Admin >> Manage Exclusion List.
- You can search by title i.e., name of the exclusion list.
- Click on view icon under action column.
- You can see the list of users in the exclusion list, click on delete (X) icon under action column to remove that entry from the exclusion list.
This will reflect on the campaign where this exclusion list is in use.