Popups
To integrate the Popup (WebPush), you need to create a campaign first. Once the FirstHive tags are placed, there are two things which will be running in the website:
- Script
- Response
| NOTE Push Notifications do not work properly for http (non-secure) sites. |
For example, let’s take the hdfcfund.com. For this page, FH has the script running in backend that checks for the Popup. To see how the process is taking place, you need follow the steps mentioned below:
- Go to Network.
- Search fh popup in the search box.
- This will display the container, piwik, main, and fh_popup. When you click fh_popup this will show:
- Headers
- Payload
- Preview
- Response, etc.
- Click Preview to view the script. This particular script will be called on each page interaction to check any webpush is there for this particular page.

| NOTE In the Response section, you will have the event. If the Response section is empty or no response found, then there is no WebPush event. |
To check the Webpush event, go to hdfcfund.com:
- Click Wealth Creation under Goal Based Solutions tab.
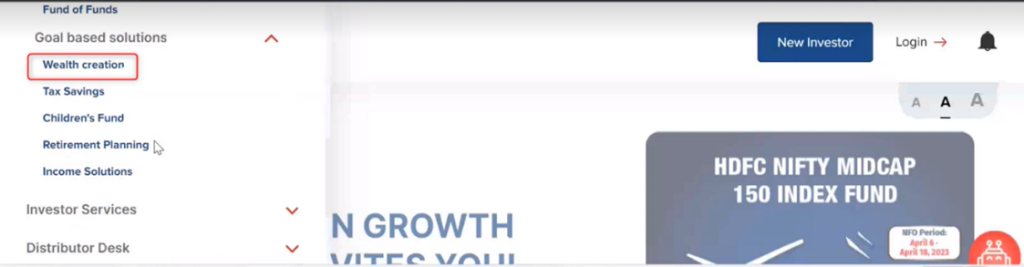
This takes you the Wealth Creation page, where you will see a Popup coming.
- You can see the Popup because for this page the webpush event is configured.
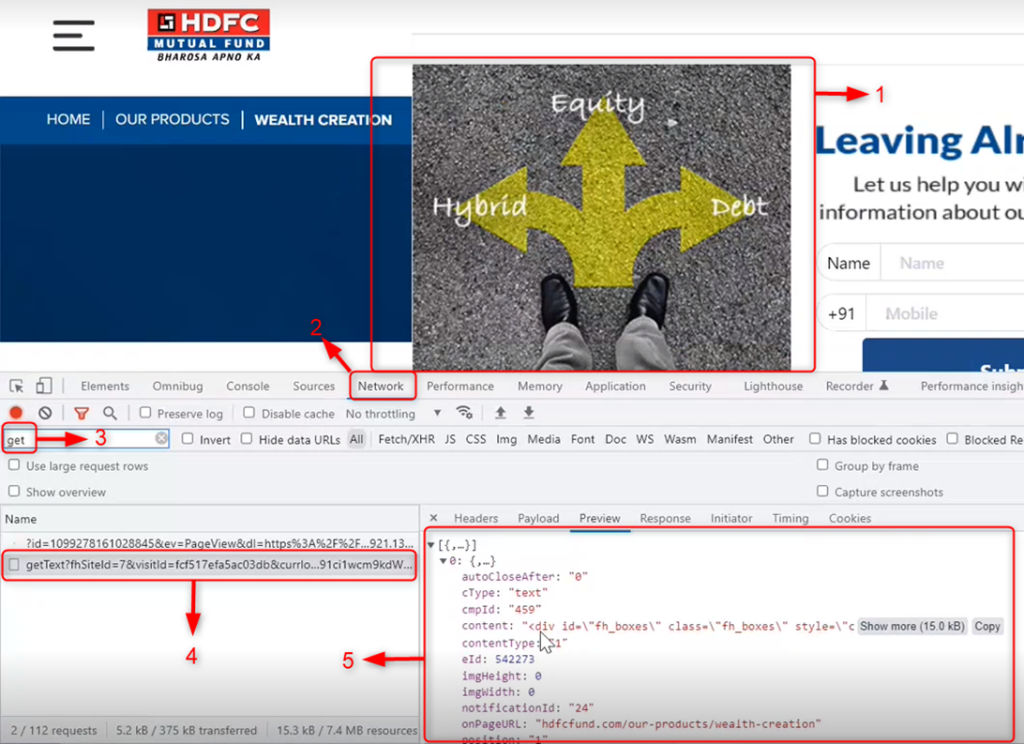
- Click Network.
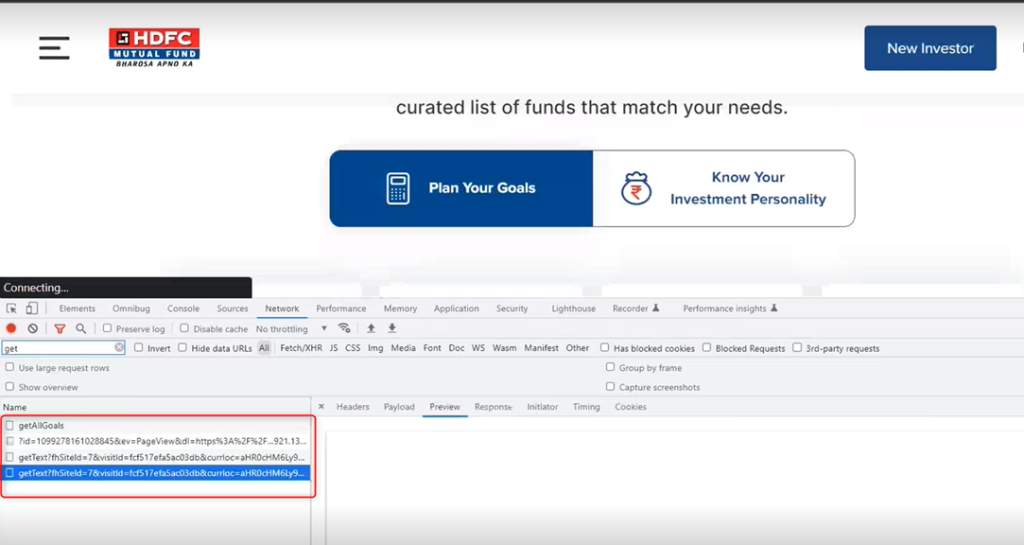
- Search getText in the search box.
- Click getText.
- Go to Preview, you see all the details that include, Campaign ID, Content, Notification ID, etc.
At the same time, if you go to any other pages, you won’t get to see details showing in the Preview (getText) section because there is no active campaign for this page.
How to Push a Campaign
There are two things to consider while pushing a campaign:
- Webpush: The push notification that comes when you visit a webpage.
- Web Banner: The web banner that appear on a particular page
Steps to Create Web Push Campaign
Step 1: Go to Campaigns, create a campaign.
Step 2: Select WebPush.

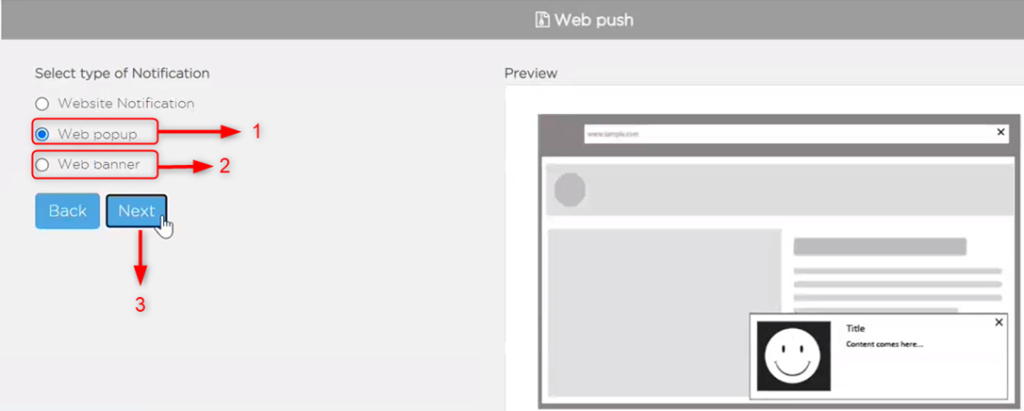
Step 3: This takes you to the Web Push Preview page, where you will have two options to choose from (Website Notification is not considered here).
- Web Popup – Select Web Popup for Popup notification (here, we have selected Web Popup).
- Web Banner – Select Web Banner to personalize the banner.
- Click Next.
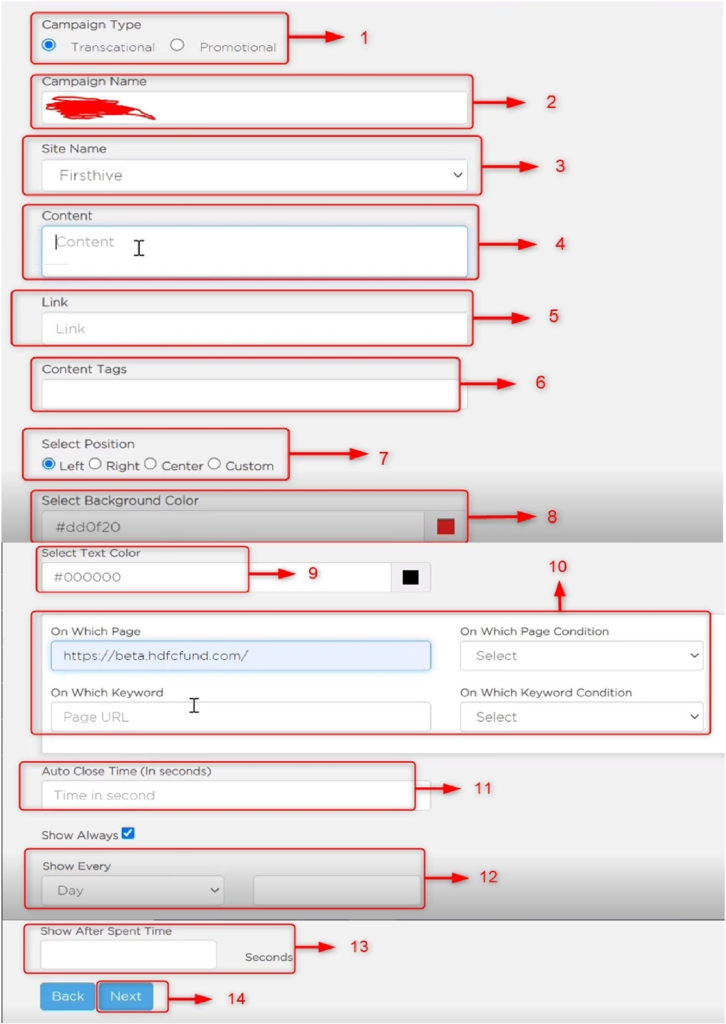
This takes you the next page, where you need to fill-up the following details:
- Select Campaign Type, whether it is a transactional or promotional – you need to mention.
- Enter the Campaign Name.
- Enter the website name (on which site you want the notification to popup) in the Site Name field.
- In the Content field, enter the content that you want to display.
- Enter the Website link in the Link field.
- Enter tags for the content.
- Select the position, where you want the popup to be shown to the visitor.
- Select the back ground color.
- Select the color for the text.
- Put all the details for the page on which popup will appear and all the conditions applied.
| NOTE On Which Page Condition, you will find three conditions out of which you have select one: Is: This condition is applied when the page URL is exact match to that of the Popup URL page (on Which Page URL). For example, the Popup page URL is http://beta.hdfcfund.com/ and site URL is also same http://beta.hdfcfund.com/Contains: This condition is applied when the Popup page URL (on Which Page URL) contains some parameters of the site URL. For example, the Popup page URL is http://beta.hdfcfund.comw/ealthcreation/ and site URL is http://beta.hdfcfund.com/. Here, you can see the popup url contains some the parameters of the site url. Does Not Contain: This condition is applied when none of the parameters from the site url match with that of Popup url (on Which Page URL). |
- In the Auto Close Time (In Seconds) field, enter the time after which the popup will be automatically closed.
- In the Show Every filed, select the days, month or year for which you want the popup to be shown, Here, you also have the option to select how many times a day the popup will appear. For example, you can select how many times and at what stage the popup shall appear. Whether this should appear every time a user comes to the website or only once (if that user comes for the second session, the popup won’t appear), likewise. If you put 1, then the popup will appear once in a day no matter how many times a user comes to that site in that day.
- In the Show After Spent Time field, enter the time after which the popup will appear on the screen. This indicates after how many seconds (starting from the user session), the popup will appear.
- Click Next.
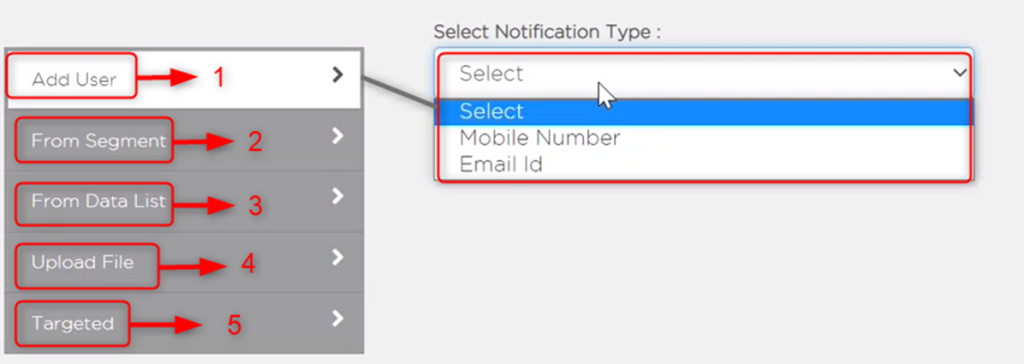
This takes you to Web Popup page, where you can:
- Add User (specific users) by selecting the Mobile Number/Email Id from the drop-down (FH captures certain PII information such as; mobile, email id when a user visits website). You can either send notification to specific mobile numbers or email ids, by entering the Mobile Number/Email ID in Comma Separated format. Then, enter the Data List name.
- You can select From Segment drop-down.
- You can select From Data List drop-down.
- You can Upload File.
- You can select Targeted visitors to whom the popup notification will go. There will two option available:
- All Visitors: This will select all the visitors from the data list or segment.
- Select Visitors: You can select specific visitors.
When you click Next, this will display:
- Preview of the Popup that you have created.
- If you click Execute/Schedule for Later, this is exactly how the Popup will be shown in the website.
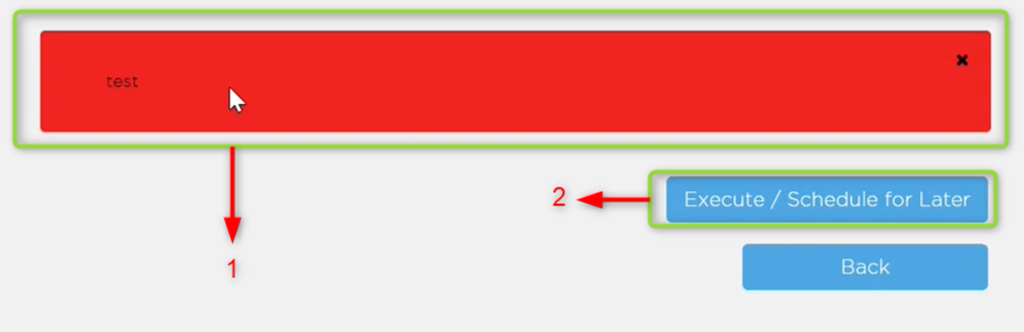
| Important The only drawback is you can’t customize the Popup here. To customize the Popup, you need to configure it from the backend. |