How to Create Email Campaign?
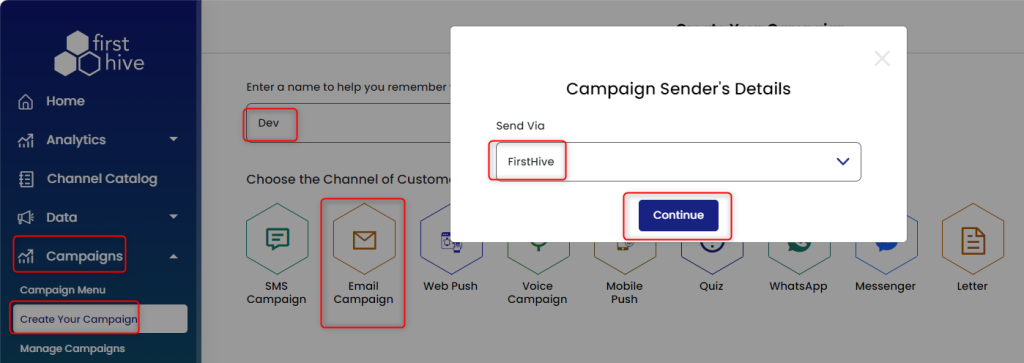
Go to Campaigns >> Click Create Your Campaign >> Enter Campaign Name >> Select Email Campaign from the channels >> Select Send via from the drop-down >> Click Continue
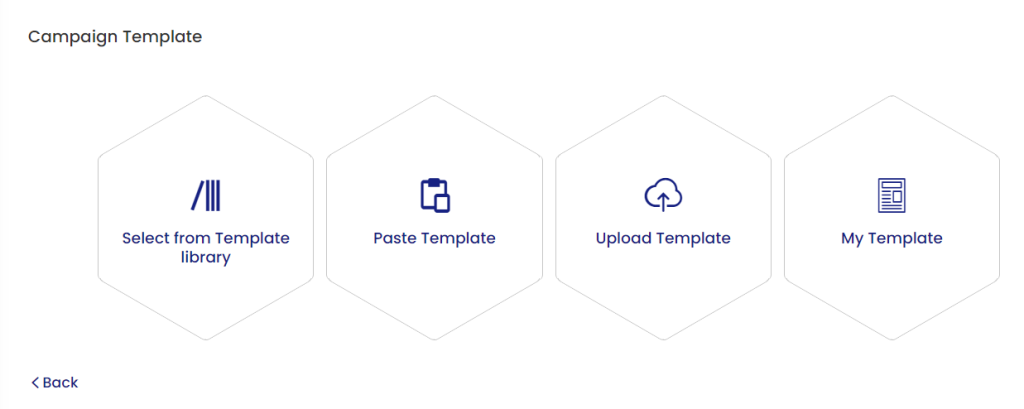
Select the template for the Email campaign:
You have the following options,
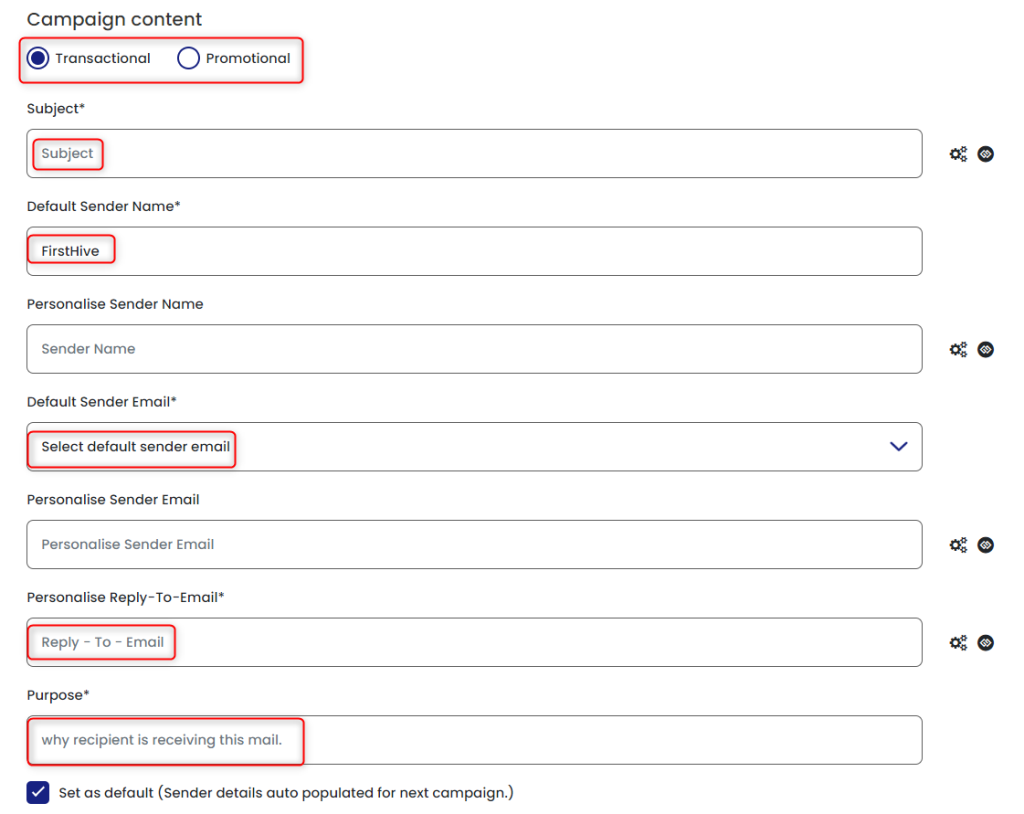
Select the campaign type, whether it is Transaction or Promotional >> Enter a subject for the campaign >> Enter sender’s name (Default) >> Enter sender’s Email Id >> Enter Reply-to-Email Id >> Enter the purpose of the Email >> Enter other required details (if any) >> Click Continue
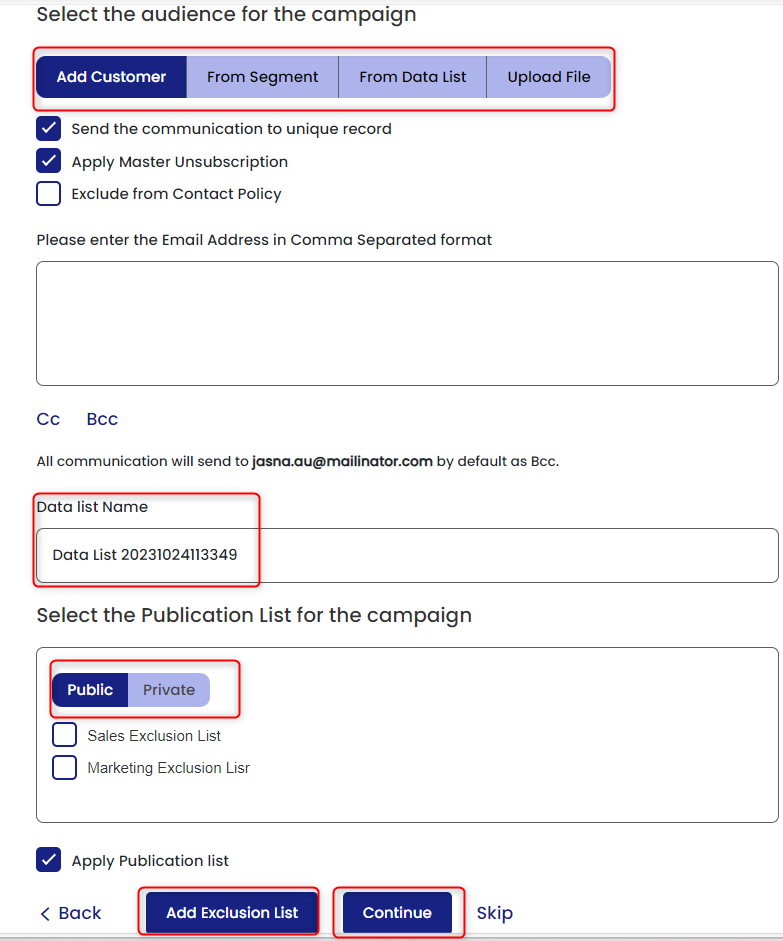
You can also add audience to the exclusion list by entering the Email Address in Comma Separated format, then click Add Exclusion List.
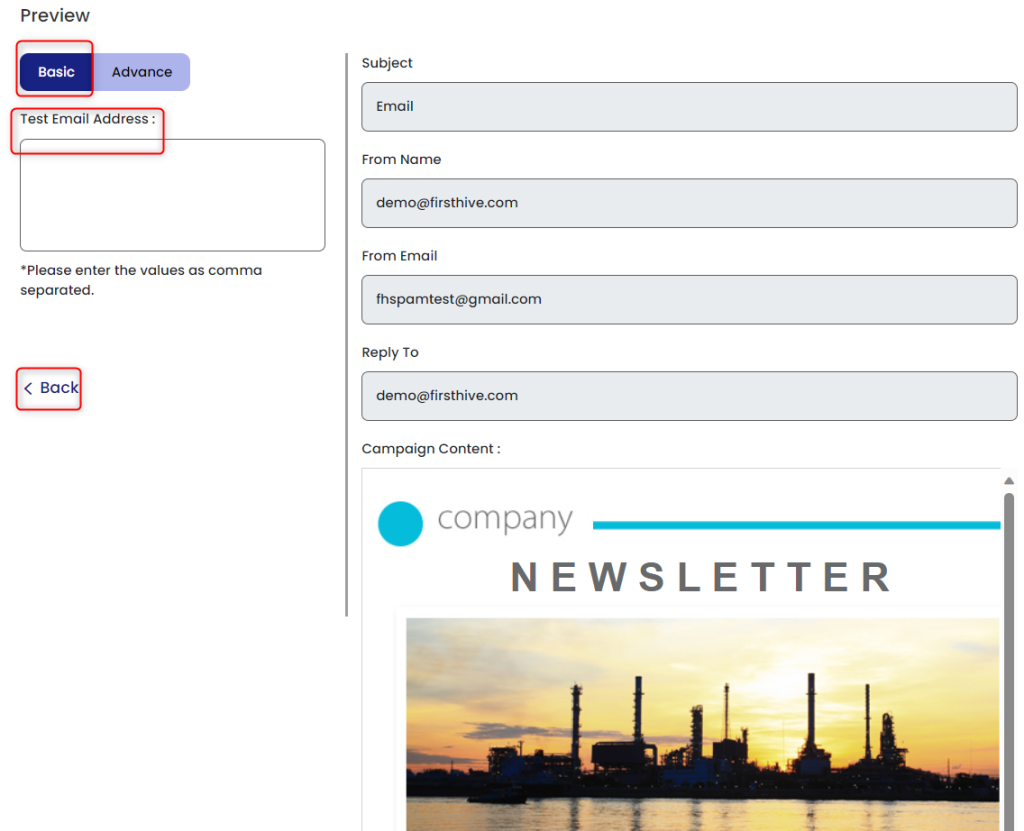
This takes you to the Preview section, where you have to options Baisc and Advance
Basic: Select Baisc >> Enter the Test Email Address >> Clik Back
This takes you to the Manage Campaigns page, where you can see the campaign >> Click Validate
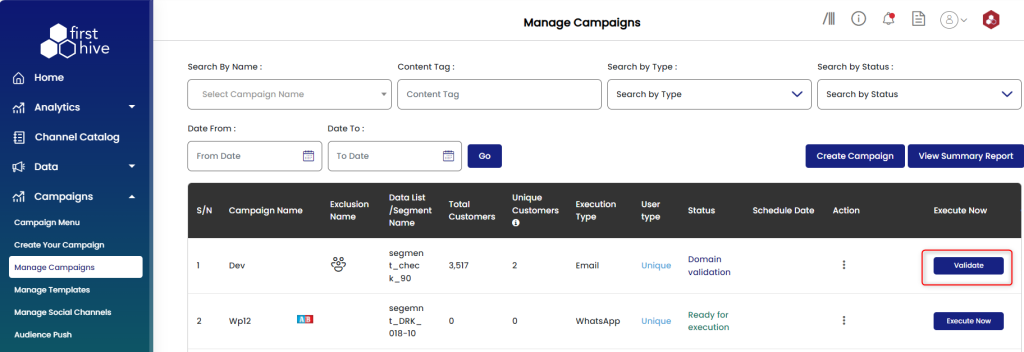
This will ask you click on Send Activation Link >> You receive the activation link on the following email id > Click to validate >> Now, you can Execute the campaign

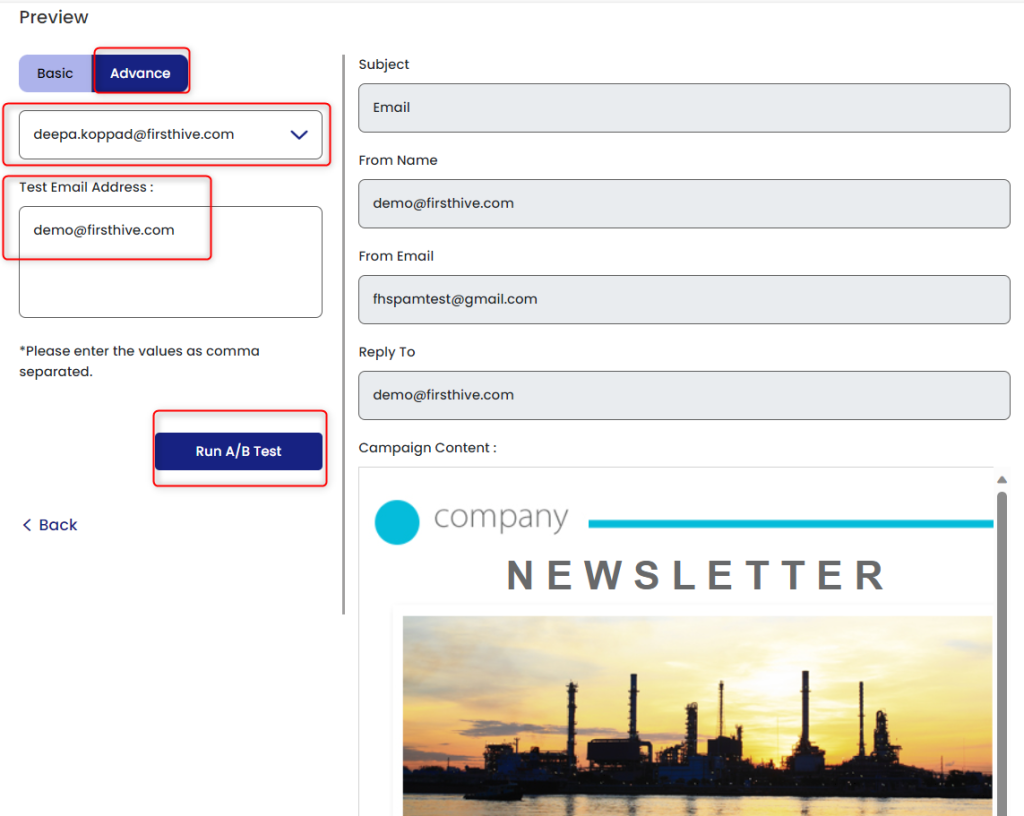
Advance
Here, you have the option to Run A/B Test.
Select Advance >> Enter the email id >> Click Run A/B Test
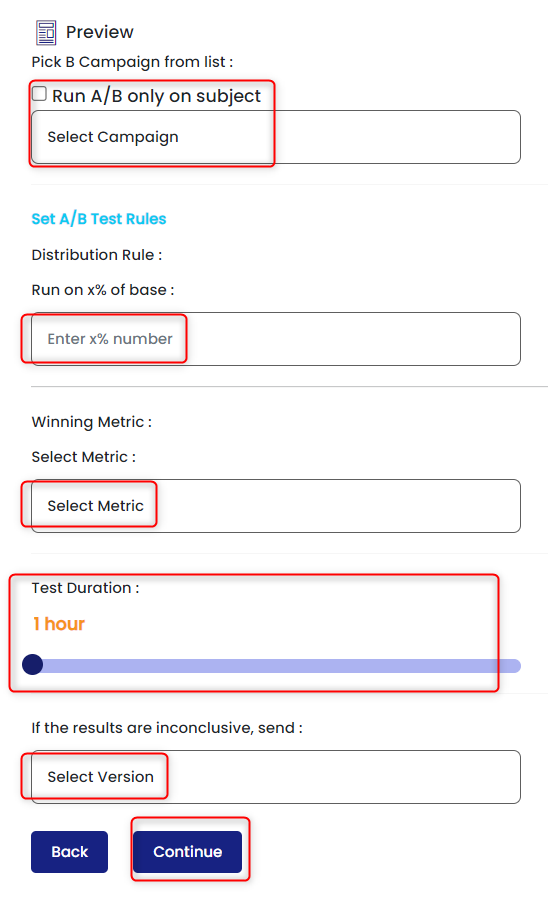
- Select the Campaign from the drop-down. When you click in the check box and enter the subject, the subject remains same but the content changes. If you do not click on the check box, then this will send different subjects with their respective contents.
- Enter Test Percentage (%).
- Select the Metric from the drop-down. Depending on the campaign metric, this will decide which campaign performs better.
- Select the Test Duration. The Test Duration range is between 1-24 Hours, after crossing the set time; this will decide which campaign has performed better.
- If the result comes inconclusive (A=B), then you need to select the campaign of your preference/choice. Choose either A or B.
- Click Continue. Once you click on continue, this will go to prgm_campaing_ABtesting, the record will be saved against the record id in pk_cmp_A and pk_cmp_B column. All the details including Test Percentage, Metric, etc., will be saved in this table.
When you click on Manage Campaign (get back to the main Menu), you see the A/B tag in the campaign dashboard.

A/B Testing
A/B testing compares two versions of an email campaign, or an aspect in a scenario to evaluate which performs best. With the different variants shown to your customers, you can determine which version is the most effective with data-backed evidence.
FirstHive offers A/B testing in scenarios (Email campaigns). A customer is assigned a variant that will be shown to them instantly when reaching an A/B split node in a scenario or matching the conditions for displaying an email campaign.
| Campaign Type | Open Link | Click Link |
| Yes | Yes |
Steps
Step 1: Create two Campaigns.
| For example, you need to create two campaigns: Campaign ACampaign B |
Step 2: Put users in Campaign A.
- Copy the Exclusion IDs to Campaign B
Step 3: Validate the users.
| Update the PCU Status for Duplicate: Duplicate = 10 |
Step 4: Get the Test % Users.
Step 5: Divide the users into two parts A and B.
| Do the Segment ExclusionDo the Domain Exclusion |
Step 6: Call the Campaign API.
| Call Campaign API à Set the Wait Time |
Step 7: Set the Wait Time.
| Set a particular Time and Wait. The wait time is 1 hour to 24 hours. |
Step 8: Calculate the Decision.
| Whether, Campaign A has performed well. Or Campaign B has performed well. |
Step 9: Select the campaign version, either A or B.
| Complete previous iterations |
Step 10: Send th Final Campaign.