Hyper-Personalization in an email campaign is an advanced method of personalization. This functionality allows you to customize the email components basis a certain content mapping logic fed in by the user. Let us go through each of the steps below in detail.
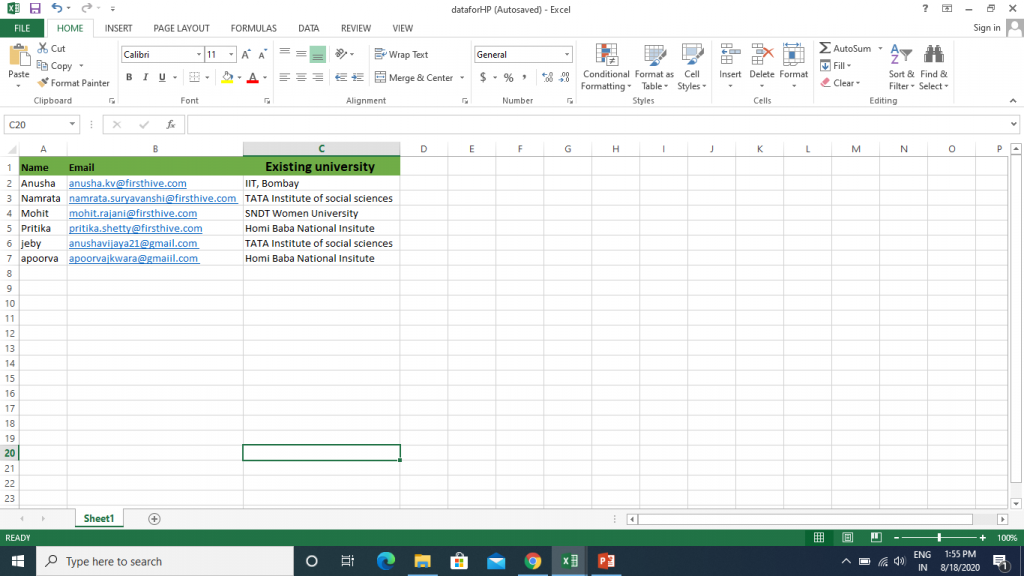
Step 1: Create a user database, which has all the relevant database fields and also the database fields you wish to map for Hyper-Personalization. The next step would be to upload this data. Below is the sample user data.
- Log in to your FirstHive account,
- Go to Data >> Click Import Customers >> Name your list >> Select the location from the drop-down from where you want to pull your database

- Map all the columns to the field mentioned in the list.
- Click on the submit button and the data list is ready for use.
Step 2: Create a Content Mapping File.
- Create an excel file that contains the content that needs to be personalized basis the rule.
- The content file should contain the existing scenario (which will be mapped with the user database), recommended scenario, images, and customized content. For example, the user database has 3 fields ‘Name’, ‘Email’, and ‘Existing University’ while the Content Mapping sheet below has the following fields; ‘Existing University’, ‘Recommended universities’, ‘Existing University Photo’, and ‘para or the recommended content’. The common field that is driving Hyper-Personalization here is ‘Existing University’. Thus hereon, the content that would appear on the user’s email body is dependent on the value that is placed under the ‘Existing University’ field.
The following example will show both image and content personalization.
Additionally, there is also a facility to define content for DEFAULT or NULL values for a situation where the value under ‘Existing University’ is NULL or beyond what is listed in the ‘Content Mapping’ sheet.

Step 3: Create a campaign.
- Log in to your FirstHive account.
- Go to Campaigns >> Click Create Your Campaign.
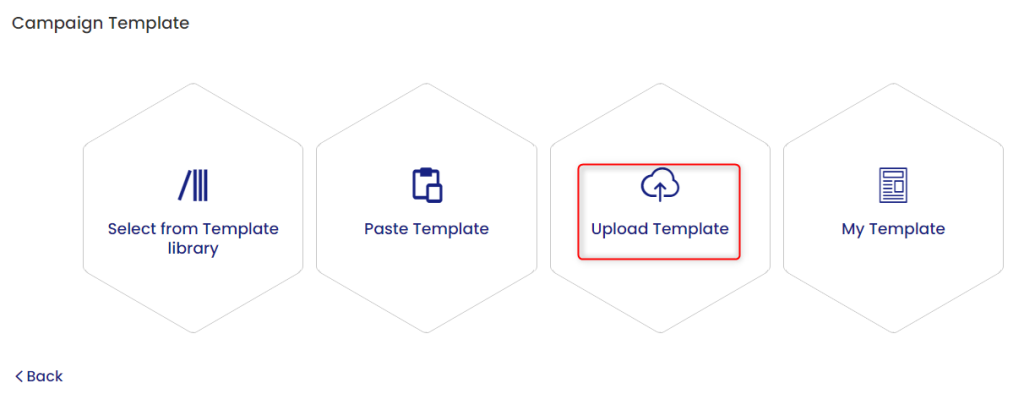
- Enter the Name of the Campaign >> Click ‘Email Campaign’ icon >> Select Send Via from the drop-down
- Click Upload Template >> Select the template and upload.
Step 4: Once you upload the HTML template, you will see a screen below where the content is developed using the editor provided within FirstHive. Before that enter the subject line, enter sender name (Personalization is available here), and the purpose of the email.
![]()
Before proceeding further let us understand what is a Database Field?
Database fields are the attributes or some data about the user or the customer. Basically, all user-related information that can be used for personalizing the content and qualifies as a Database field can be used in Hyper-Personalization.
Example: Name, Phone Number, Email ID, Gender, Country, etc…
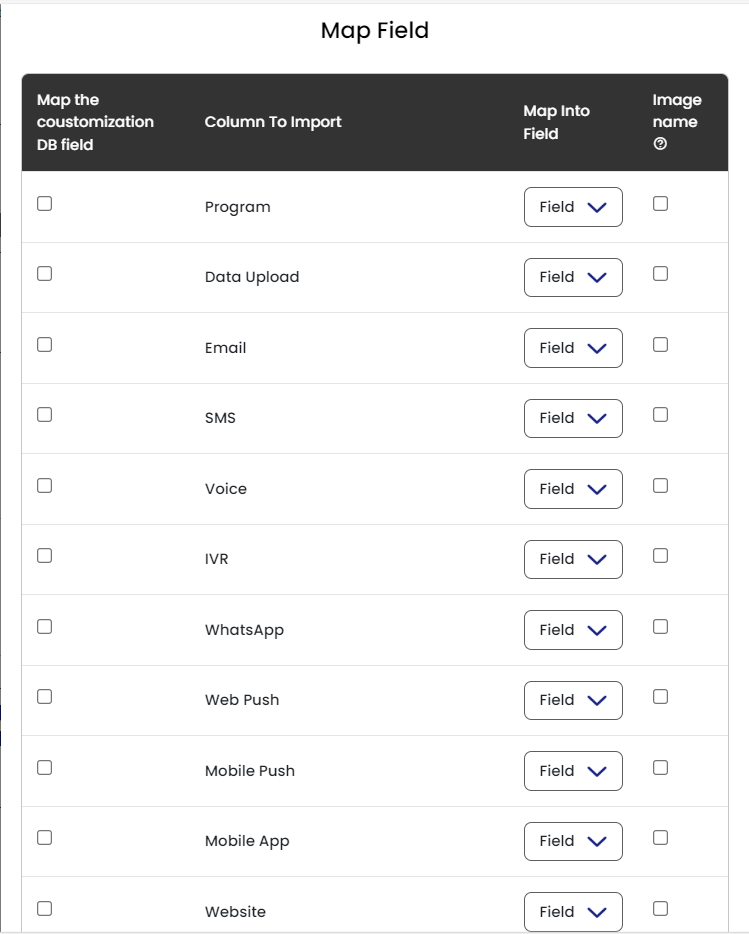
Step 5: Upload the Content Mapping logic.
To upload the content mapping file, scroll down to find Advanced settings. Upload your file in xls, csv format. First, check the box of the common field that is driving Hyper-personalization (In our example, ‘Existing University’ is the common field). Map the rest of the content fields, define if it is a text or an image or numeric format, and click on ‘Submit’.
Step 6: Browse the images required for content mapping.
Make sure that all images are placed in a zip file and then select the zip file from the system containing all the images and upload them.
Step 7: Hyper-personalize the content.
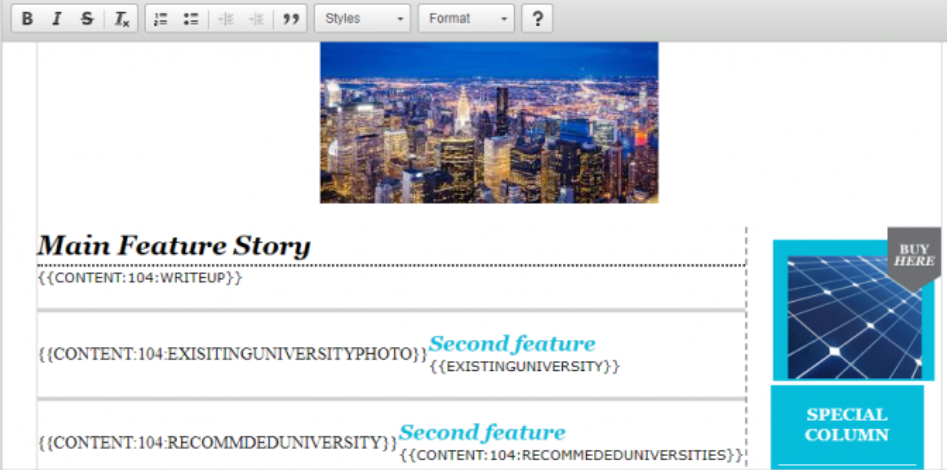
Now select the content that needs to be hyper-personalized and pick the field from the list of fields seen in the ‘Content Fields’ box.
Once you select the field, you will see a prefix in the format ‘Content:{{numeric value}}:{{Field Name}}’ as seen below.
Step 8: Select the audience for the campaign.
Select the data list/segment/upload the user database in case you didn’t pre-load.
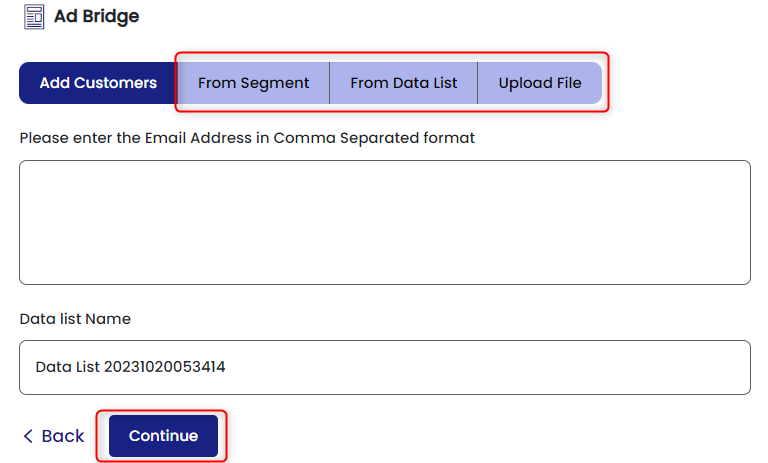
Click on the continue button.
Step 9: Execute the campaign or schedule for a later date. Before executing a campaign, send a test email to check whether hyper-personalization is working as per what you have defined.
For activation of Hyper-Personalization in your FirstHive Account, reach out to your Customer Success Manager and to request a demo of this feature, write to us at [email protected]