Marketing automation refers to software platforms and technologies designed for marketing departments and organizations to more effectively market on multiple channels online and automate repetitive tasks.
FirstHive’s module of Automation allows you to orchestrate user journeys across multiple channels with multiple campaigns based on multiple conditions. This on-the-go automation tool would relieve you from repeated efforts taken to schedule recurring goal-based campaigns and bring in efficiency in continuous engagement with customers.
Below are the key steps involved in automation:
- Select a starting point that would trigger an automation
- Add a new action
- Select Channel
- Select campaign
- Add waiting period
- Add Conditional flow or If/Else flow
- End automation
Let us go through each step in detail.
- Login to FirstHive and click on Campaigns >> New Automation
- Enter unique Automation Name
- Add Content Tag and description of what is the automation about.
- Enter the expiry date.
- Select how the user will enter your automation.
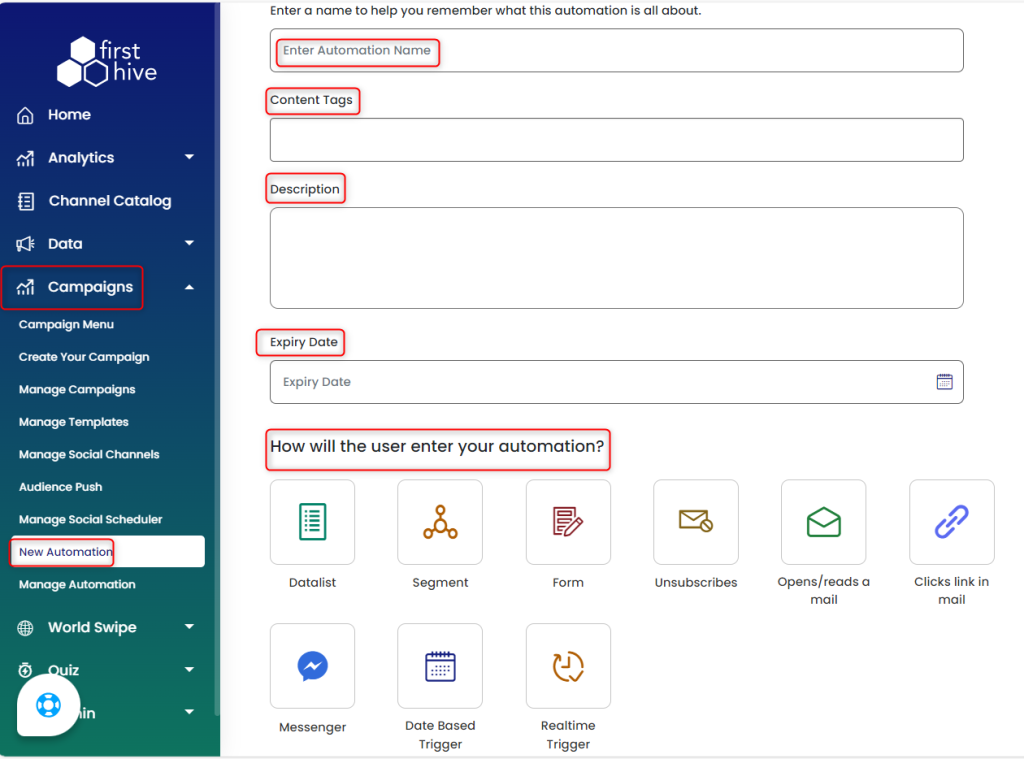
Automation Trigger:
This is the starting point of automation which defines the audience for automation and the relevant action point. You will need to select one of these trigger points to initiate an automated user journey.
- Data List: Users in a particular data list would be considered as an audience for that automation. Select the Data List from the drop-down >> Select whether you want to go for Incremental Run or Complete Run >> Select the field, is, and value from the drop-down >> Click on the plus icon + or Add Segment Group to add a new segment >> Click Start Marketing Automation

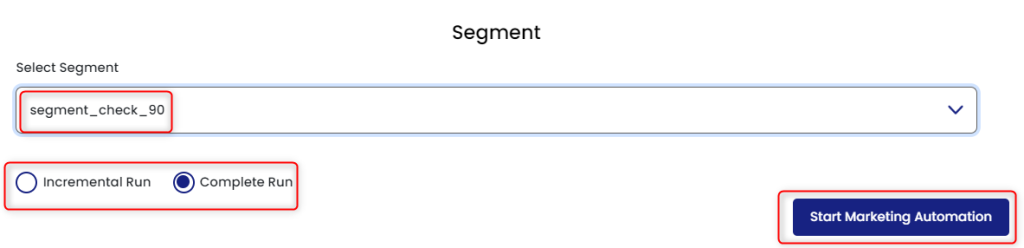
- Segment: Users in a particular segment would be considered as an audience for that automation. Select the segment from the drop-down >> Select whether you want to go for Incremental Run or Complete Run >> Click Start New Automation
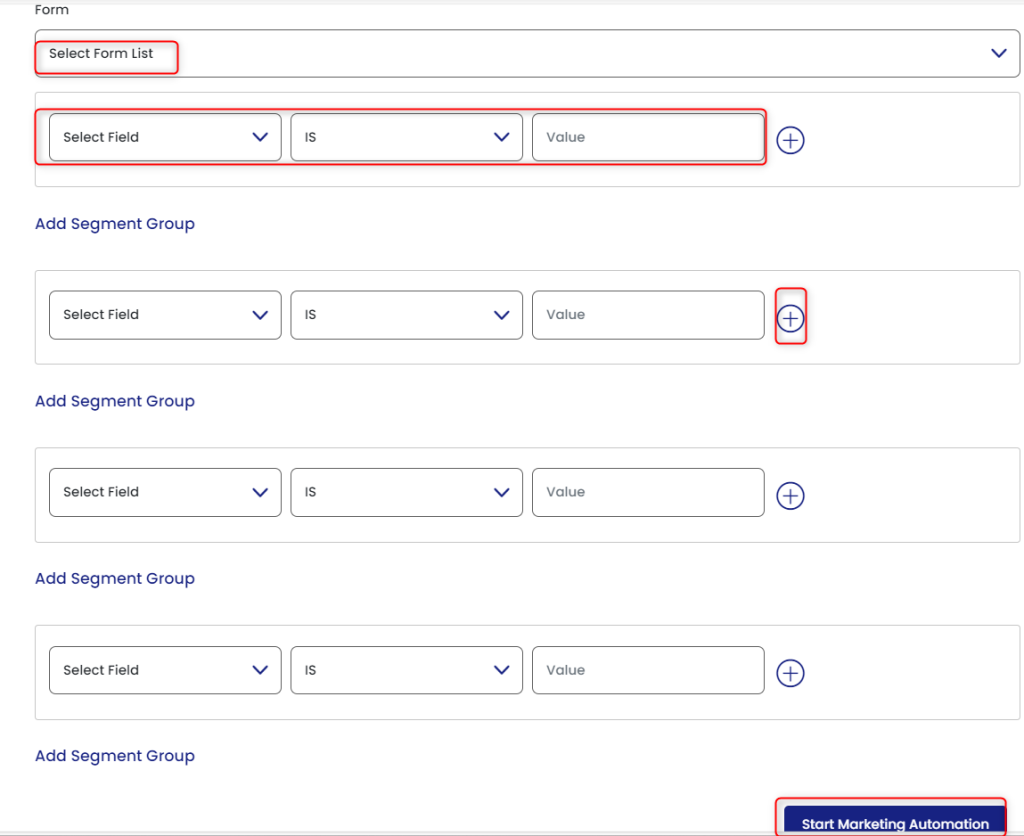
- Form: Users who fill up a particular form would be considered as an audience for that automation. Select the Form List from the drop-down >> Select the field, is, and value from the drop-down >> Click on the plus icon + or Add Segment Group to add a new segment >> Click Start Marketing Automation. The form has to be in the form of ‘Lead generation landing page’ and can be created via the ‘Import Customers’ option in FirstHive
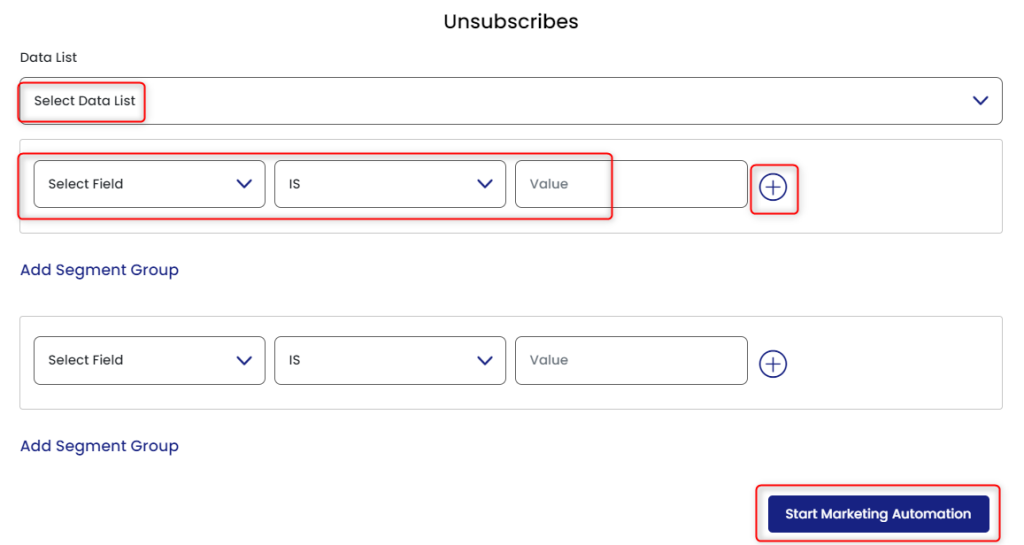
- Unsubscribes: Users who unsubscribe a particular email would be considered as an audience for that automation. Select the Data List from the drop-down >> Select the field, is, and value from the drop-down >> Click on the plus icon + or Add Segment Group to add a new segment >> Click Start Marketing Automation.
- Opens/reads a mail: Anyone who opens the email would be considered as an audience for that
automation. Select Campaign List from the drop-down >> Select the field, is, and value from the drop-down >> Click on the plus icon + or Add Segment Group to add a new segment >> Click Start Marketing Automation.
- Clicks link in Mail: Any user who clicks any link in the email would be considered as an audience for
that automation. Select Campaign List from the drop-down >> Select the field, is, and value from the drop-down >> Click on the plus icon + or Add Segment Group to add a new segment >> Click Start Marketing Automation.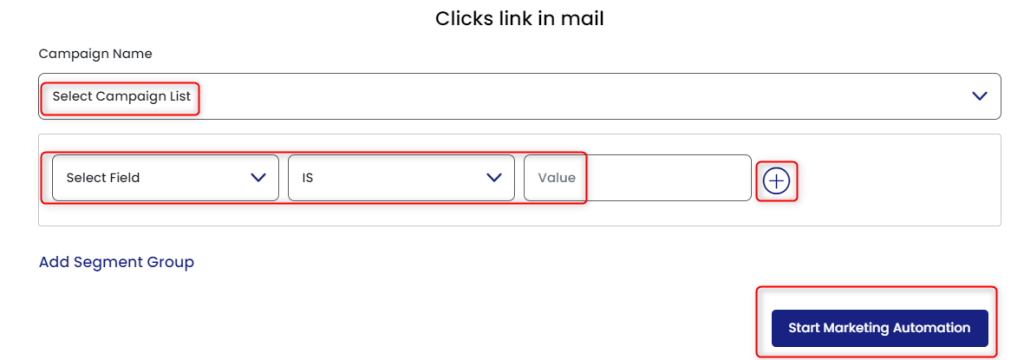
- Messenger: Users who interact via FB messenger would be considered as an audience for that automation. Select your Facebook Account from the drop-down >> Click Start Marketing Automation.

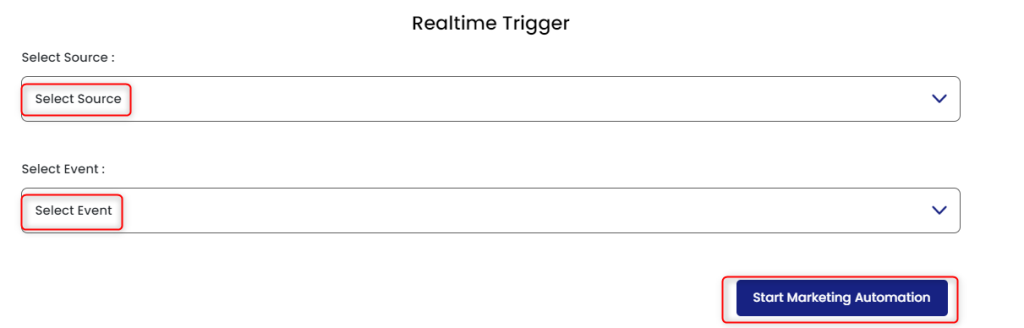
- Realtime Trigger: The notifications are triggered in the device, which enables you to post notifications even in offline. Select the source from the drop-down >> Select the Event from the drop-down >> Click Start Marketing Automation
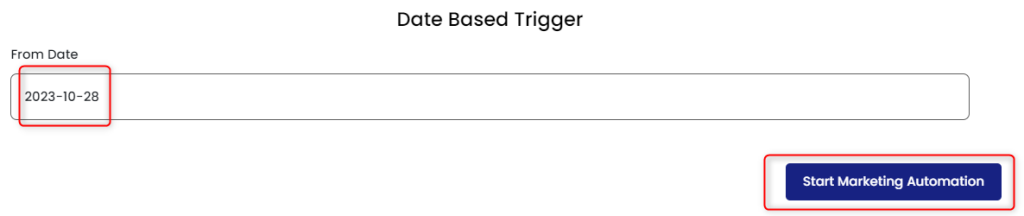
- Data Based Triggers: An event can be sent to a data tag and used by a program to determine whether an action should proceed or not. Select the start date >> Click Start Marketing Automation.
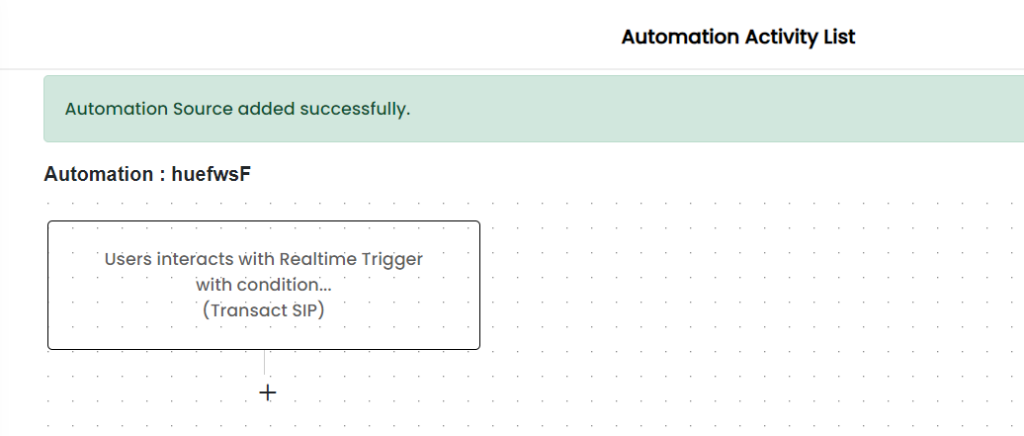
On selecting the Trigger point, you will see a similar journey builder screen below. On clicking the + icon, you can proceed to the next step of orchestrating the journey.
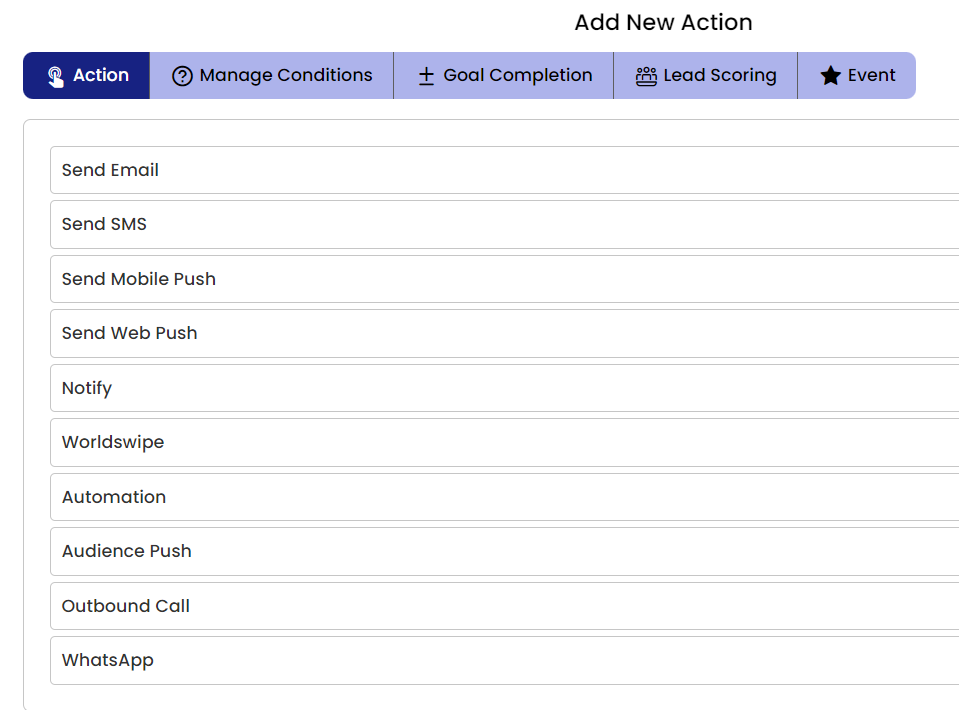
Add a New Action
On clicking the + icon in the journey builder tool, you will see a pop-up as shown below which will probe you to select Channel.
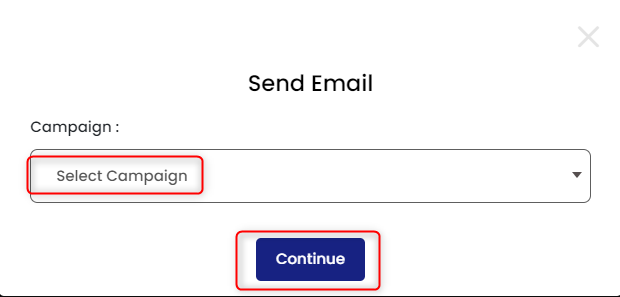
On selection of channel, you will need to click on + icon in the journey builder and click on ‘Manage Conditions’ in order to select the next step i.e. Campaign Selection.
Select the relevant campaign name from the dropdown >> Click ‘Continue’.
Once the Campaign is selected and added to the journey builder, you will need to click on + icon.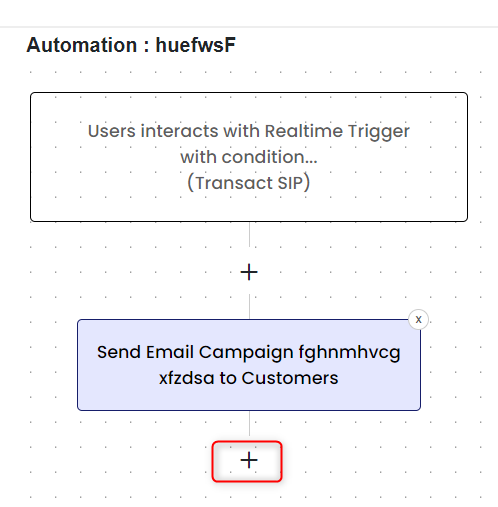
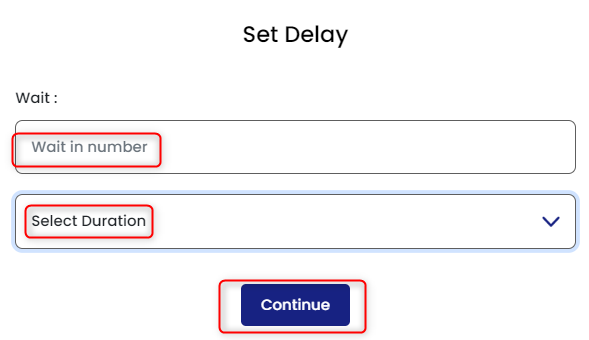
Then, Click Manage Conditions >> Set Delay.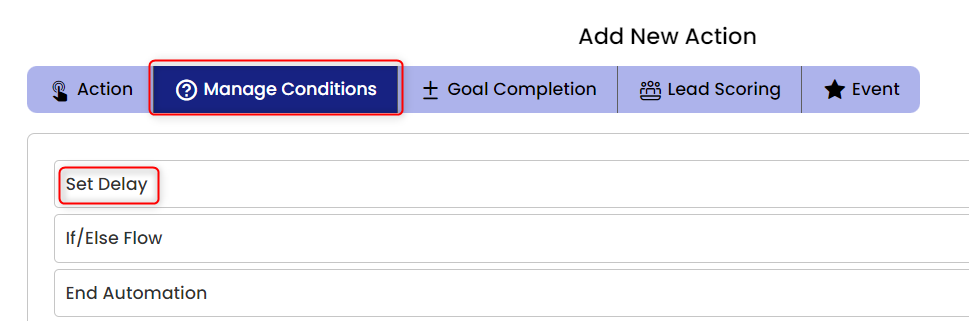
On clicking ‘Set Delay’, Enter the Wait in Number >> Select the Duration from the drop-down which is in either Minutes/Hours/Days/Weeks/Months.
Once the delay is set, add the next action by clicking the + icon in the journey builder.
The action could be in 2 forms as mentioned below:
- End Automation: To end the automation.
- If/Else Flow: Extending the communication for both positive and negative scenarios.
If/Else Flow
Select the condition that you want put, whether it is for All Time or Post Automation Start >> Select the Field and Criteria from the drop-down and enter the value >> You can click on ‘Add Segment Group’ or plus icon to add the next condition.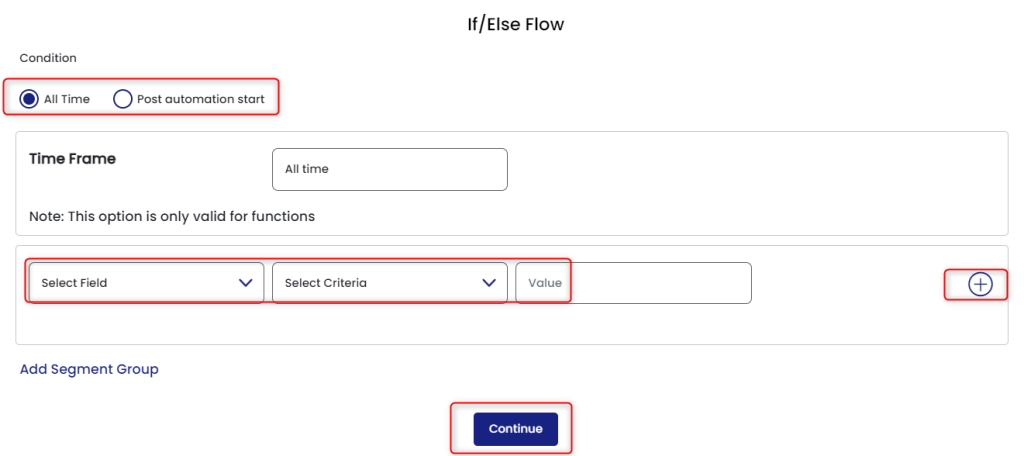
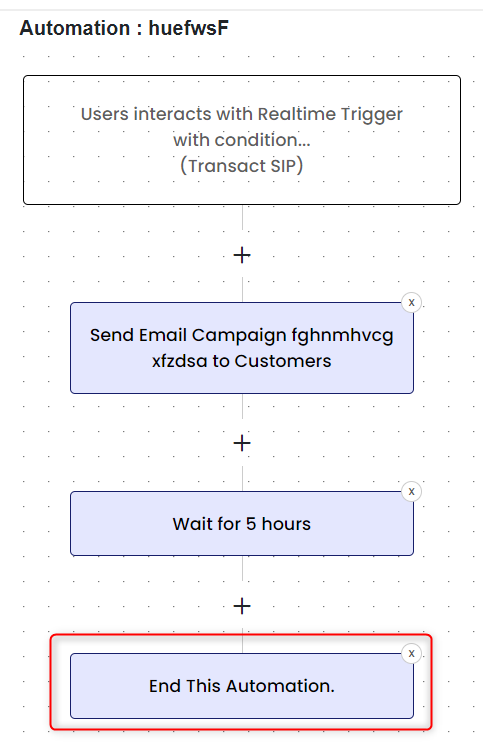
Once you are done adding conditions, you will see the journey getting split as shown in the screen below.

You can keep adding multiple layers of conditions, waiting period, and push campaigns in order to orchestrate the journey.
End Automation
Click on End Automation to end the automation. This will ensure that user tracking will end beyond this point.
Manage Automation
To view and manage the automation:
- Go to Campaigns >> Click Manage Automation
- You see the Automation is created (Automation Name)
- On completion of journey orchestration, you will have a number of options under Action >> Click three vertical dot icon.
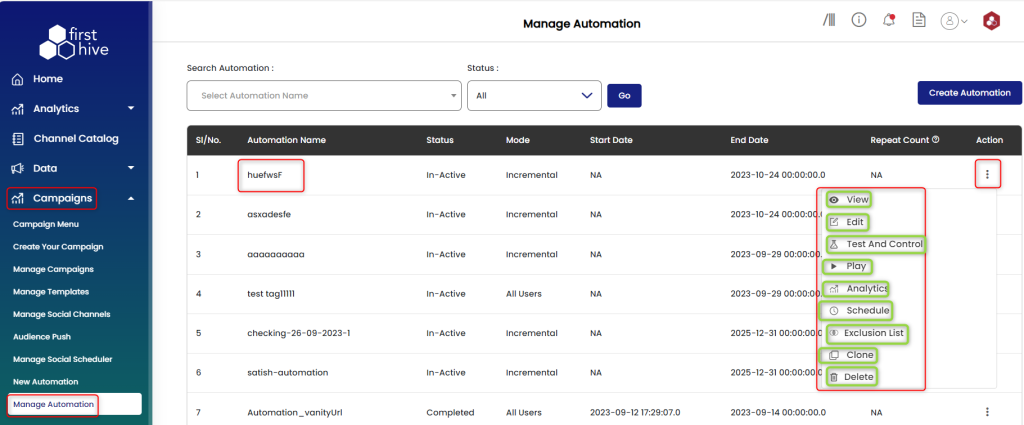
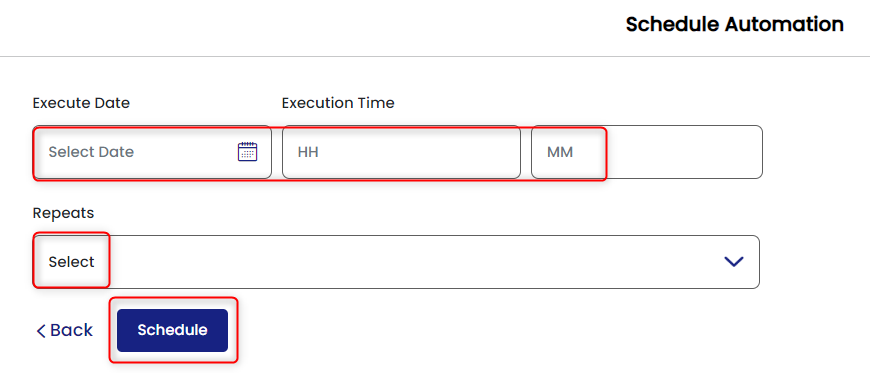
- On clicking Schedule icon, you will see a screen below where you need to Select the date and time when you would want to initiate a journey >> Select Repeat from the drop-down (whether you want to repeat it once/daily/weekly/monthly/yearly >> Click Schedule.
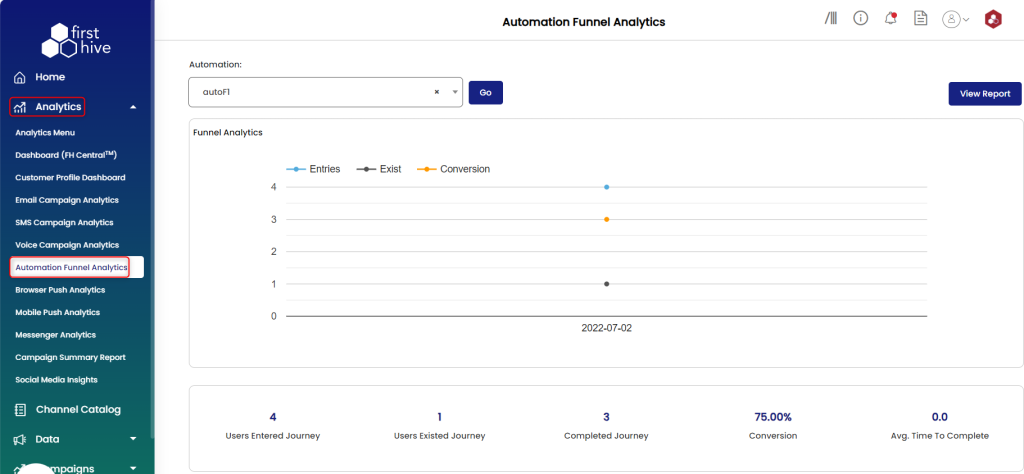
Automation Analytics
Once you play Automation, you can keep checking the progress of users in journey and track their conversions. The analytics can be accessed by clicking on either Filter icon in ‘Manage Automation’ or Go to Analytics >> Click Automation Funnel Analytics.
Hope we have answered all your queries. In case you wish to seek more clarification, please reach out to your account manager or write to us at [email protected]