How Do I Create User ?
| Go to Admin –> Click Manage Users –> Click Create New User |
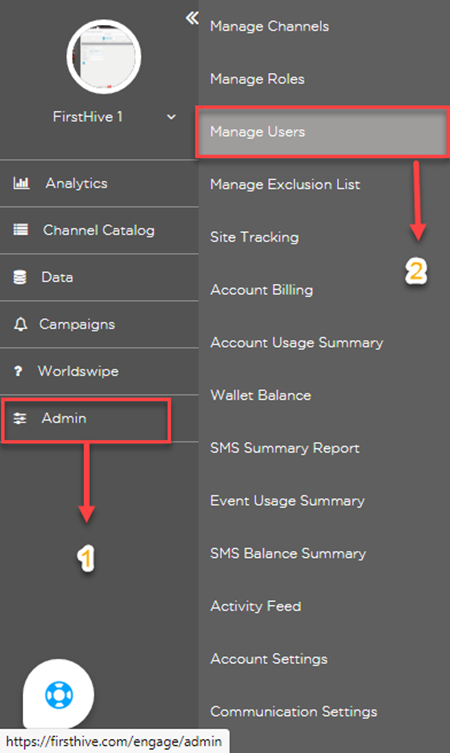
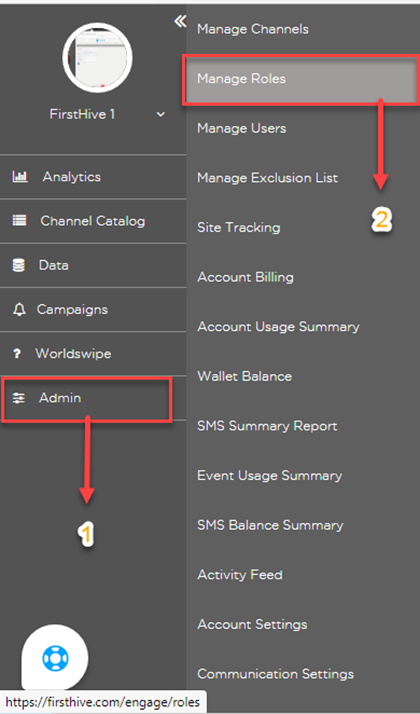
With reference to the screen:
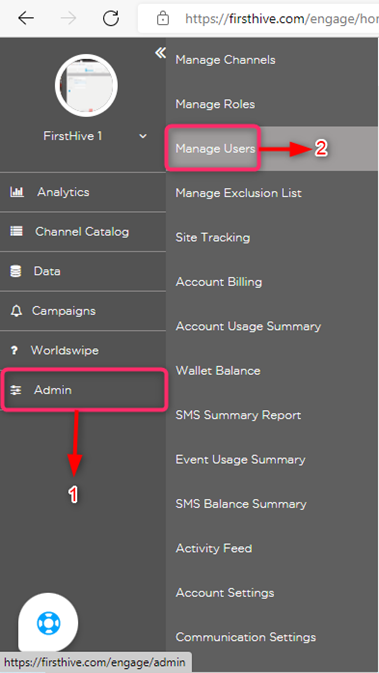
Step 1: Navigate to Admin
Step 2: Click Manage Users (third from the top)
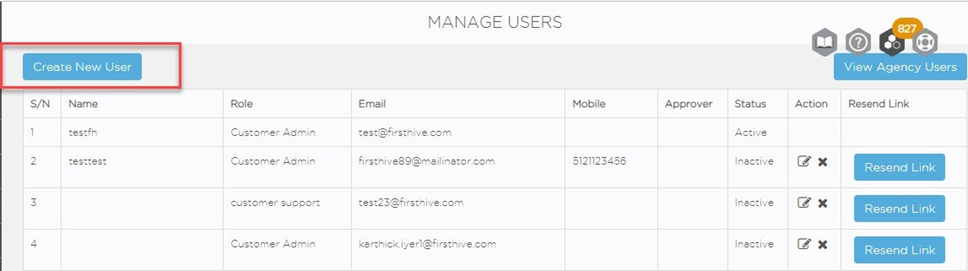
With reference to the screen, click Create New User – this will take you to the user creation page.
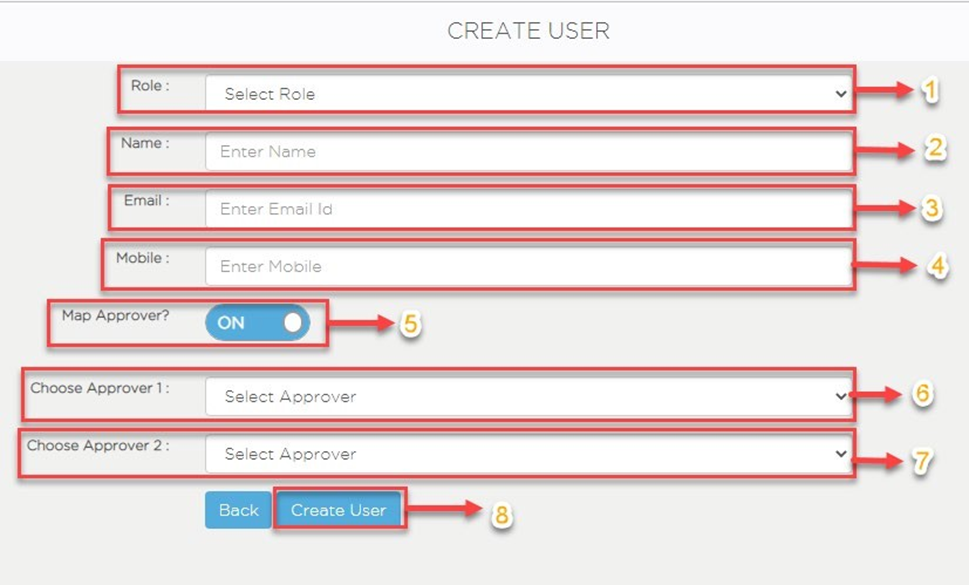
With reference to the screen, the following steps provide an overview of Create User.
Step 1: Click Role, select role from the drop-down.
Step 2: In the Name field, enter name of the user. Step 3: In the Email field, enter email Id of the user.
Step 4: In the Mobile field, enter mobile number of the user.
Step 5: Click toggle button, turn ON the Map Approver.
Step 6: Click Choose Approver 1, select approver 1 from the drop-down.
Step 7: Click Choose Approver 2, select approver 2 from the drop-down.
Step 8: Click Create User, create a new user.
Creating Admin Users with Manage Roles
| Go to Admin –> Manage Roles –> Create Admin User (custom admin for that particular account) –> User Defined Role (Role associated to that particular account will be accessible only). |
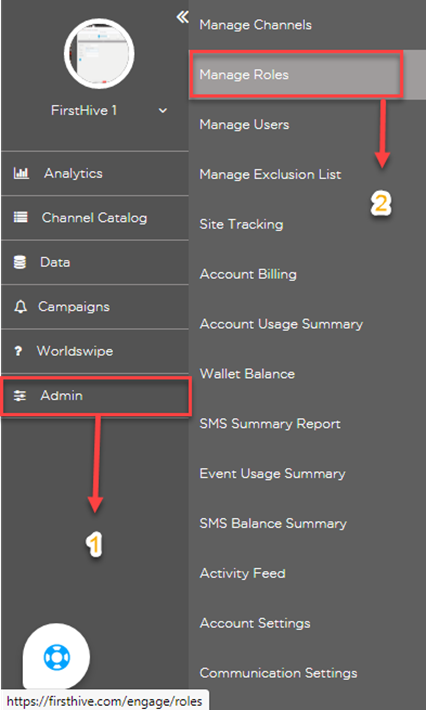
With reference to the screen:
Step 1: Navigate to Admin
Step 2: Click Mange Roles (second from the top)
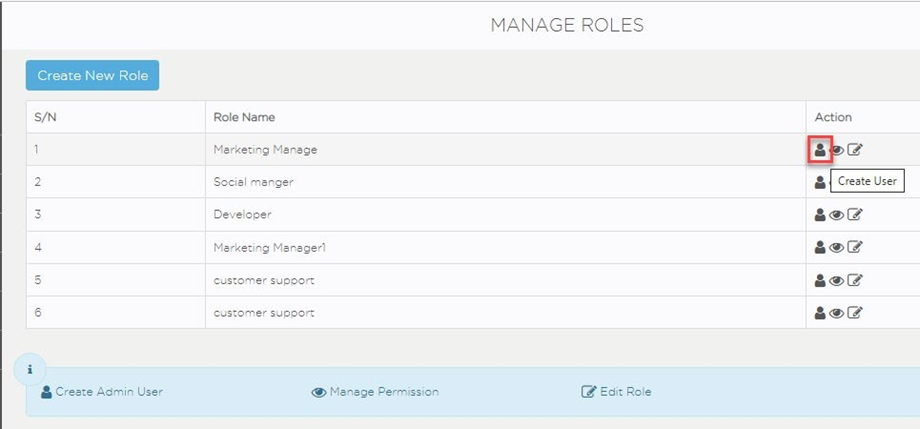
With reference to the screen, click Create User icon. This will be custom admin for that particular account.
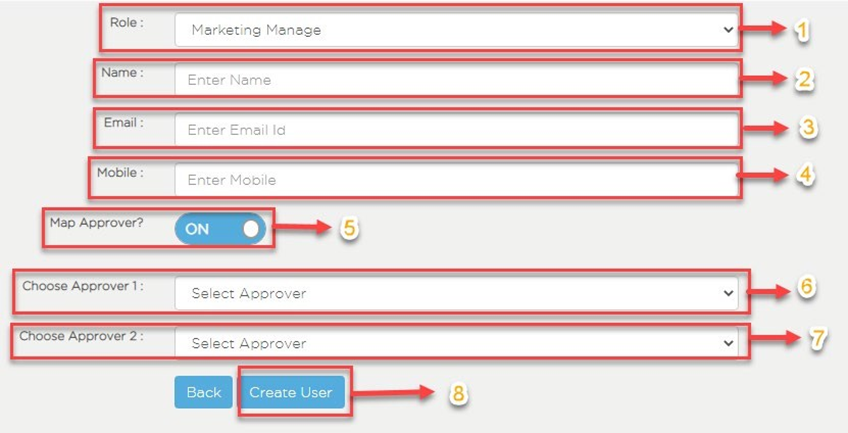
With reference to the screen, the following steps provide an overview of Create User:
Step 1: Click Role, select role from the drop-down.
Step 2: In the Name filed, enter the name of the admin user.
Step 3: In the Enter field, enter the email_id of the admin user.
Step 4: In the Mobile field, enter the mobile number of the admin user.
Step 5: Click toggle button, turn ON the Map Approver.
Step 6: Click Choose Approver 1, select Approver 1 from the drop- down.
Step 7: Click Choose Approver 2, select Approver 2 from the drop- down.
Step 8: Click Create User to create a new user.
You can give permissions and assign role, using the Manage Permissions |
Managing Roles and Permissions
When provisioning your FirstHive CDP account, make sure to set permissions correctly for your users. Defined permission sets help you manage access and visibility in the FirstHive CDP.
User permissions specify the tasks that users can perform and the features that they can access. For non-admin users to connect an external FirstHive org to FirstHive CDP, they must have the required user permissions assigned by the main FirstHive CDP account.
Once users given role, a communication (email containing a link) will be sent to their email address. Once they click on that link, they can start using.
If the email lands on spam or they do not have email set up, we can activate it from the backend. We ask the customer to check the spam folder. If the link has expired, then automatically another email is created and send to the given email address. |
With reference to the screen, the following steps provide an overview of managing Roles and Permissions.
Step 1: Navigate to Admin
Step 2: Click Manage Roles (second from the top)
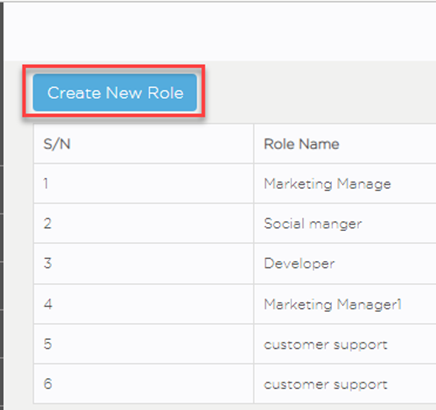
With reference to the screen, click Create New Role.
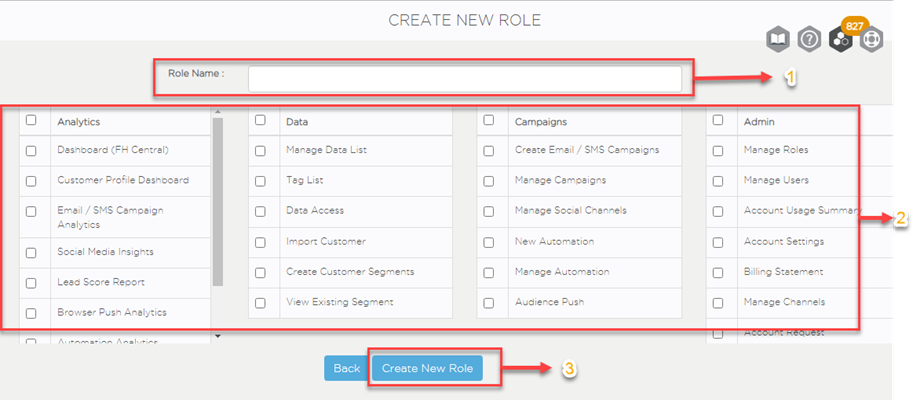
With reference to the screen:
Step 1: In the Role Name field, enter the role name for the user
Step 2: Click the empty boxes, select/de-select the desired FirstHive CDP permissions.
Step 3: Click Create New Role, grant a new role to the user.
You can edit the role name, using the Edit icon. |
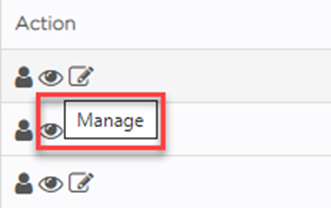
With reference to the screen, click Manage icon under Action to edit/change the permissions given to the role that you have created.
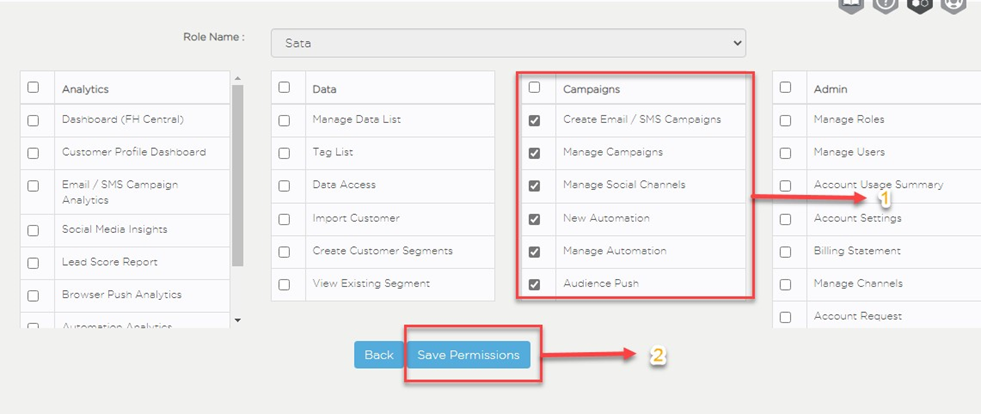
With reference to the screen, the following steps provide an overview of edit permissions:
Step 1: Click the boxes to add/remove the permissions which were previously given to the role.
Step 2: Click Save Permissions, make the newly given permissions work for the role.
How to Give Access to Program?
With reference to the screen:
Step 1: Navigate to Admin
Step 2: Click Manage Users
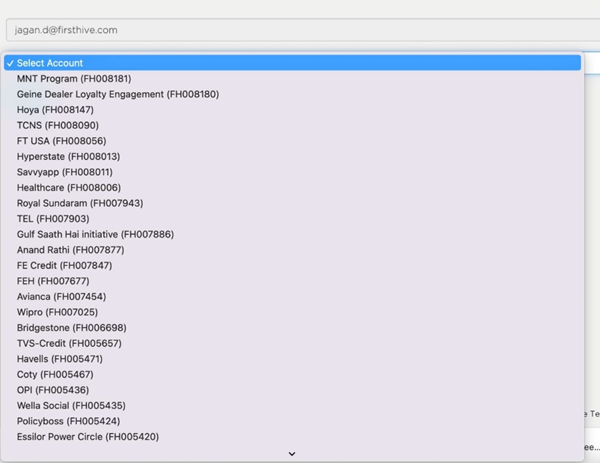
Select the account
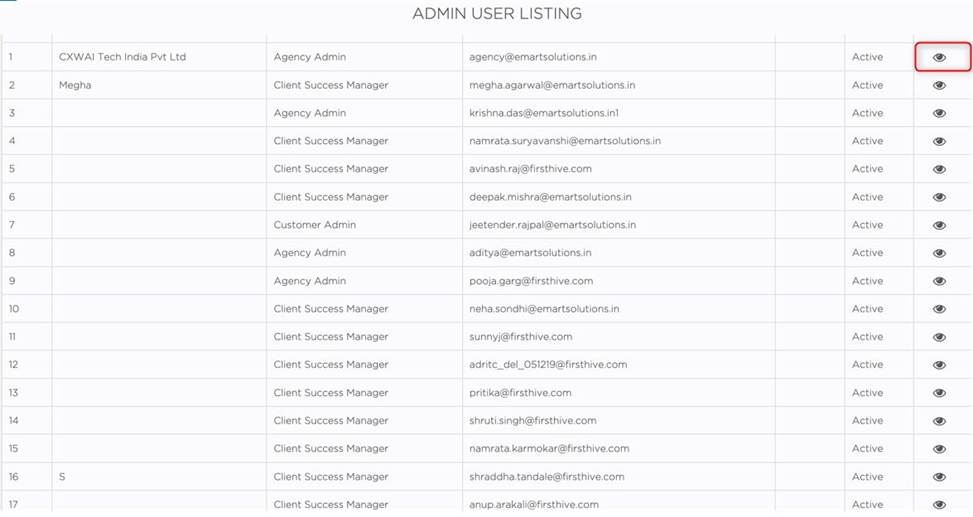
Click View icon under action
Give access to program into that account