Manage Variables in FH Tag Manager
While you configure some tags or triggers, you may have noticed text fields with such an icon on the right:
Instead of setting a fixed value for a form field, this icon lets you select a so-called Variable. A Variable allows you to use a dynamic value whose actual value will be resolved at the time it is accessed. For example, this could depend on the current page URL, Referrer, Screen size, or other contextual parameters.
If it looks like a great feature, that’s because it is.
For example, instead of defining a hard-coded event name like “//mypageurl”, you may want to replace the event name with the current page URL path. This means that depending on which page a user is currently viewing, the event name will automatically be different.
To do this, click the icon on the right-hand side and locate the row that says Page URL Path, then select it.
The curly brackets you see mean that they reference a variable with the ID PagePath.
You can even go a step further and connect multiple variables or add custom text.
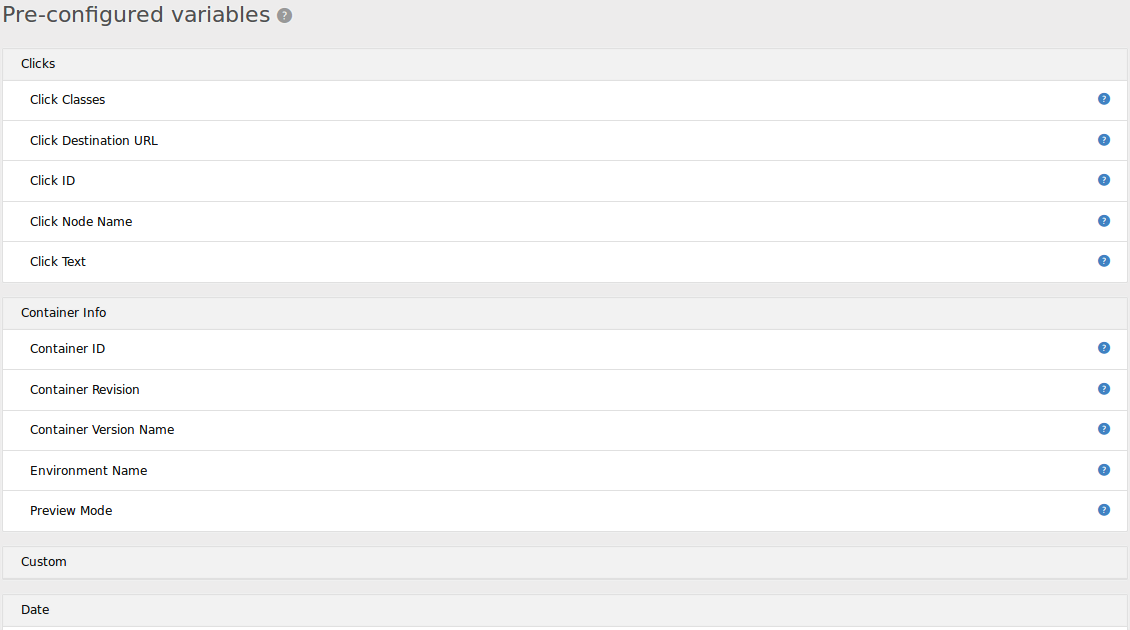
Preconfigured Variables
FirstHive CDP Tag Manager comes with a set of preconfigured variables that you can use right away without having to configure them. Whenever you want to use them, just select the variable and that’s it.
As you will see, the list is quite long.
For example, let’s say you would like to know if some of your pages are containing several H1 HTML tags. You could then use a variable within the FirstHive CDP configuration, as shown below:
As a result, it will appear like this when a page is loaded:
As you can see in the example above, the variable plays its role by auto-filling your custom dimension.
Preconfigured variables can be very powerful, but you can go even further with user-defined variables.
User-Defined variables
Besides this, FirstHive CDP comes with an equally big set of Variable types that you can configure to your needs.
For example, you may want to:
- Read the value from a certain HTML DOM element (like the content of a form),
- Read the value from a meta tag (e.g., the current language being used),
- Capture a specific cookie value,
- Or fetch a value from the data layer.
To use any of these variable types, you first need to create a variable, configure it, and then reference this variable by name whenever you need it.
Say you have given the variable the name “my own variable name that I created”, then you can reference it.
Don’t worry — you don’t have to remember the name of the variable. You can simply select the created variable by clicking the icon on the right.
To create such a variable:
- Go to Variables ⇒ Create Variable, or
- Directly create a variable by clicking on the text-field icon, then select Create a new variable.
Now you’ll see the screen of variable types, which explains that you first need to select a variable type
In this example, let’s say you want to collect the “publishing date.” This variable is defined within a DOM element of the page.
To fetch this data, you need to indicate to FirstHive CDP the DOM Element you’d like to work on. In our case, this DOM element contains a class with the value “entry-date published.”
Once created, you just need to associate it with a tag (for example, a custom dimension) in order to process that data within reports.
If you’re feeling that the possibilities are endless… that’s because they are. And guess what? You can even go further.
Advanced Variable Settings: Default Value & Lookup Table
Advanced variable settings allow you to take your TMS configuration even further.
For example, using a lookup table, you can create a variable that changes its value according to conditions:
You can then call this variable within your FirstHive CDP tag through the configuration variable:
As a result, you only need one container to send data to all your websites — saving you significant time in tag deployment.