Manage Dashboards
Dashboards in FirstHive CDP let you bring together different types of customer, campaign, and engagement data on a single page for easier analysis. You can create and customise dashboards to align with your business goals and tailor them to different teams or use cases.
For example:
- A business leader may prefer a high-level overview of KPIs.
- A marketing team running campaigns may need detailed engagement and conversion reports.
Creating and Customising Dashboards
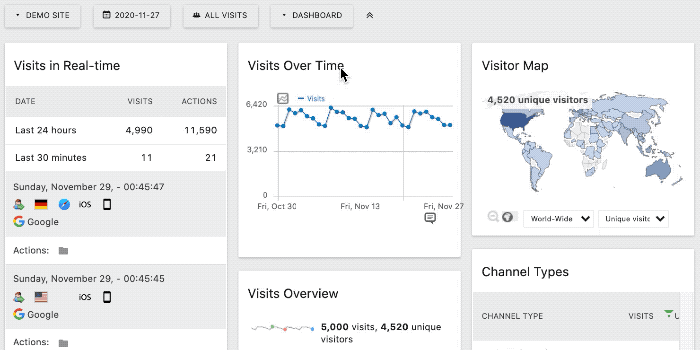
You can create as many dashboards as you need. Within each dashboard, you can:
- Add your own selection of widgets.
- Arrange them into different layouts.
- Access settings directly from the Dashboard menu, available on any dashboard page via the Dashboard button in the Data Selector area.
How to Create a New Dashboard
- Go to the Dashboard section in the main navigation.
- Click the Dashboard button → select Create new dashboard.
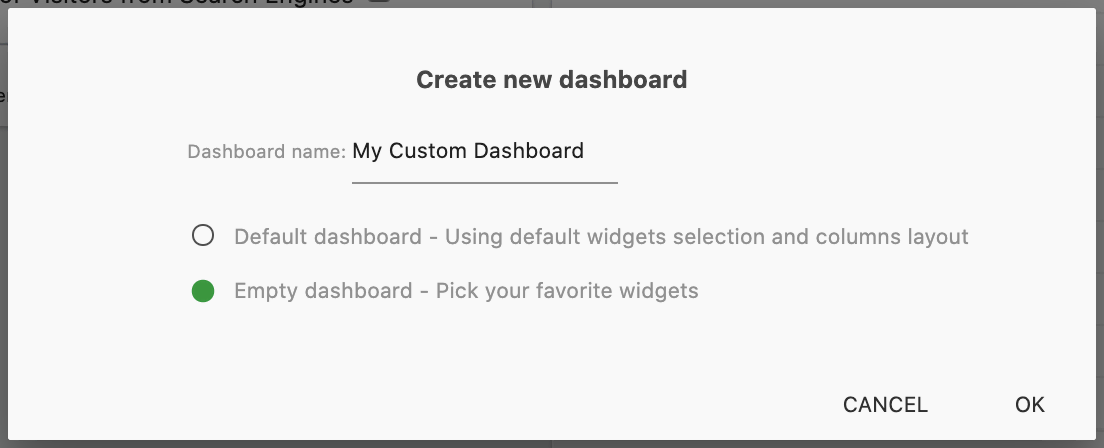
- Enter a descriptive name.
- Choose between:
- Empty dashboard (recommended)
- Default dashboard
- Click OK, then Add a Widget to open the widget selection menu.
Adding Widgets to Your Dashboard
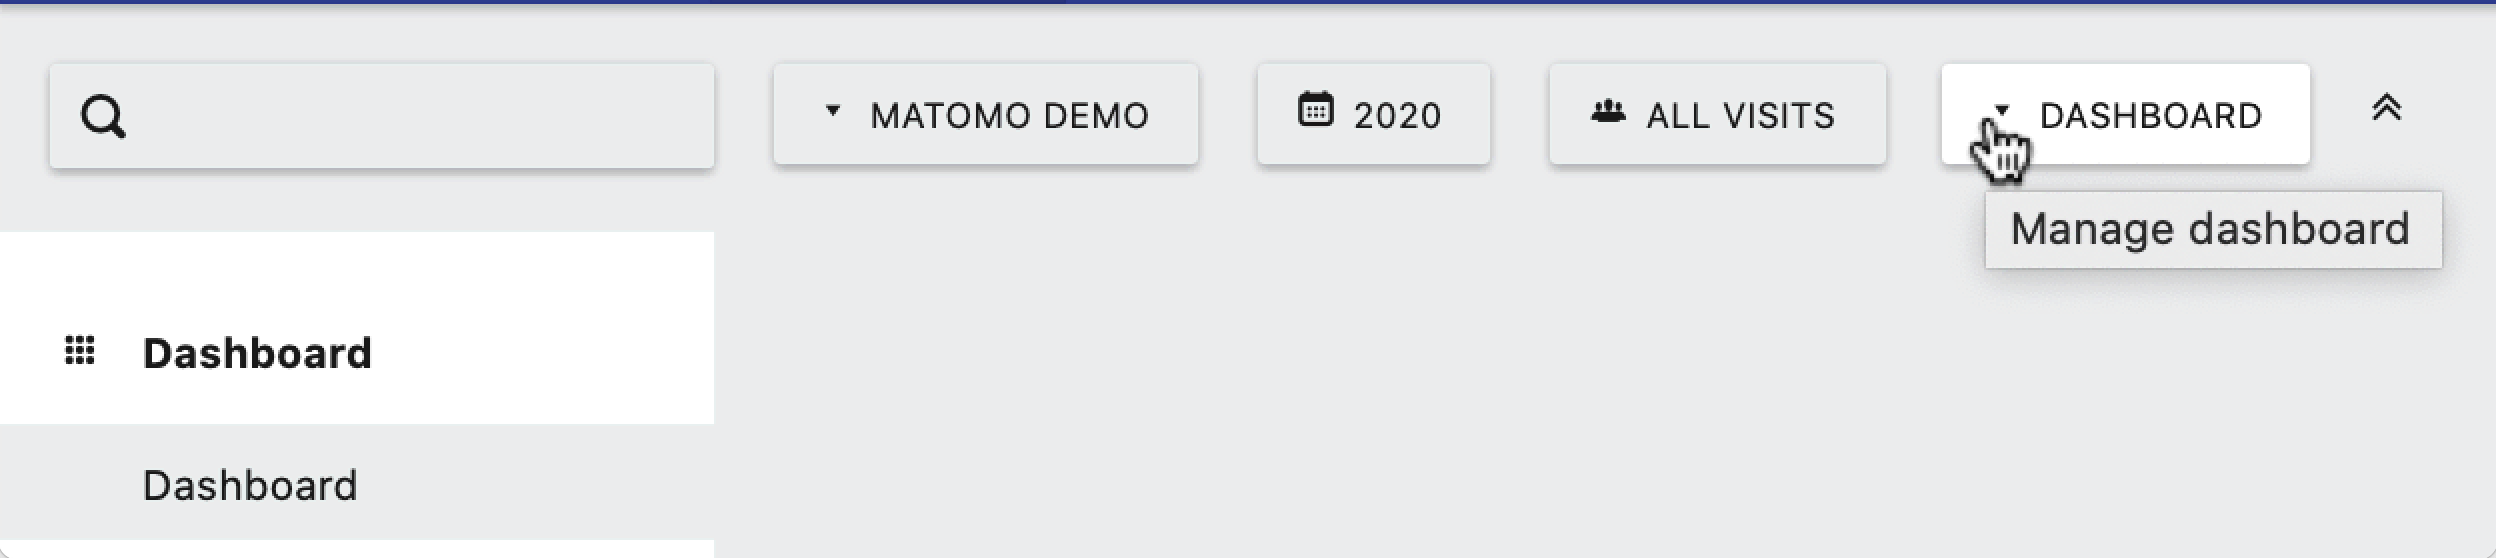
- In the Dashboard section, click the Dashboard button in the Data Selector area.
- From the Dashboard menu, select Add a widget.
- Choose from the available widgets and add as many (or as few) as needed.
👉 Tip: Add your most important metrics so you can track them at a glance right after logging in.
Dashboard-Specific Widgets
Some widgets are unique to dashboards and are not available in other reporting sections. Examples include:
- KPI Metric Widget
- Custom Reports Widgets
- Engagement or Conversion Tracking Widgets
Managing Existing Widgets
To manage widgets, hover over the top-right corner of the widget card to open the Widget menu, which includes:
- Refresh – Updates widget data in real time.
- Minimise – Temporarily hides data for a cleaner view.
- Maximise – Expands the widget into a larger popup view.
- Close – Removes the widget from your dashboard (you can re-add it later if needed).
Customising Dashboard Layout
Change the number of columns
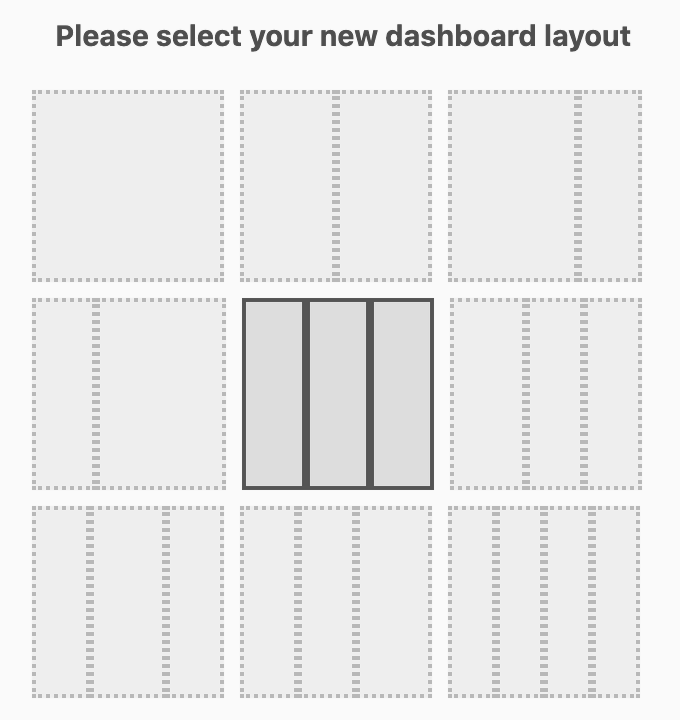
- On your dashboard page, click the Dashboard button.
- In the Manage dashboard section, select Change dashboard layout.
- Choose between one and four columns of varying widths.
👉 Tip: It’s easier to pick a layout after you’ve added your widgets, so you know how much space each requires.
Reorder or move widgets
Drag and drop widgets into your preferred position. Hover over the top of the widget until the crosshair icon appears, then drag to rearrange.
Removing, Renaming, or Resetting a Dashboard
In the Manage dashboard section of the Dashboard menu, you can:
- Remove dashboard – Deletes the current dashboard (except the default one).
- Reset dashboard – Clears all widgets and restores the default layout.
- Rename dashboard – Updates the label shown in the navigation.
If you’re an admin user, you can also set a customised dashboard as the default view for new users.