Create, Manage and Track Session Recordings
Before your users’ sessions can be recorded, you need to create a session recording in FirstHive CDP.
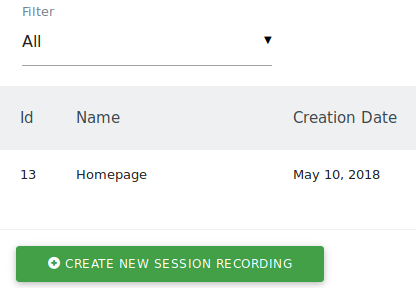
To access the Manage Session Recordings screen, go to either the reporting or the administration menu, click on Session Recordings, and then Manage. No developer knowledge is required to configure session recordings, and you don’t need to adjust any code on your website. The interface clearly explains each step in detail, so setting up a recording only takes a few seconds.
Creating and Editing a Session Recording
To record new sessions, click Create new session recording at the bottom left. To edit an existing session recording, click the edit icon next to the recording’s name.
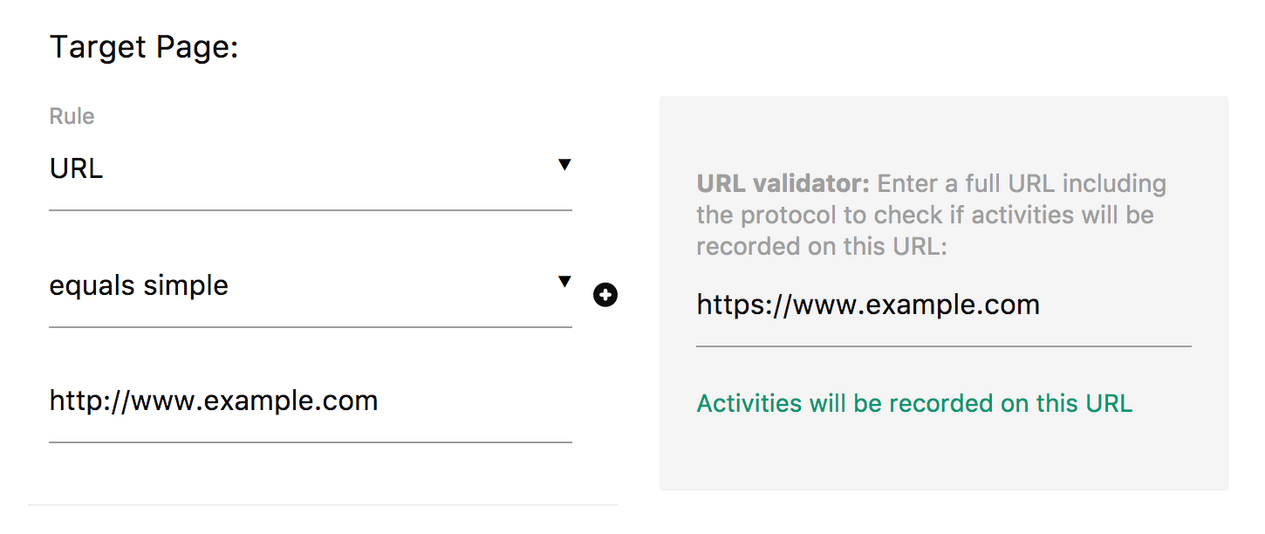
When creating or editing a session recording, all you need to do is define a name for the recording. That’s it. Optionally, you can choose to capture activities only on specific target pages. To do this, you can filter by attributes like URL, URL path, or URL parameter, and use comparisons such as equals, starts with, contains, matches regular expression, and more. The validator next to your target page lets you easily test whether your settings match the intended pages where you want to record sessions.
Advanced options
When configuring a session recording in FirstHive CDP, you can optionally define advanced options such as:
- Record a session only if the user clicked and scrolled (Requires activity)
- Record sessions only if users have spent at least a certain amount of time on the page (Min Session Time)
- Disable the capture of keystrokes entered into form fields (Capture keystrokes)
- Define the number of sessions to be recorded (Number of sessions)
- Set how likely a user is to be recorded (Sample Rate)
Tracking session recordings
Sessions will be automatically recorded as soon as you create one via the FirstHive CDP UI or HTTP API. The system automatically begins tracking activities on your website or web application.