Create RCS Campaign
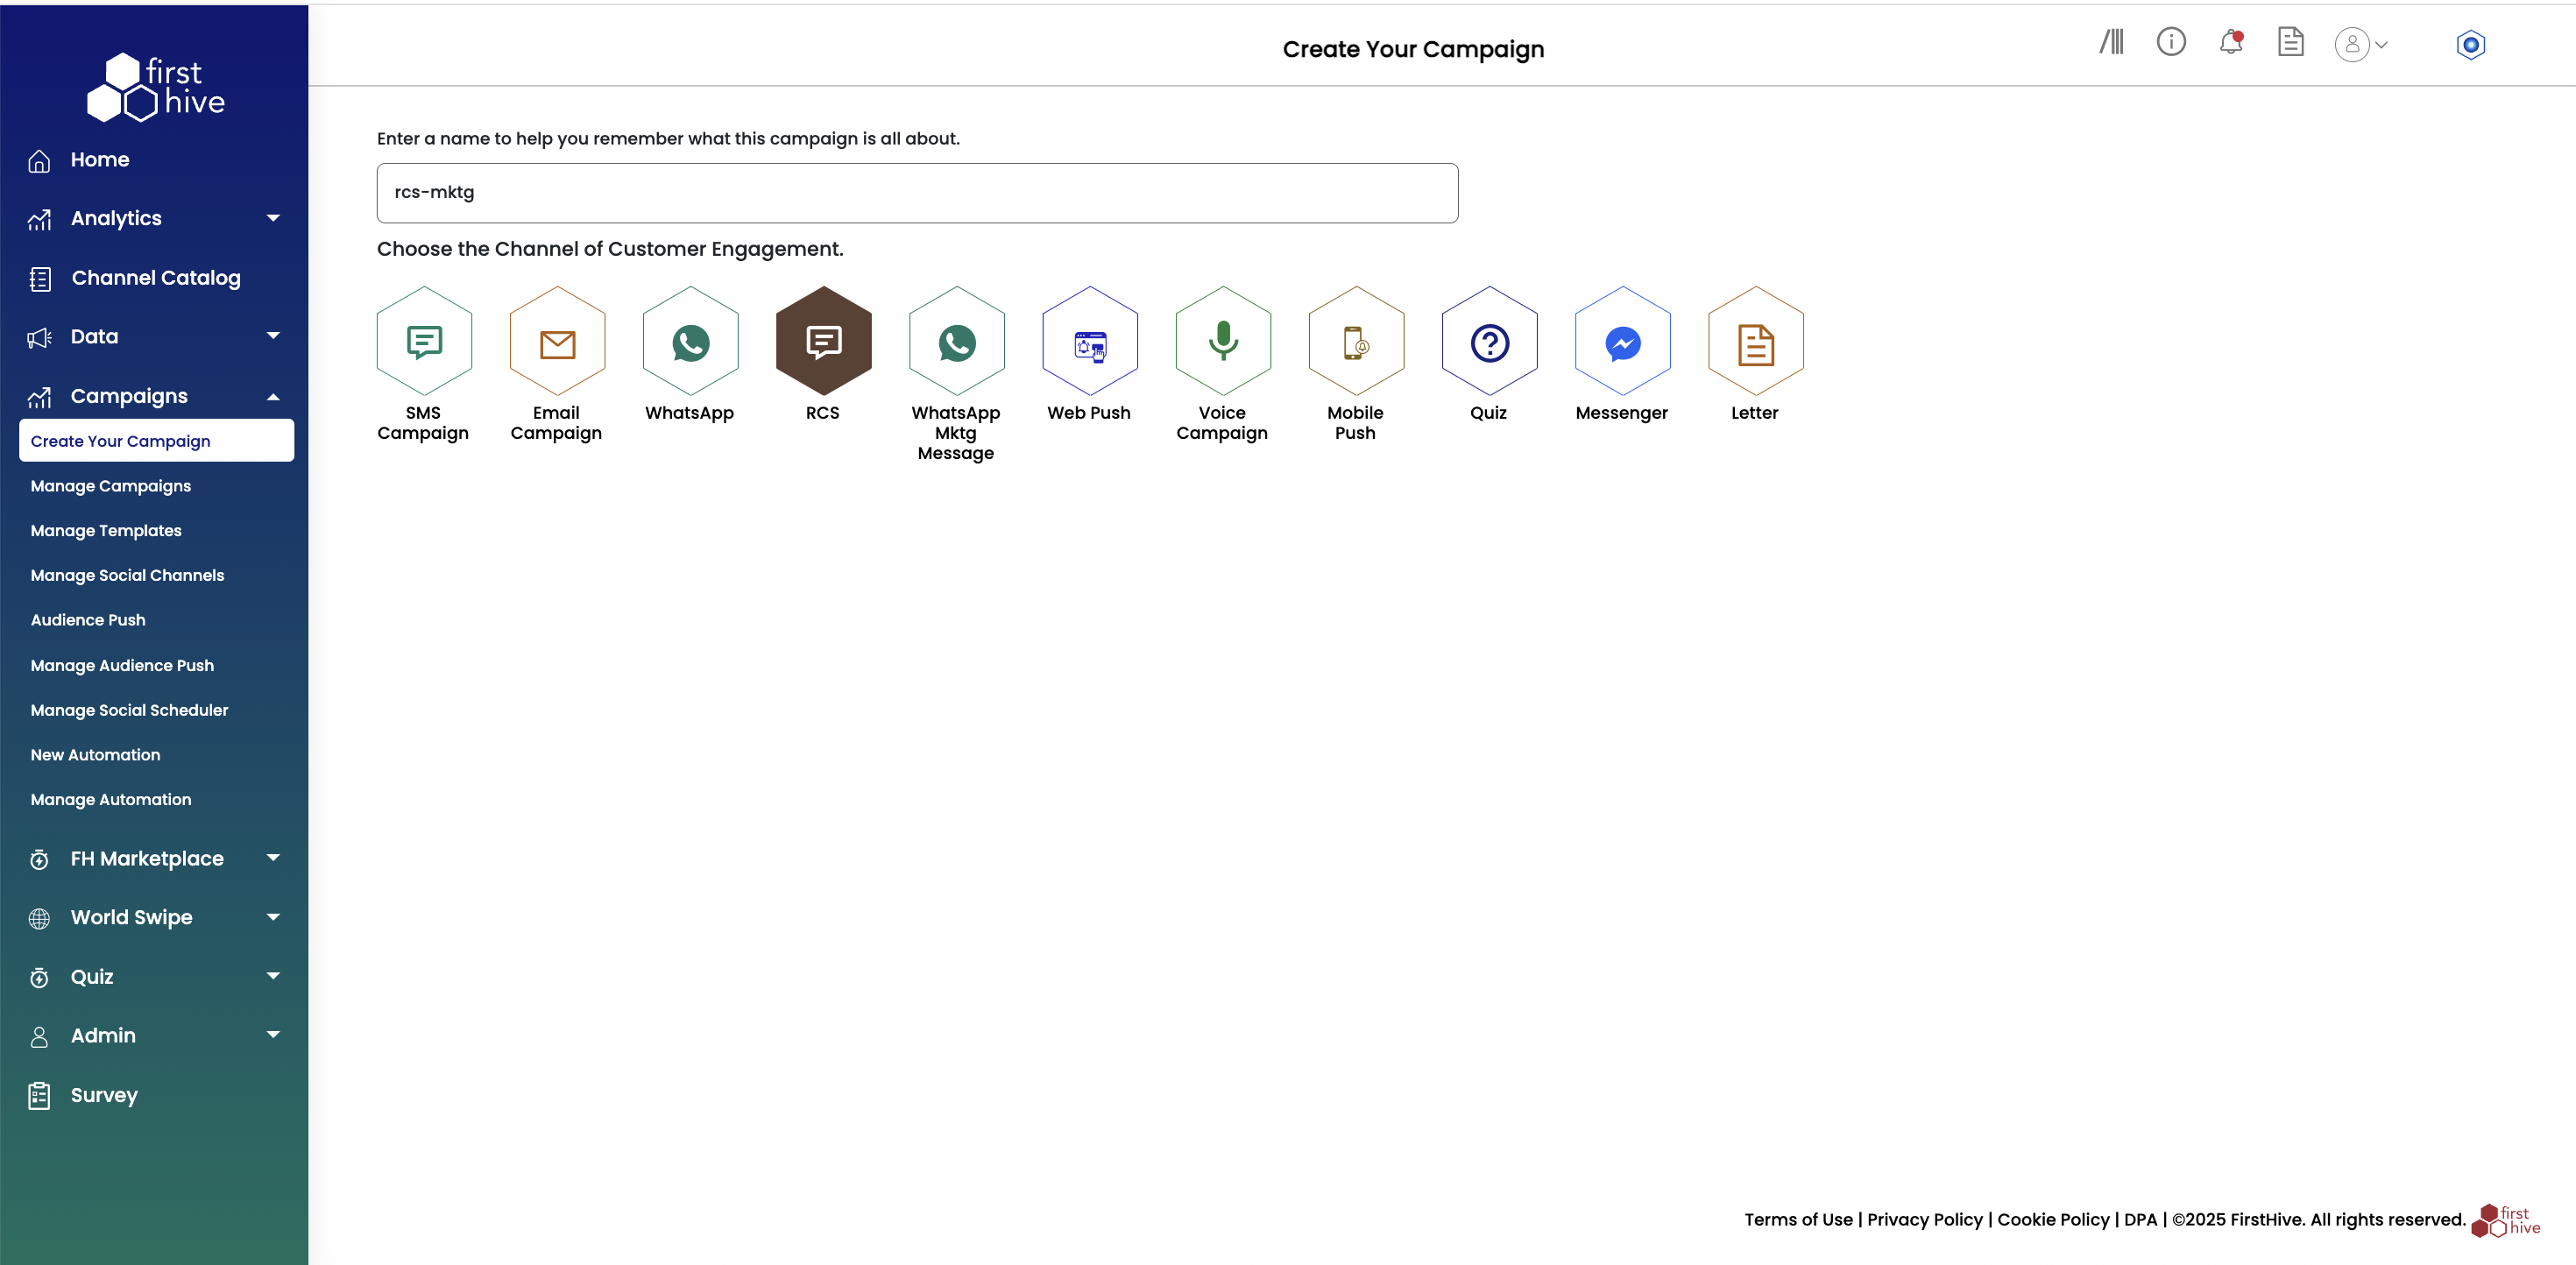
To create an Email campaign, navigate to Campaigns from the left menu and click Create Your Campaign. FirstHive guides you through four simple steps to build and launch your email campaign.
Step 1: Set Up Basic Information
- Enter a name for your campaign, then select RCS Campaign from the channel grid.
- Choose how your message appears to recipients by setting up a Sender ID.
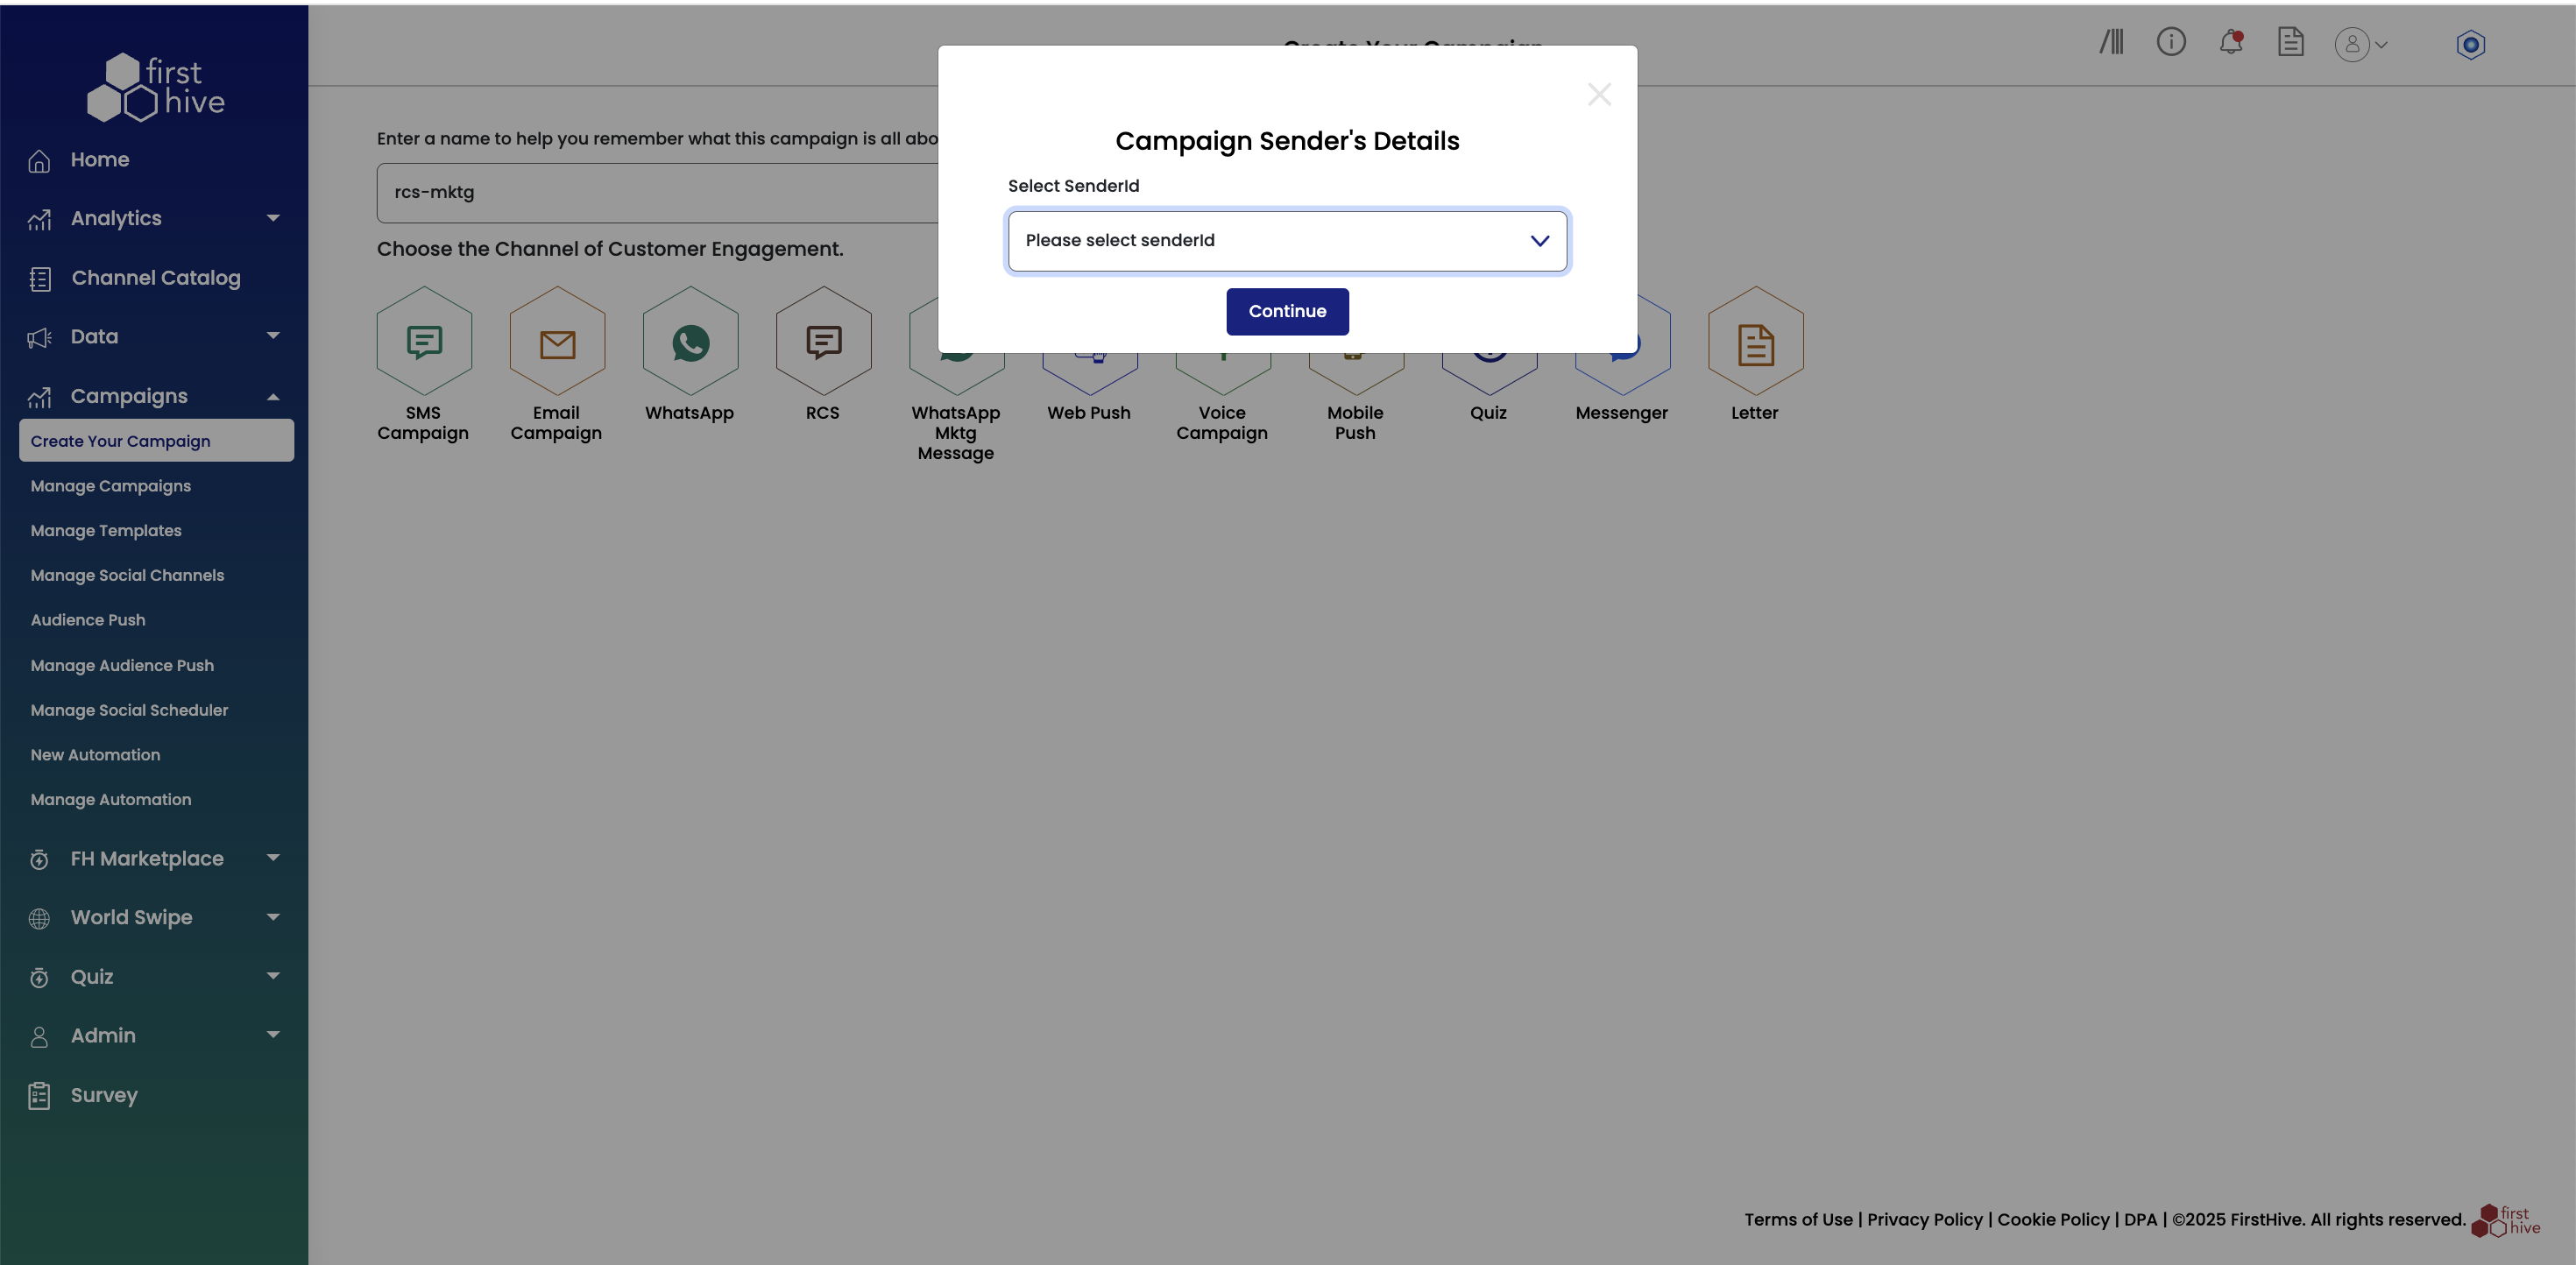
- Click Continue to proceed to the next step of campaign creation.
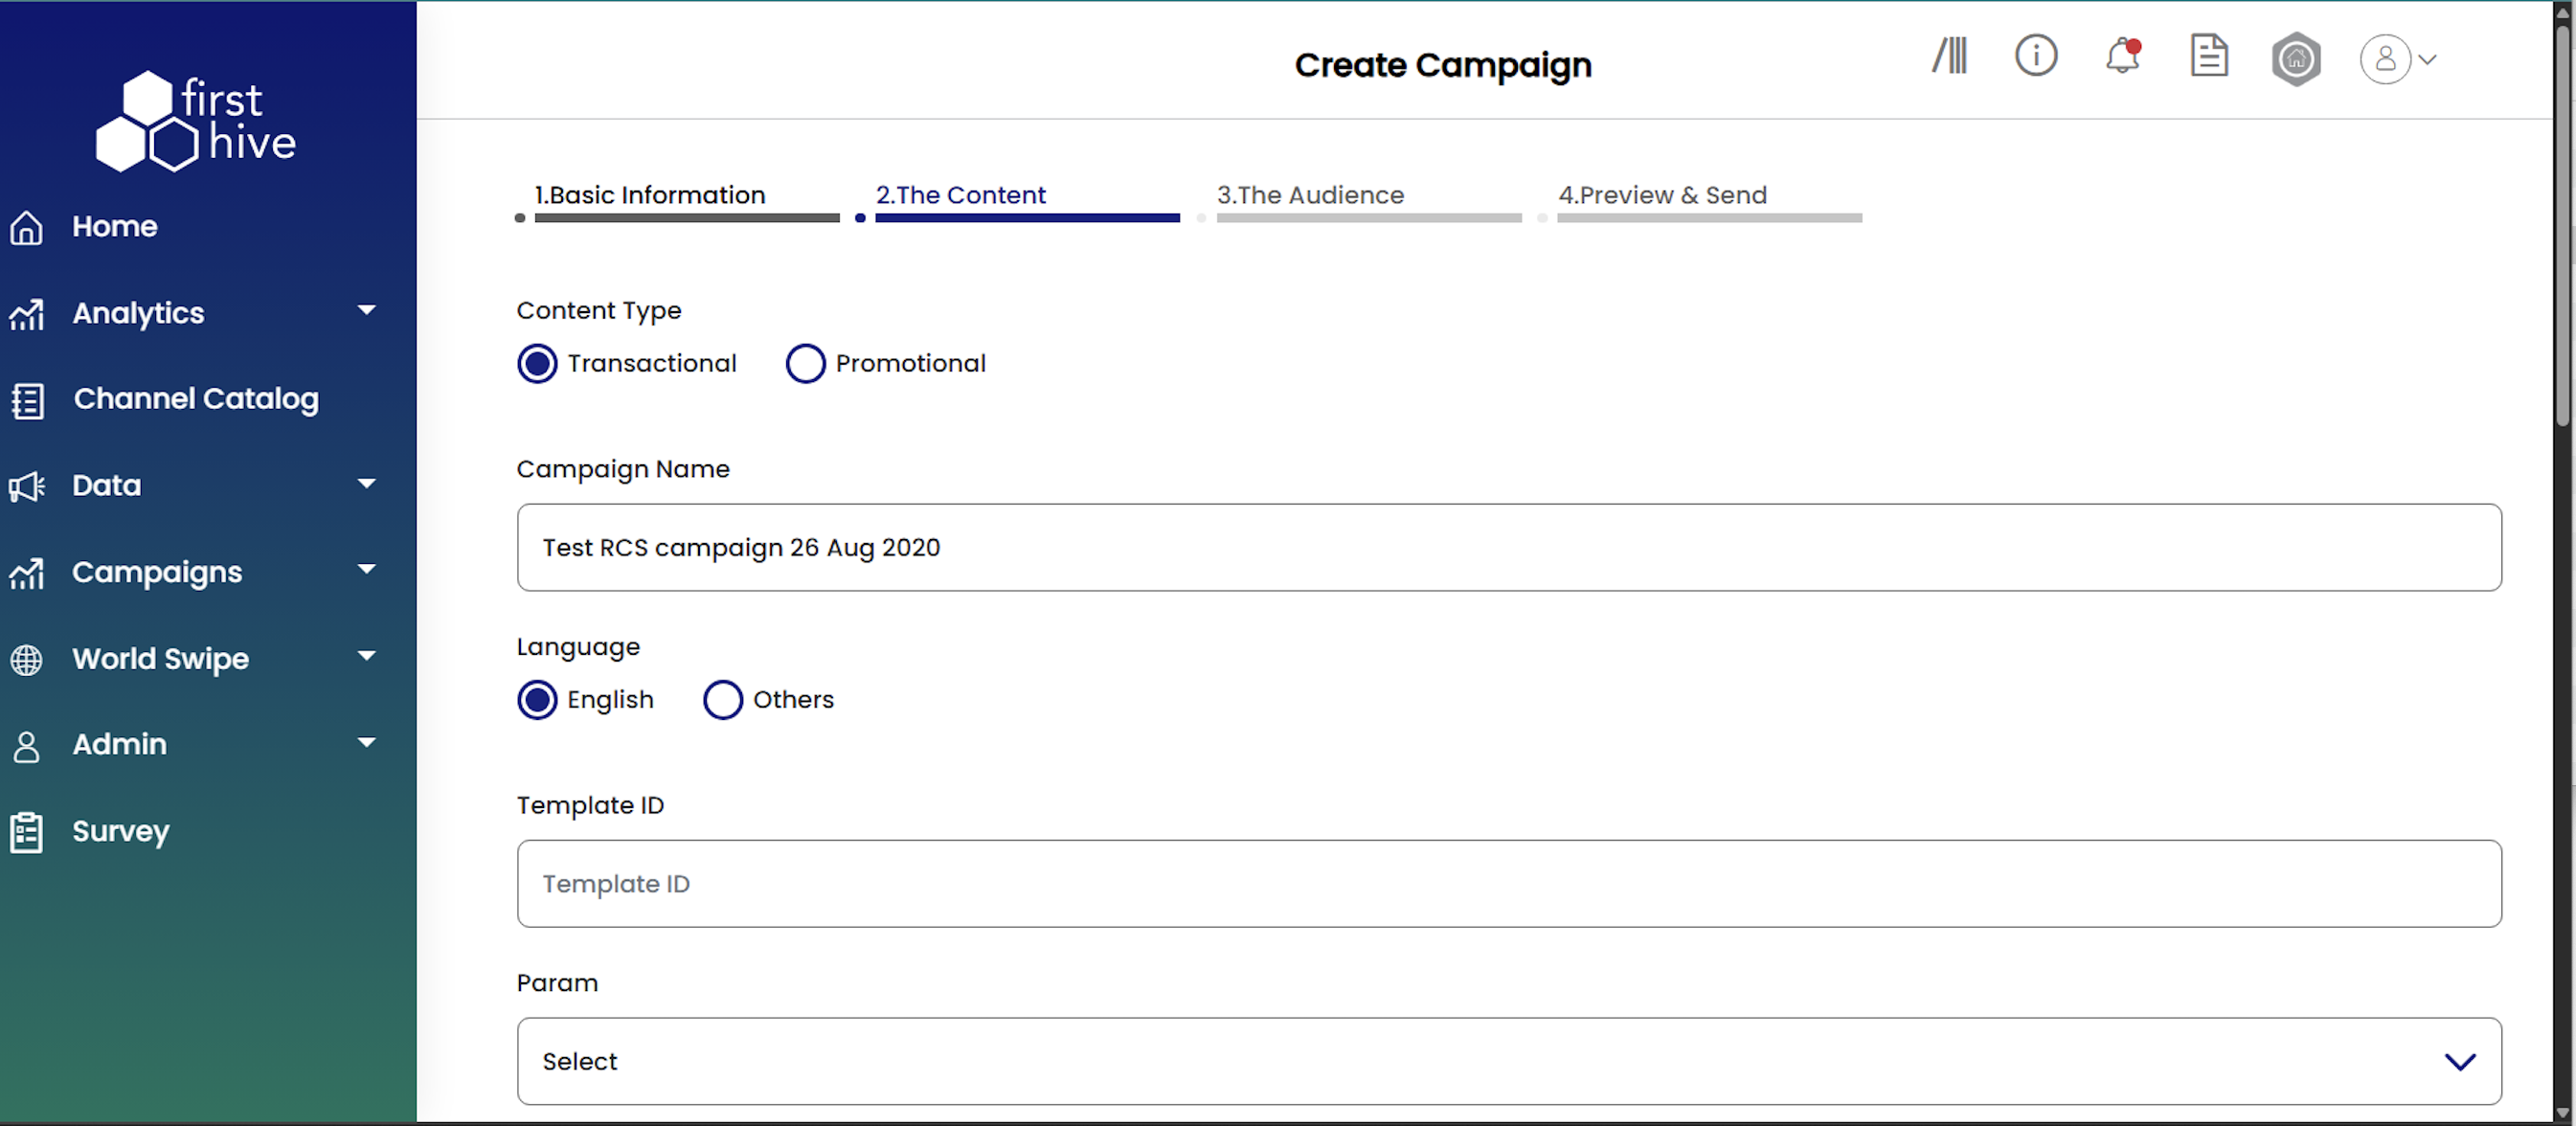
Step 2: Add Campaign Content
- Select your Content Type as Transactional (alerts, updates) or Promotional (offers, marketing).
- Enter a Campaign Name to identify your campaign.
- Select the Language (English or Other).
- Enter the Template ID if applicable.
- Add Param values to personalize your message with tokens.
- Choose the Message Format (e.g., Templated).
- Enter your campaign Content. You can include plain text, links, or personalization fields.
- (Optional) Add a survey to the campaign by enabling the survey checkbox.
- Shorten links using:
- Bitly URL
- FH Short URL
- Enter the URL and click Apply URL with UTM parameters if you want to track performance.
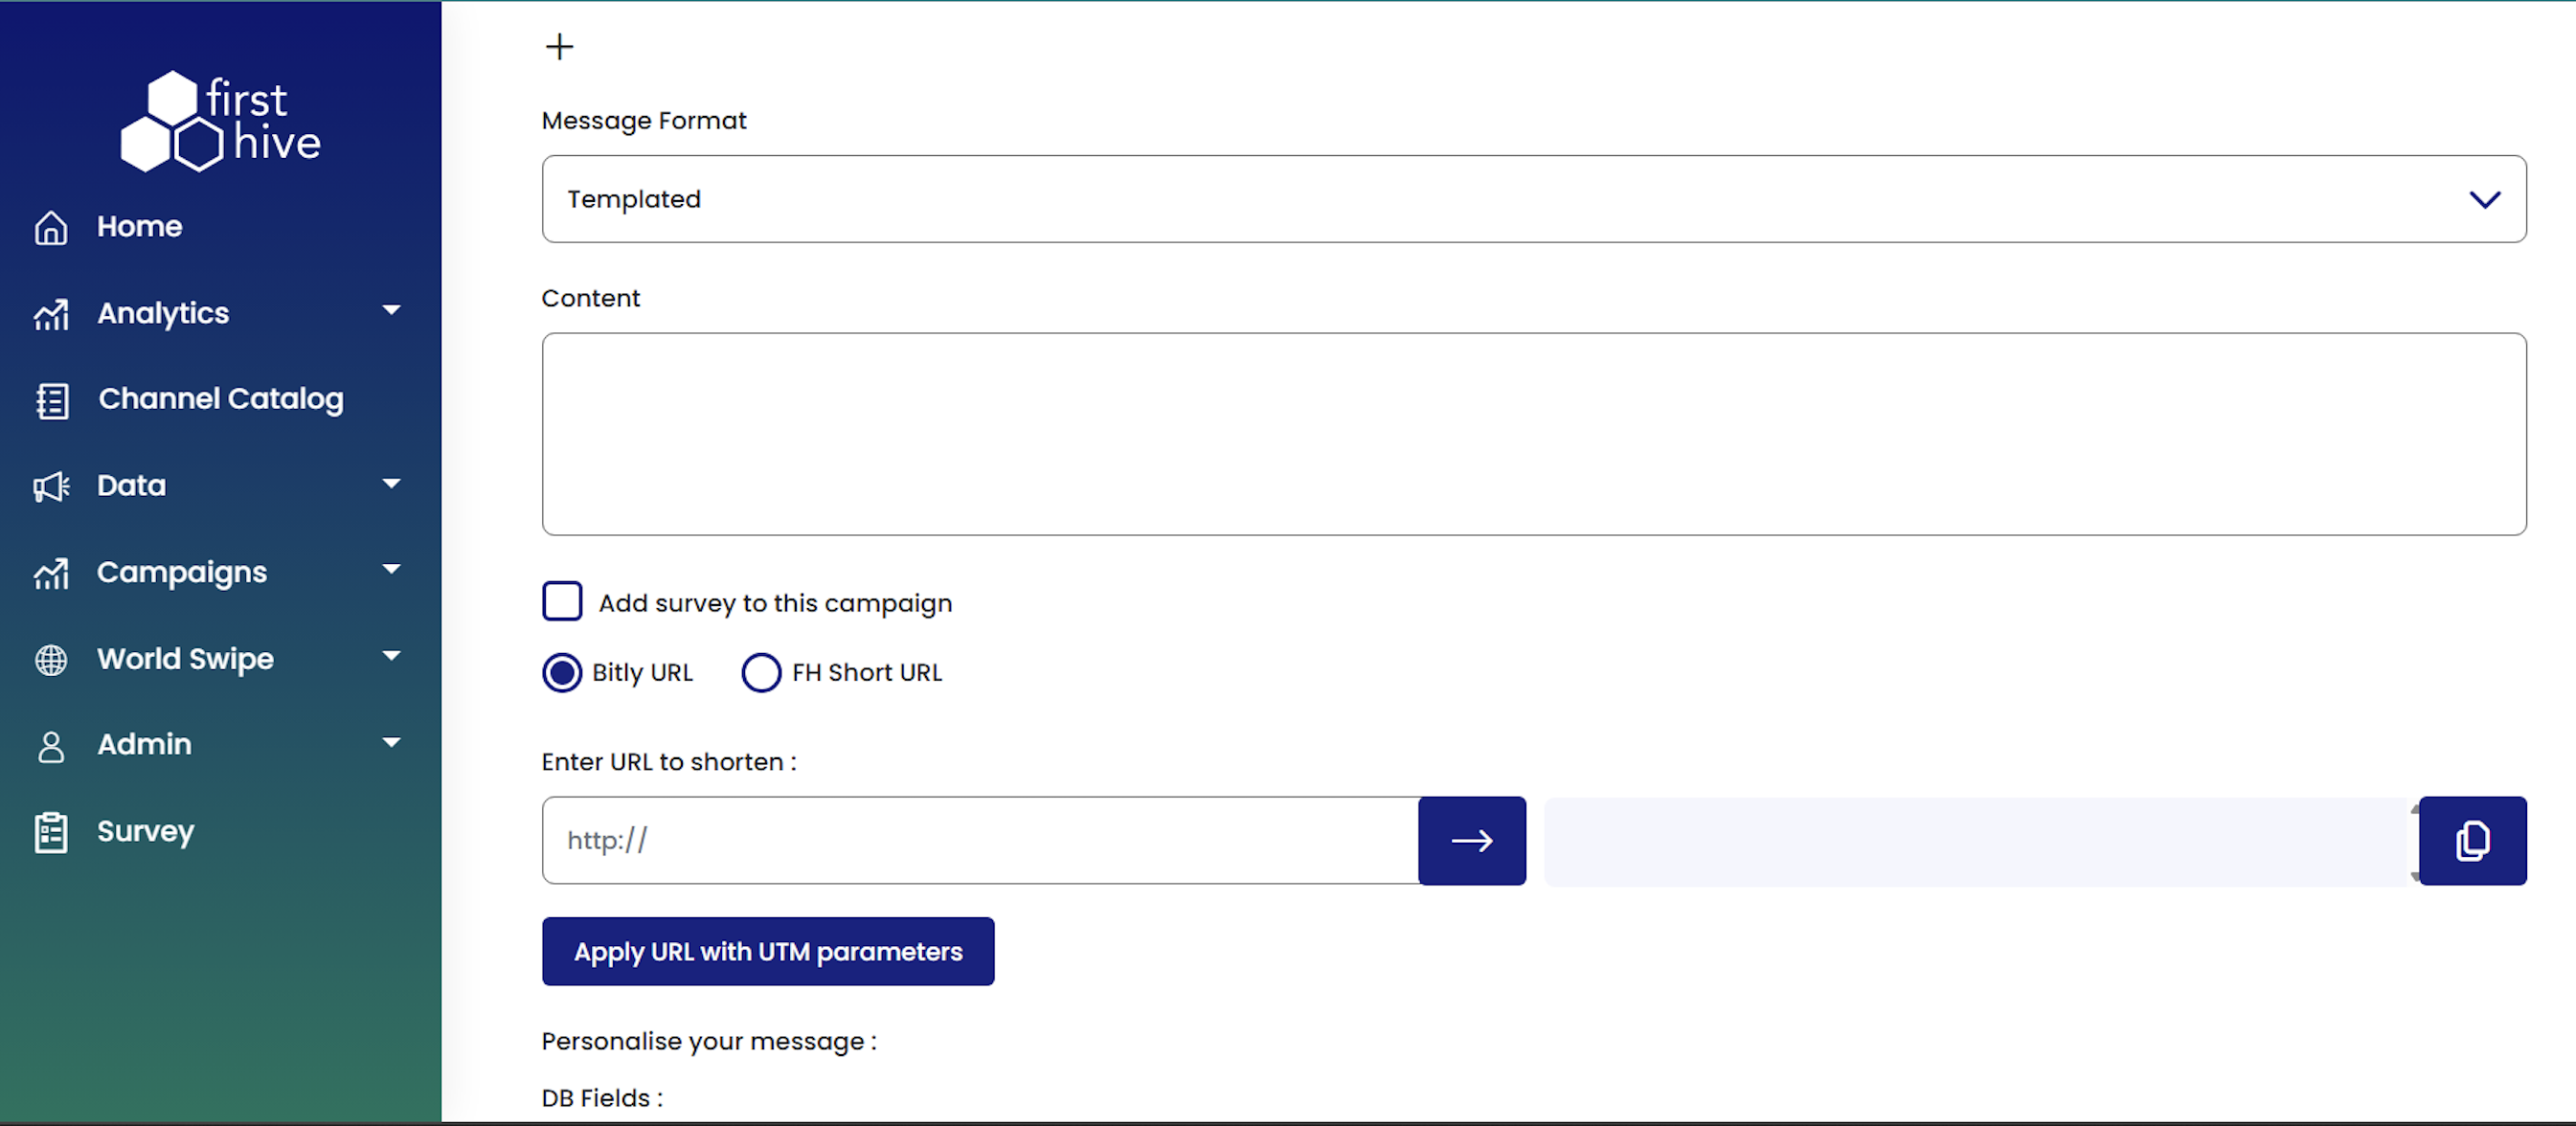
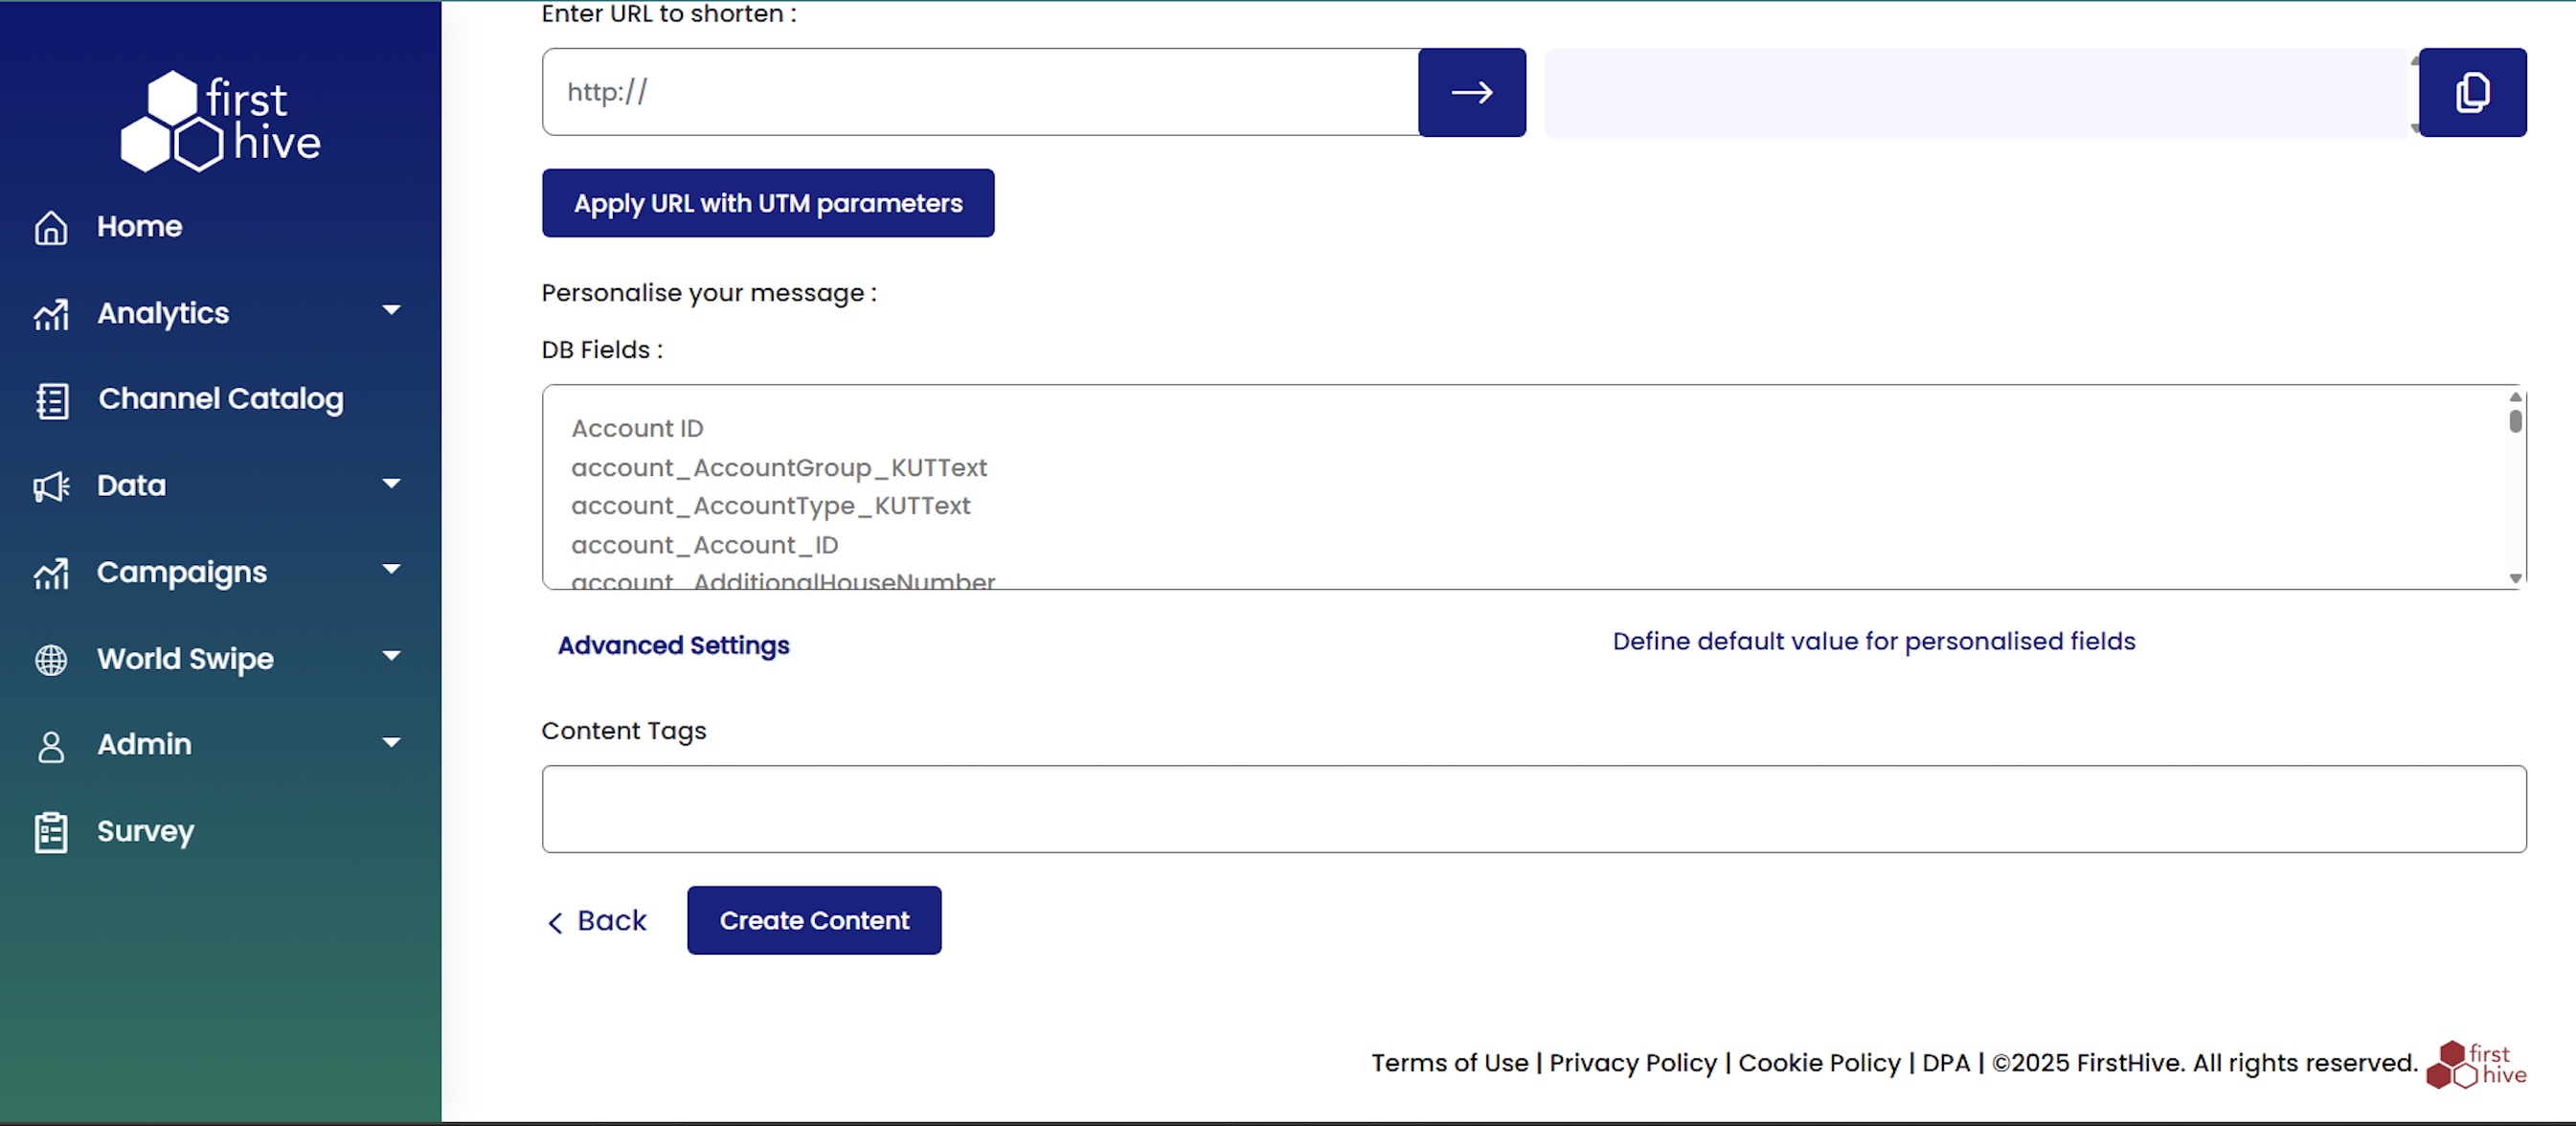
- Personalize your message by inserting database fields (e.g., Account ID, Name, Mobile Number).
- Under Advanced Settings, define default values for personalized fields if data is missing.
- Add Content Tags for easy filtering and future search.
- Click Create Content to save and proceed to the next step.
Step 3: Choose Your Audience
You can define your audience using one of the following methods:
- Select how you want to add your audience:
- Add Customer: Manually input phone numbers.
- From Segment: Select from pre-defined customer segments.
- From Data List: Choose a saved data list.
- Upload File: Import a .xls, .xlsx, or .csv file containing your audience phone numbers.
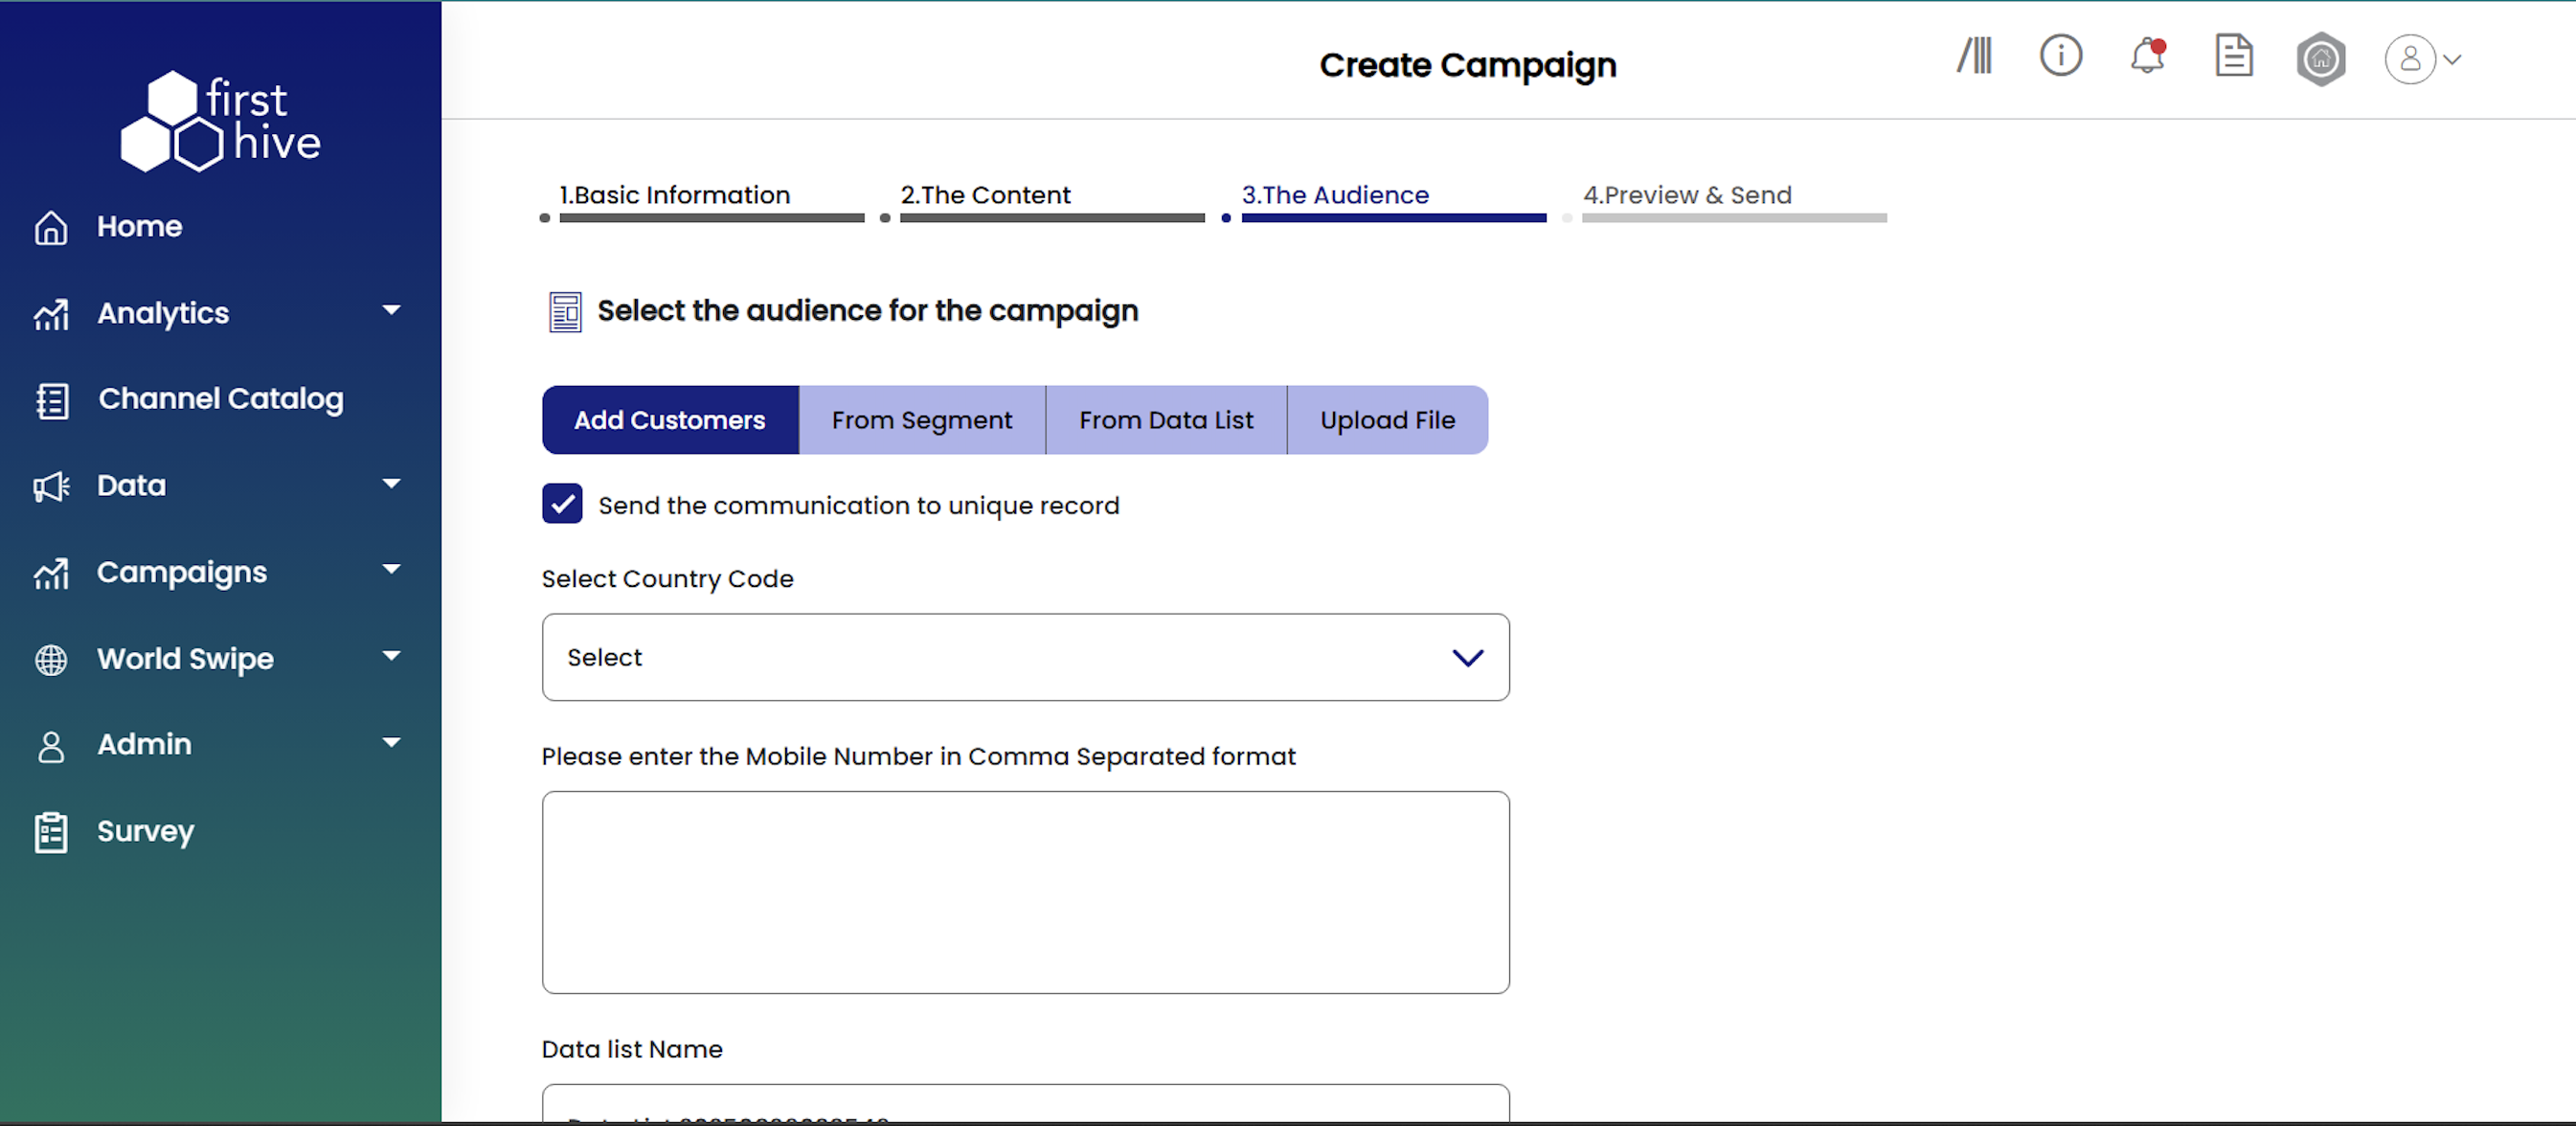
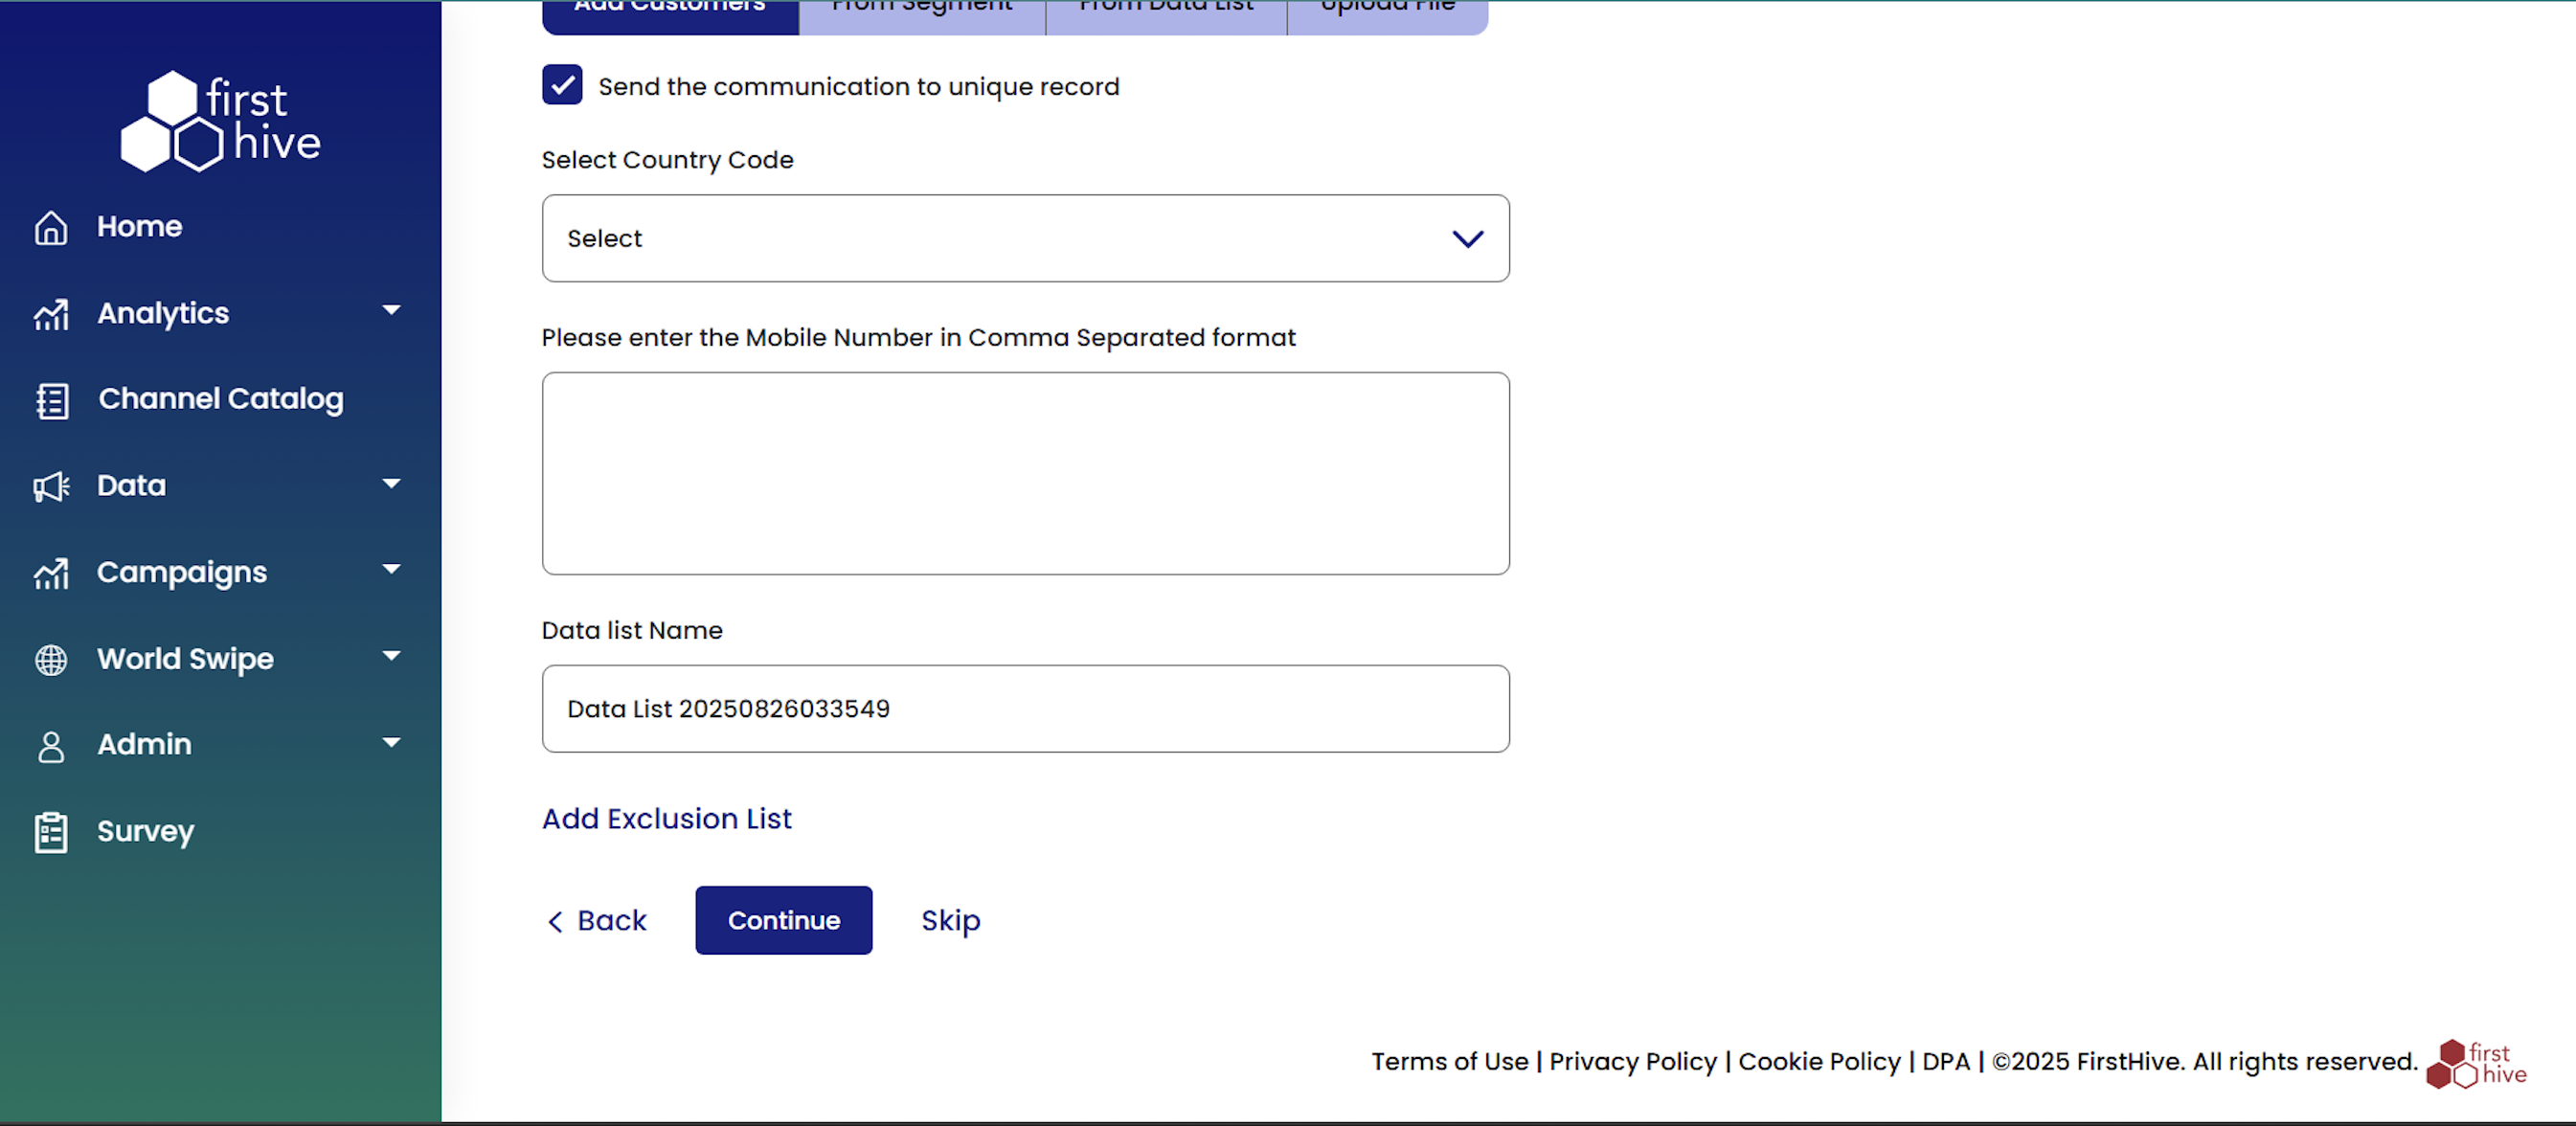
- Set the communication preferences as needed:
- Enable Send the communication to unique record to prevent sending duplicate messages to the same person.
- Enable Apply Master Unsubscription to respect users who have unsubscribed globally.
- Enable Exclude from Contact Policy to bypass communication frequency limits.
- Enter comma-separated phone numbers manually. You can also use Cc or Bcc as required. FirstHive saves these as a new data list.
- Choose from existing data lists with saved customer contacts.
- Select the Publication List for the campaign:
- Choose either Public or Private.
- Optionally check Marketing Campaigns if relevant.
- Ensure that the Apply Publication List checkbox is enabled.
- Click Add Exclusion List to omit specific numbers from delivery. Upload a .xls, .xlsx, or .csv file. FirstHive automatically converts the data into a reusable data list.
- Click Continue to move to the next step, or Skip if you do not wish to set up an audience now.
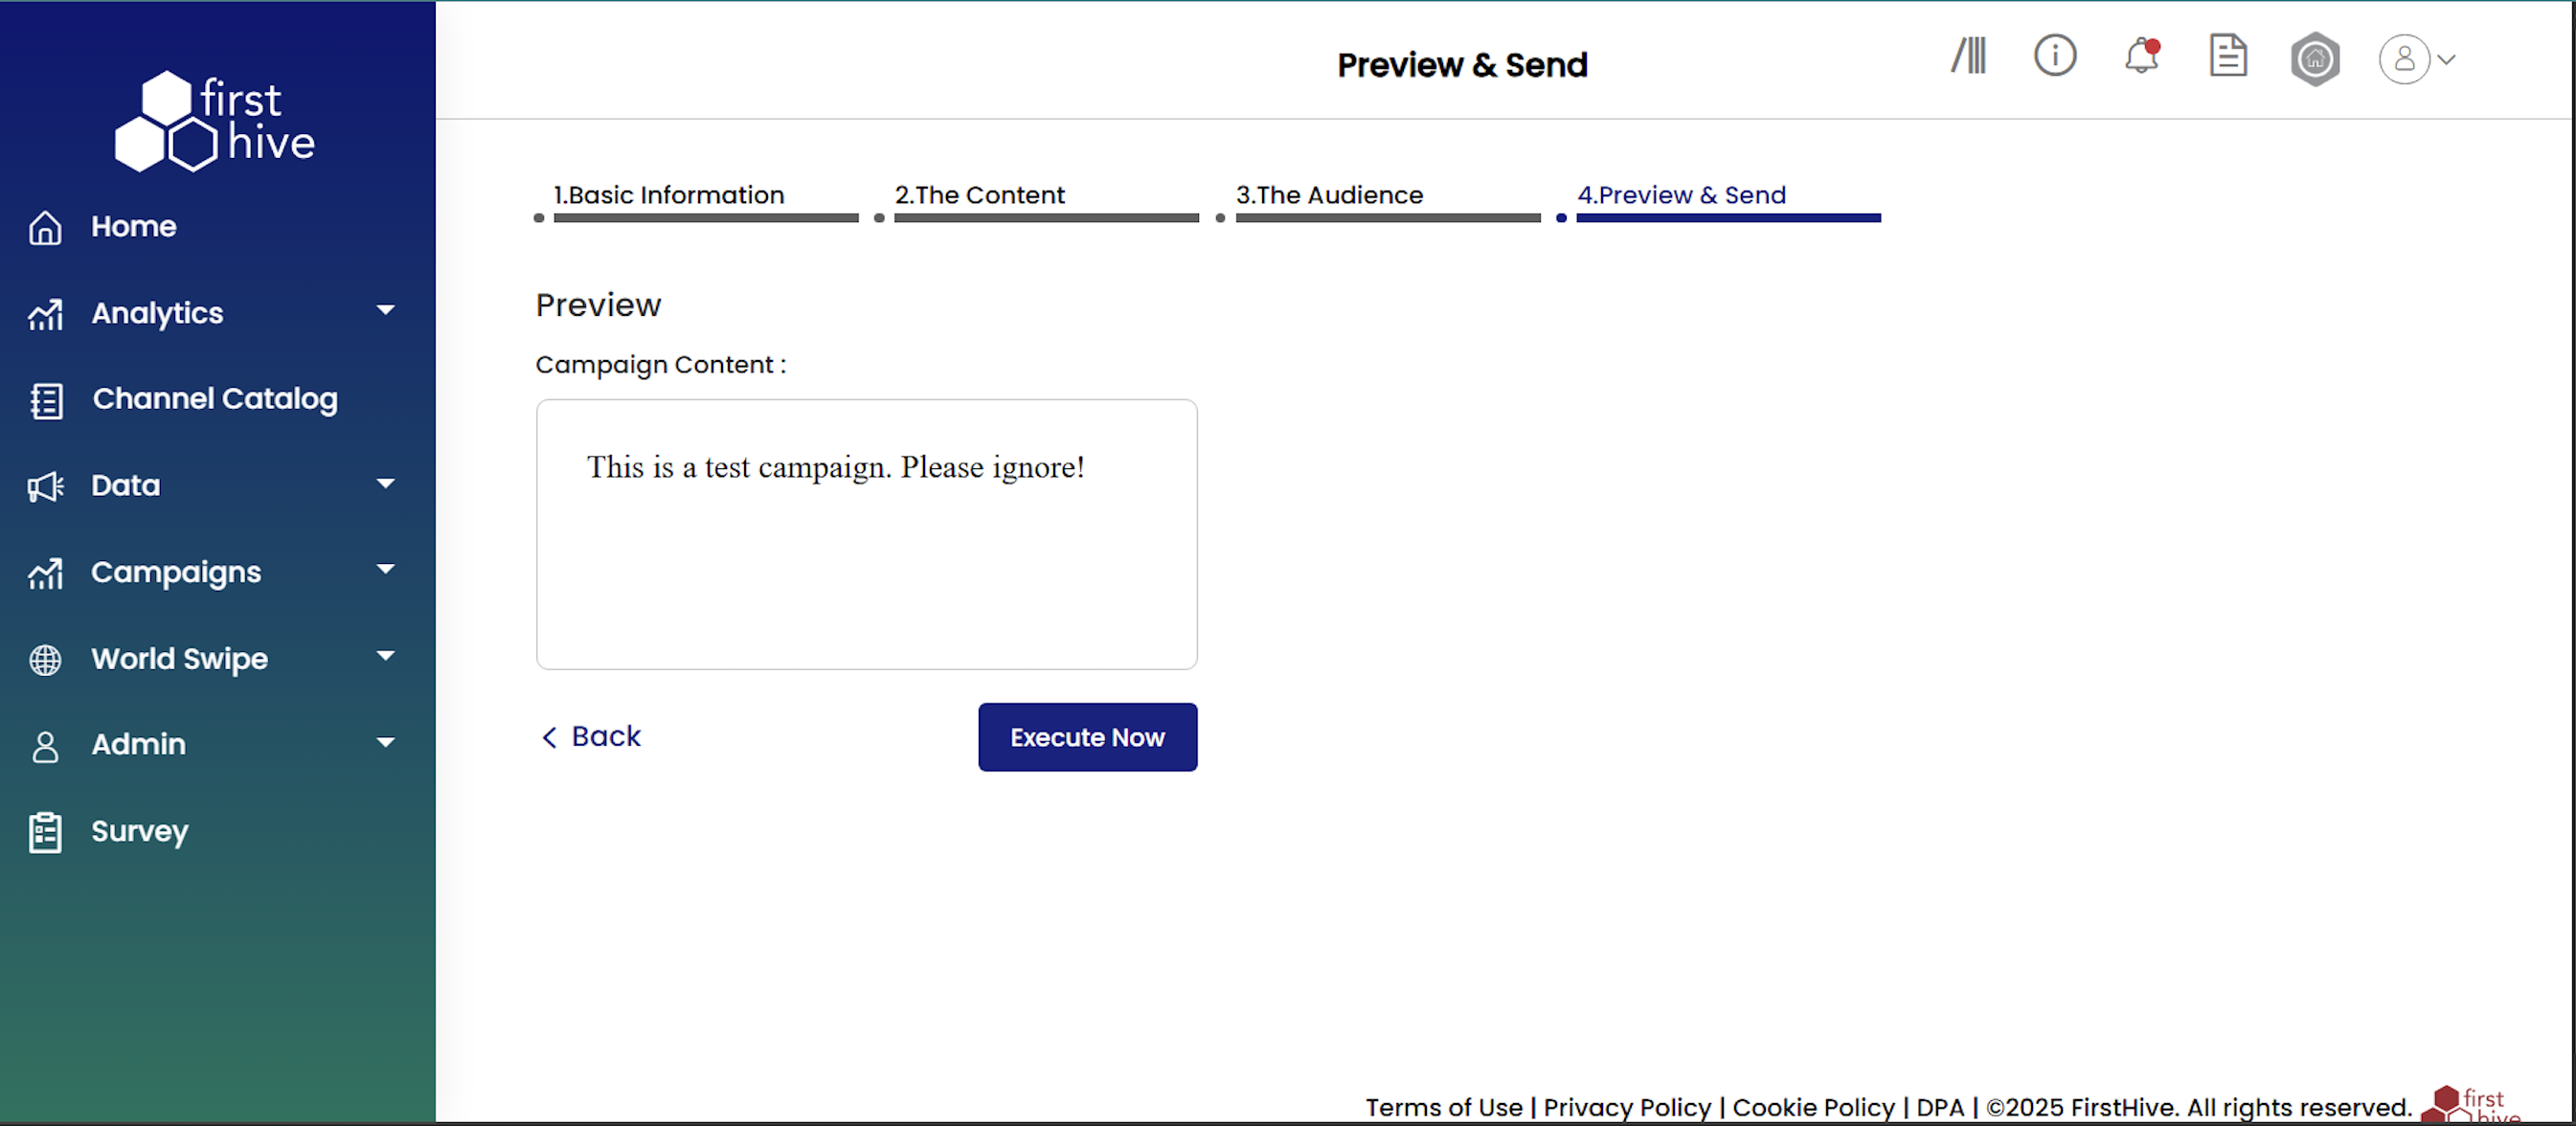
Step 4: Preview & Send
Review your campaign setup and choose how to deliver your RCS message to your audience. FirstHive provides two preview options to validate your campaign before launch.
- Select your preferred preview mode:
- Basic: Standard preview for quick campaign validation.
- Advanced: Detailed preview with additional testing and configuration options.
- View your complete RCS campaign content to verify formatting, messaging, and visual elements display correctly.
- Input comma-separated email addresses in the provided text field. FirstHive saves manually entered numbers as a new data list for future use.
- Click Back to return to previous steps for modifications. Or, click Execute Now to launch your campaign immediately to your selected audience.