Create WhatsApp Campaign
Prerequisites for Using WhatsApp Messaging in FirstHive
WhatsApp messaging for business can be set up in two ways:
- WhatsApp Business App – Best suited for small businesses managing conversations directly with customers.
- WhatsApp Business Platform – Designed for medium to large businesses to communicate at scale through programmatic access.
If you’re not a developer or want to connect WhatsApp with other tools in your tech stack (such as a CDP or marketing automation platform), you’ll need to work with a Business Solution Provider (BSP).
About BSPs
- BSPs are third-party providers approved by Meta to enable WhatsApp Business Platform usage.
- They help you manage customer communications for approved use cases like customer support and time-sensitive, personalized notifications.
- FirstHive currently supports the following BSPs: Gupshup, ACL, Netcore, and http://Yellow.ai .
Before Creating a WhatsApp Campaign
- Integrate your chosen BSP in FirstHive.
- Create a Sender ID for your WhatsApp account.
- Once setup is complete, you can create WhatsApp campaigns by following the same steps as other campaign types (with minor variations depending on your BSP).
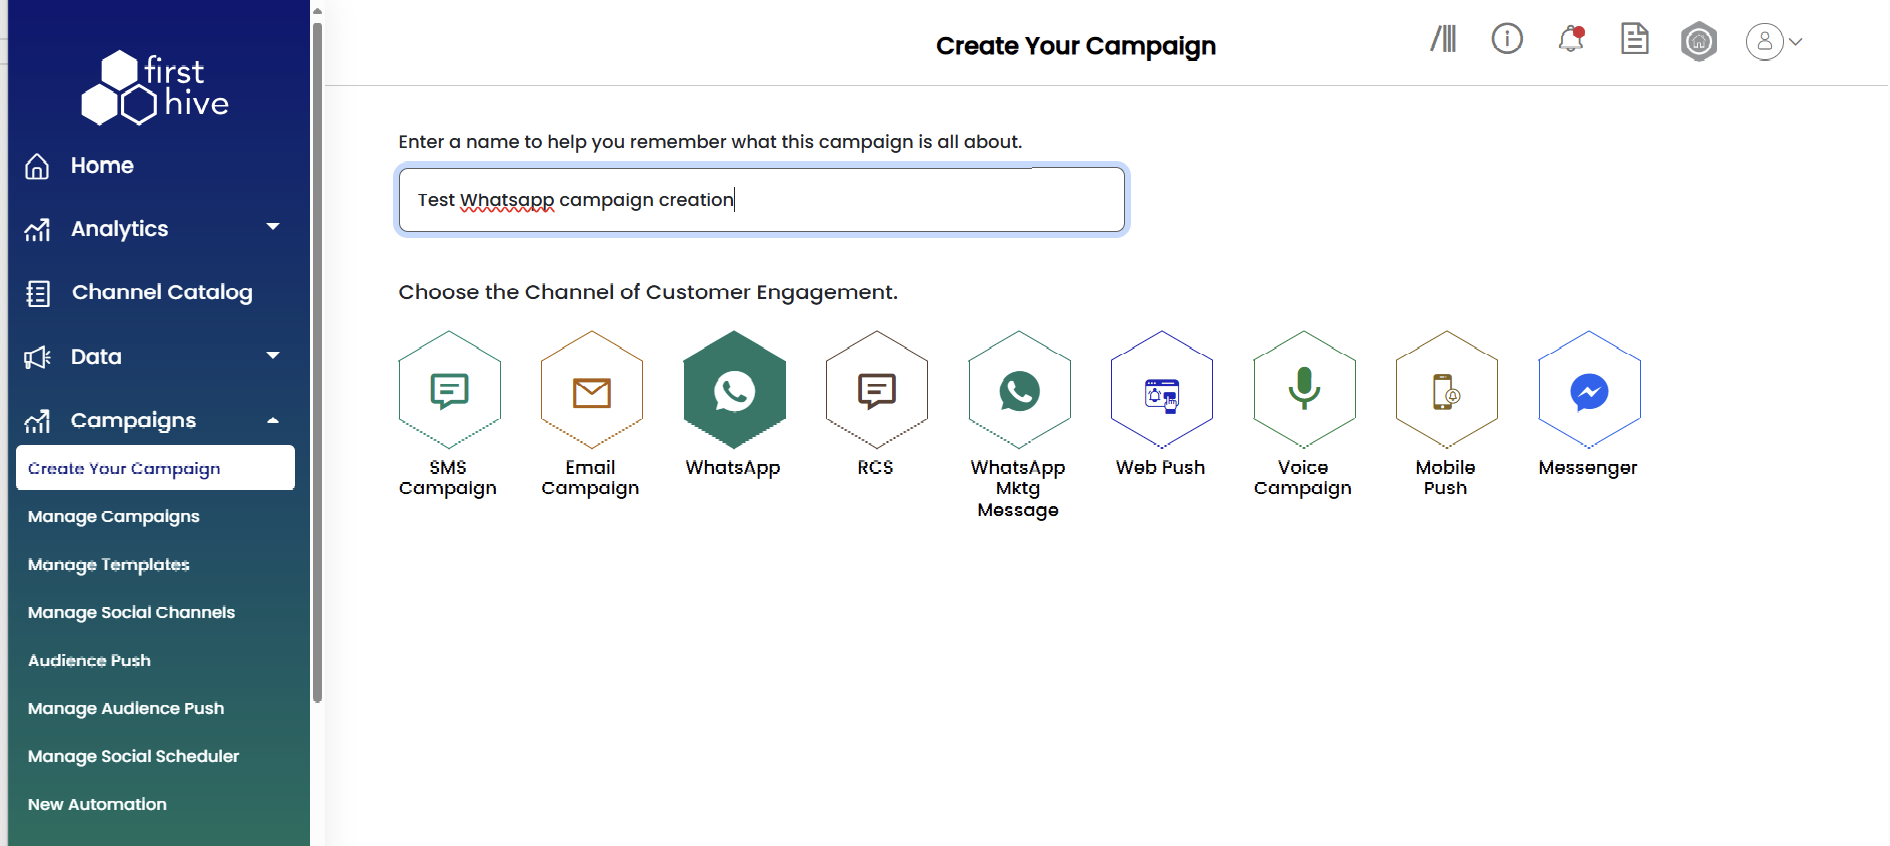
To create a WhatsApp campaign, log into your FirstHive account, navigate to Campaigns from the left menu, and click Create Your Campaign. FirstHive guides you through four simple steps to build and launch your WhatsApp campaign.
Step 1: Set Up Basic Information
- Enter a name for your campaign, then select WhatsApp Campaign from the channel grid.
- Choose how your message appears to recipients by setting up a Sender ID.
- Select your preferred template option.
Step 2: Add Campaign Content
- Select your Content Type as Transactional (alerts, updates) or Promotional (offers, marketing).
- Enter your Campaign Name to identify the campaign and add Content Tags for easy filtering and search.
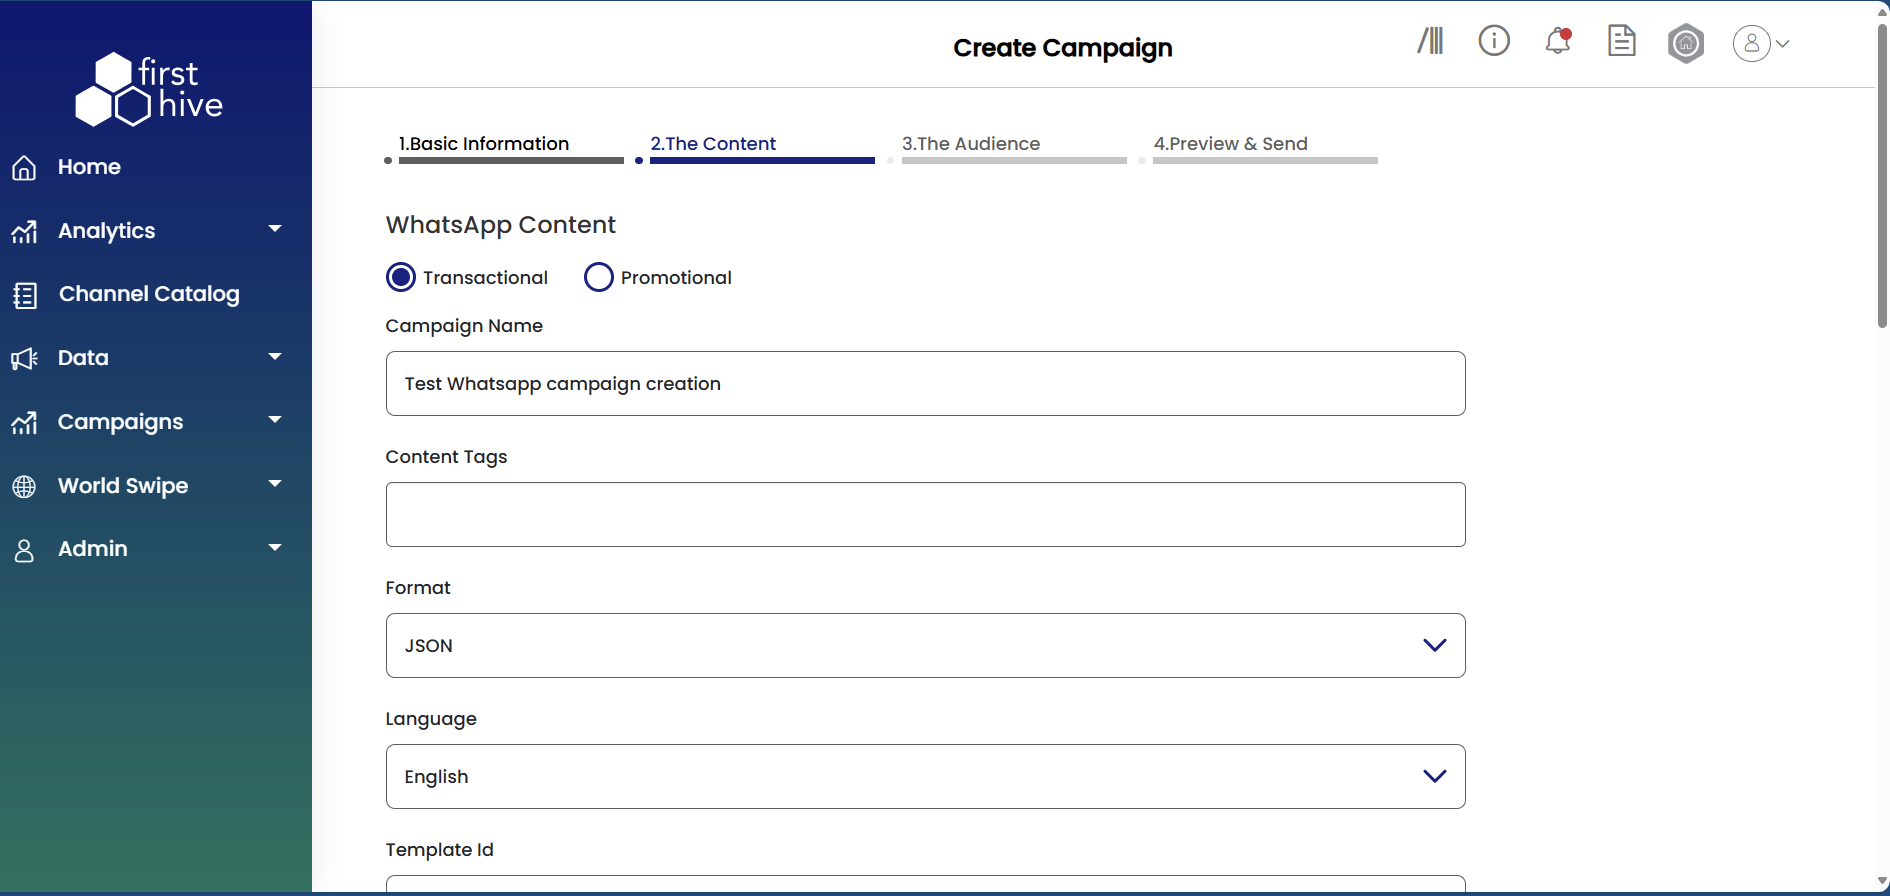
- Choose the Format (JSON or XML; JSON is most common for GupShup) and select the Language of your campaign message.
- If you’re using a sender other than GupShup, enter the approved WhatsApp Template ID and add Param values for personalization tokens.
- Choose the Content Type as Text, Image, Video, Document, or Audio. For media, upload or link your file. You can personalize media URLs using customer data fields or add tracking codes to monitor engagement.
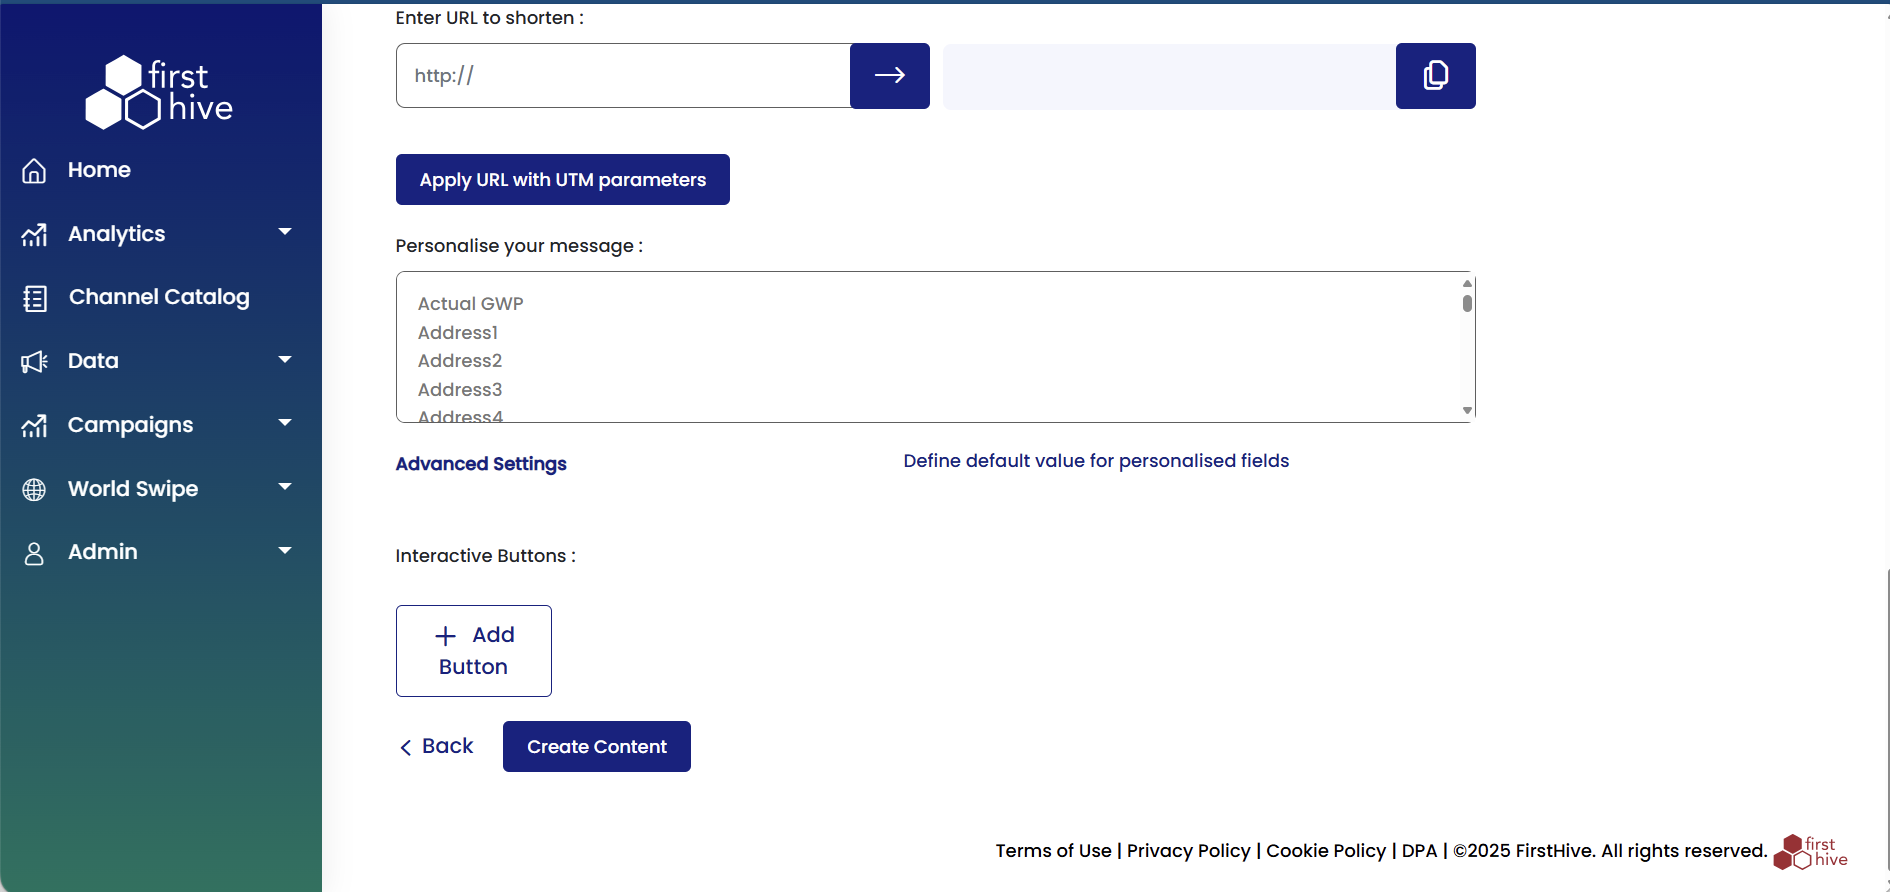
- Type your Content or Caption. For media campaigns, this will appear as the caption. Add plain text, links, or customer data such as Name, Gender, Mobile No., or Order ID. Use Bitly URL for short links, FH Short URL for shortened links with tracking, or Vanity URL to retain your domain with tracking.

- Use Personalise to insert dynamic customer fields from your database. Double-click the field to add it where needed.
- If required, upload files to include advanced personalization details.
- Add Interactive Buttons to your message—use Quick Action buttons like “Call” or “Visit Website,” or CTA buttons to drive conversions.
- Click Create Content to save your WhatsApp campaign message.
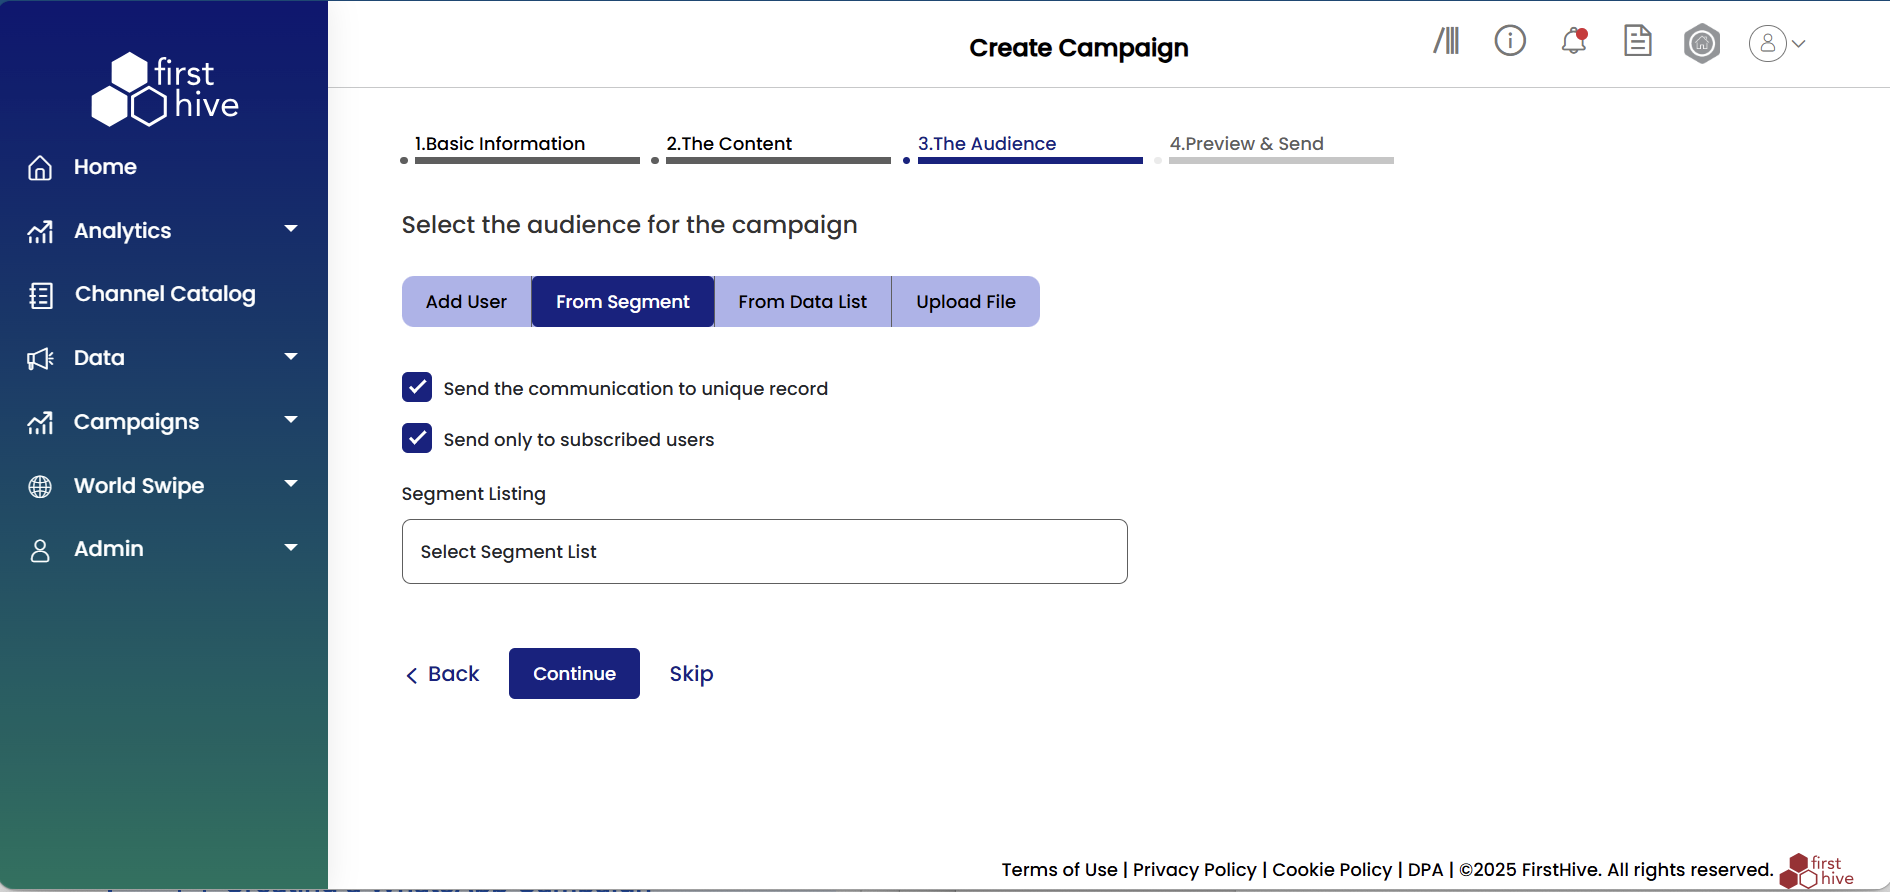
Step 3: Choose Your Audience
You can define your audience using one of the following methods:
- Select how you want to add your audience:
- Add User: Manually add a single customer to the campaign.
- From Segment: Select customers from pre-defined segments.
- From Data List: Choose an existing saved data list.
- Upload File: Import a file with customer records.
- Set the communication preferences as needed:
- Send the communication to unique record to prevent duplicate sends to the same customer.
- Send only to subscribed users to ensure only opted-in customers are targeted.
- If you selected From Segment, choose the required segment list under Segment Listing.
- Click Continue to move to the next step, or Skip if you do not wish to set up an audience now.
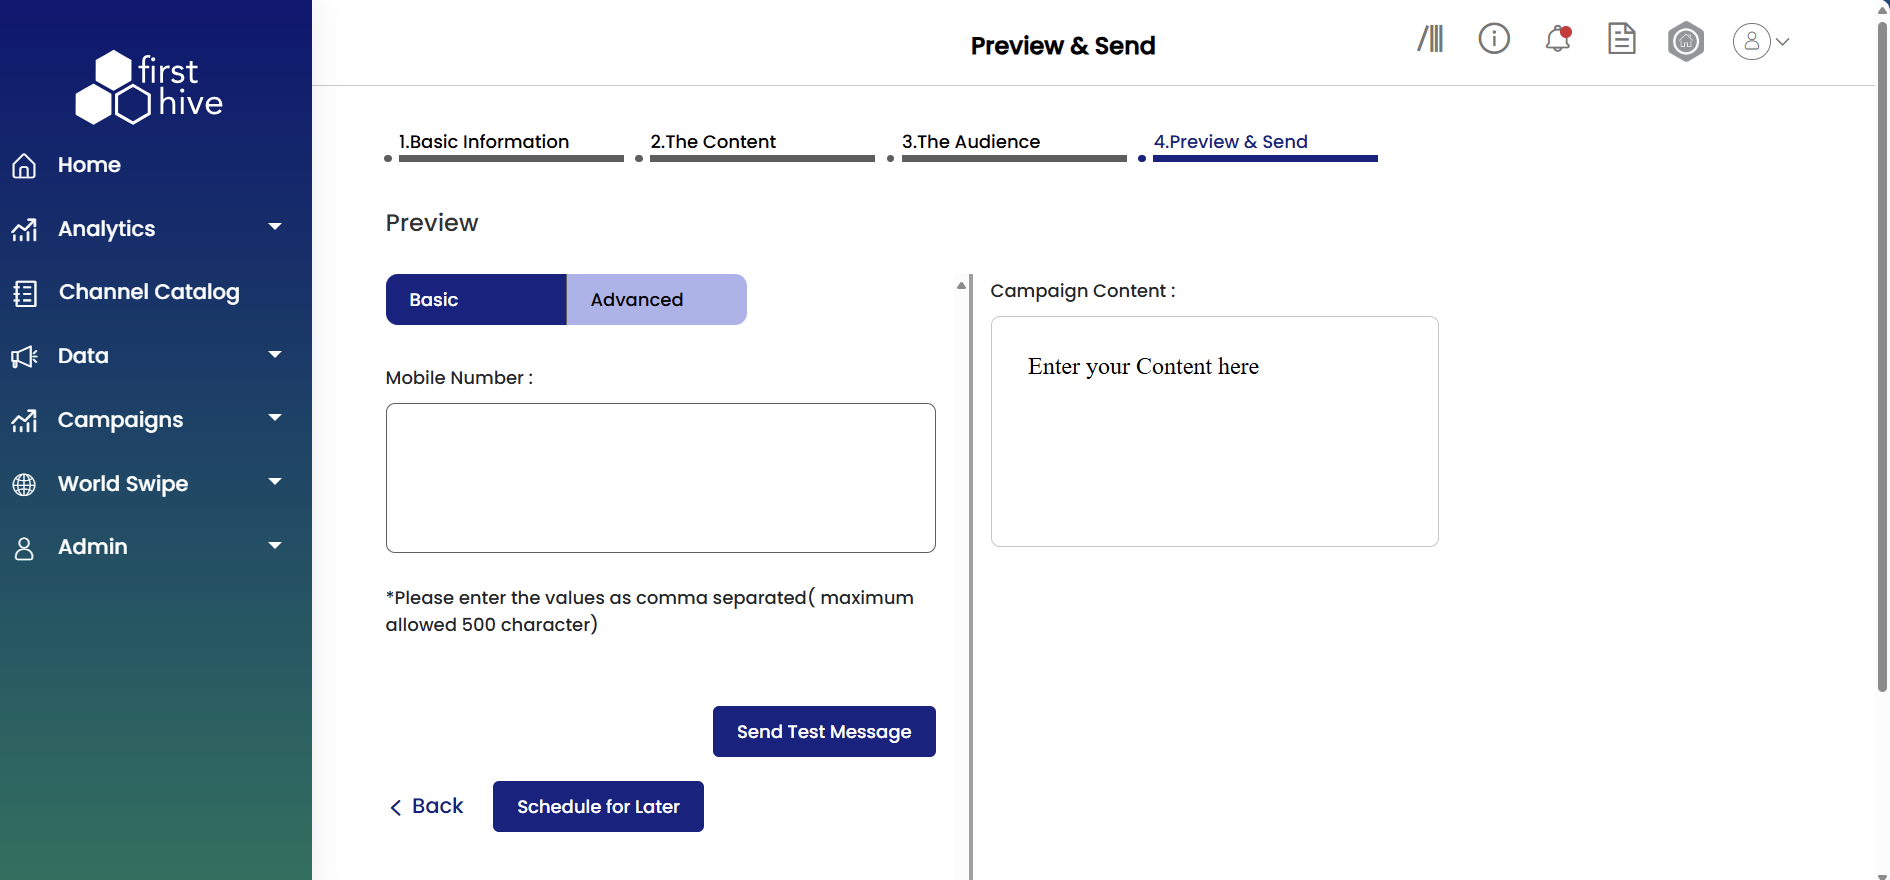
Step 4: Preview & Send
Review your campaign setup and choose how to deliver your WhatAapp message to your audience. FirstHive provides two preview options to validate your campaign before launch.
- Review your campaign setup and choose how to deliver your WhatsApp message.
- Select your preferred preview mode:
- Basic: Quick preview for standard validation.
- Advanced: Detailed preview with additional testing and configuration options.
- Enter comma-separated mobile numbers in the Mobile Number field (maximum 500 characters).
- Type or review your complete campaign content in the Campaign Content box on the right.
- Click Send Test Message to validate the campaign by sending a test to the entered numbers.
- Click Schedule for Later to set a future delivery time, or launch immediately using the available options.
- Use Back if you want to return and make changes in the previous steps.